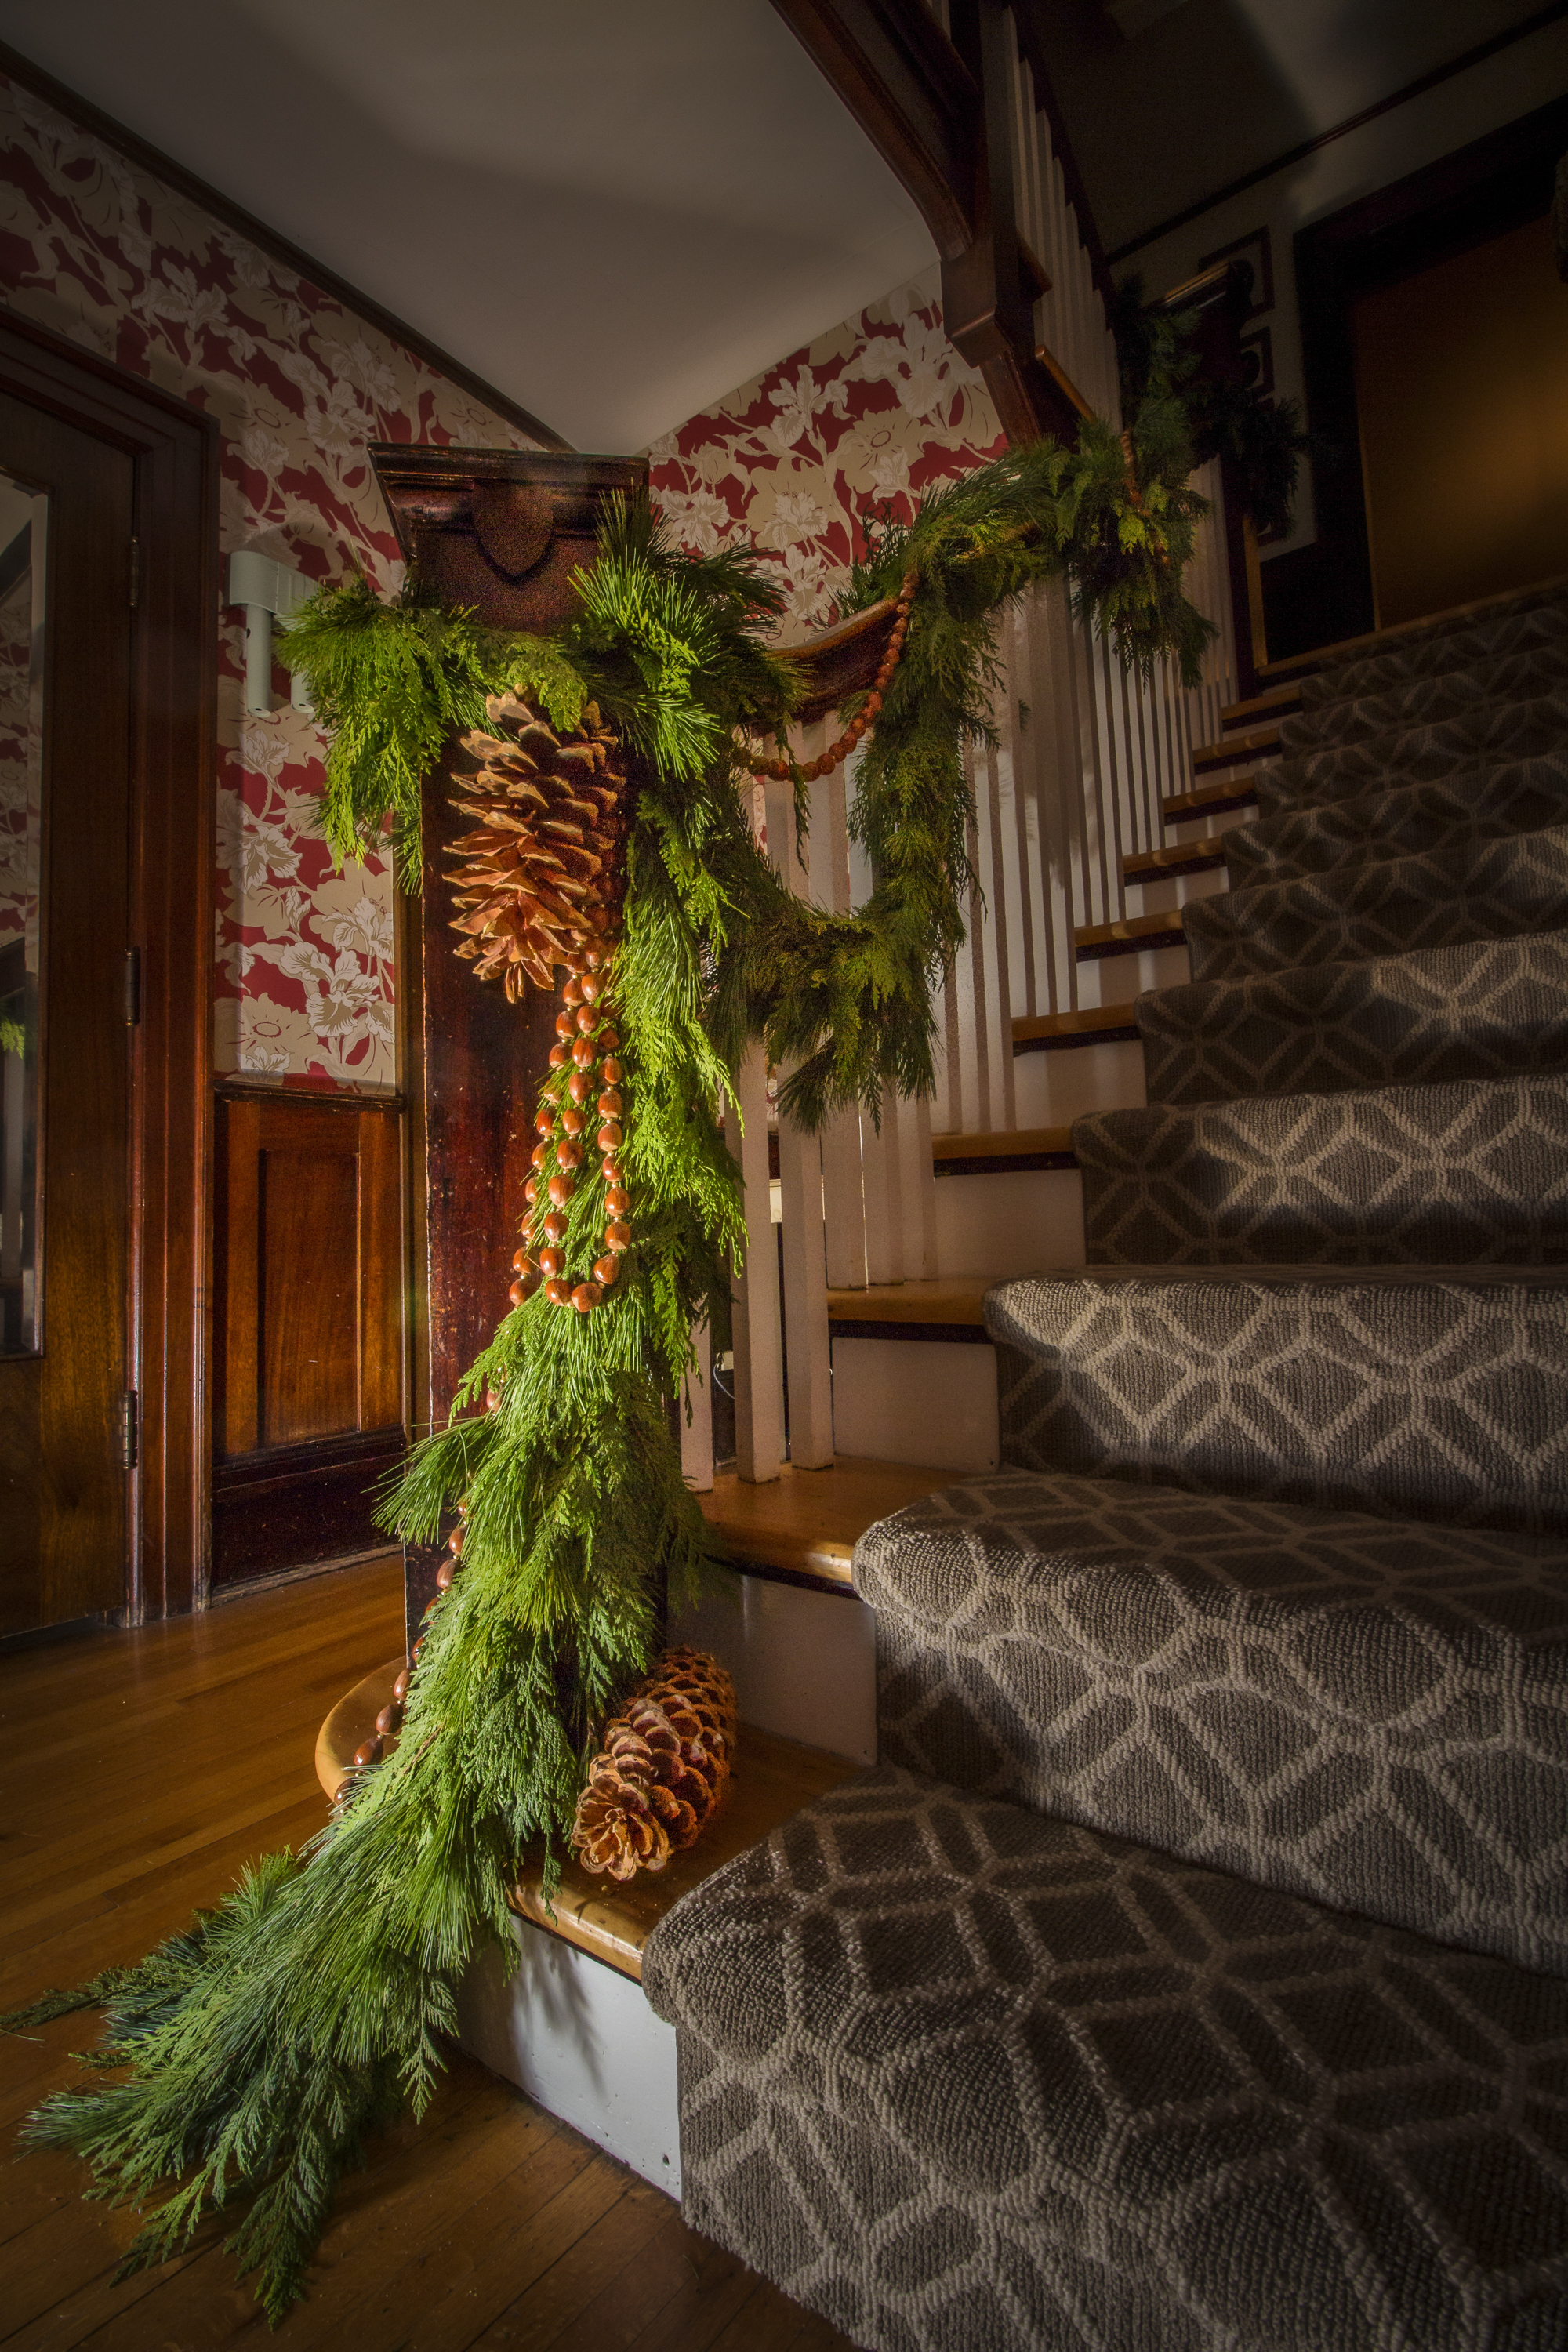
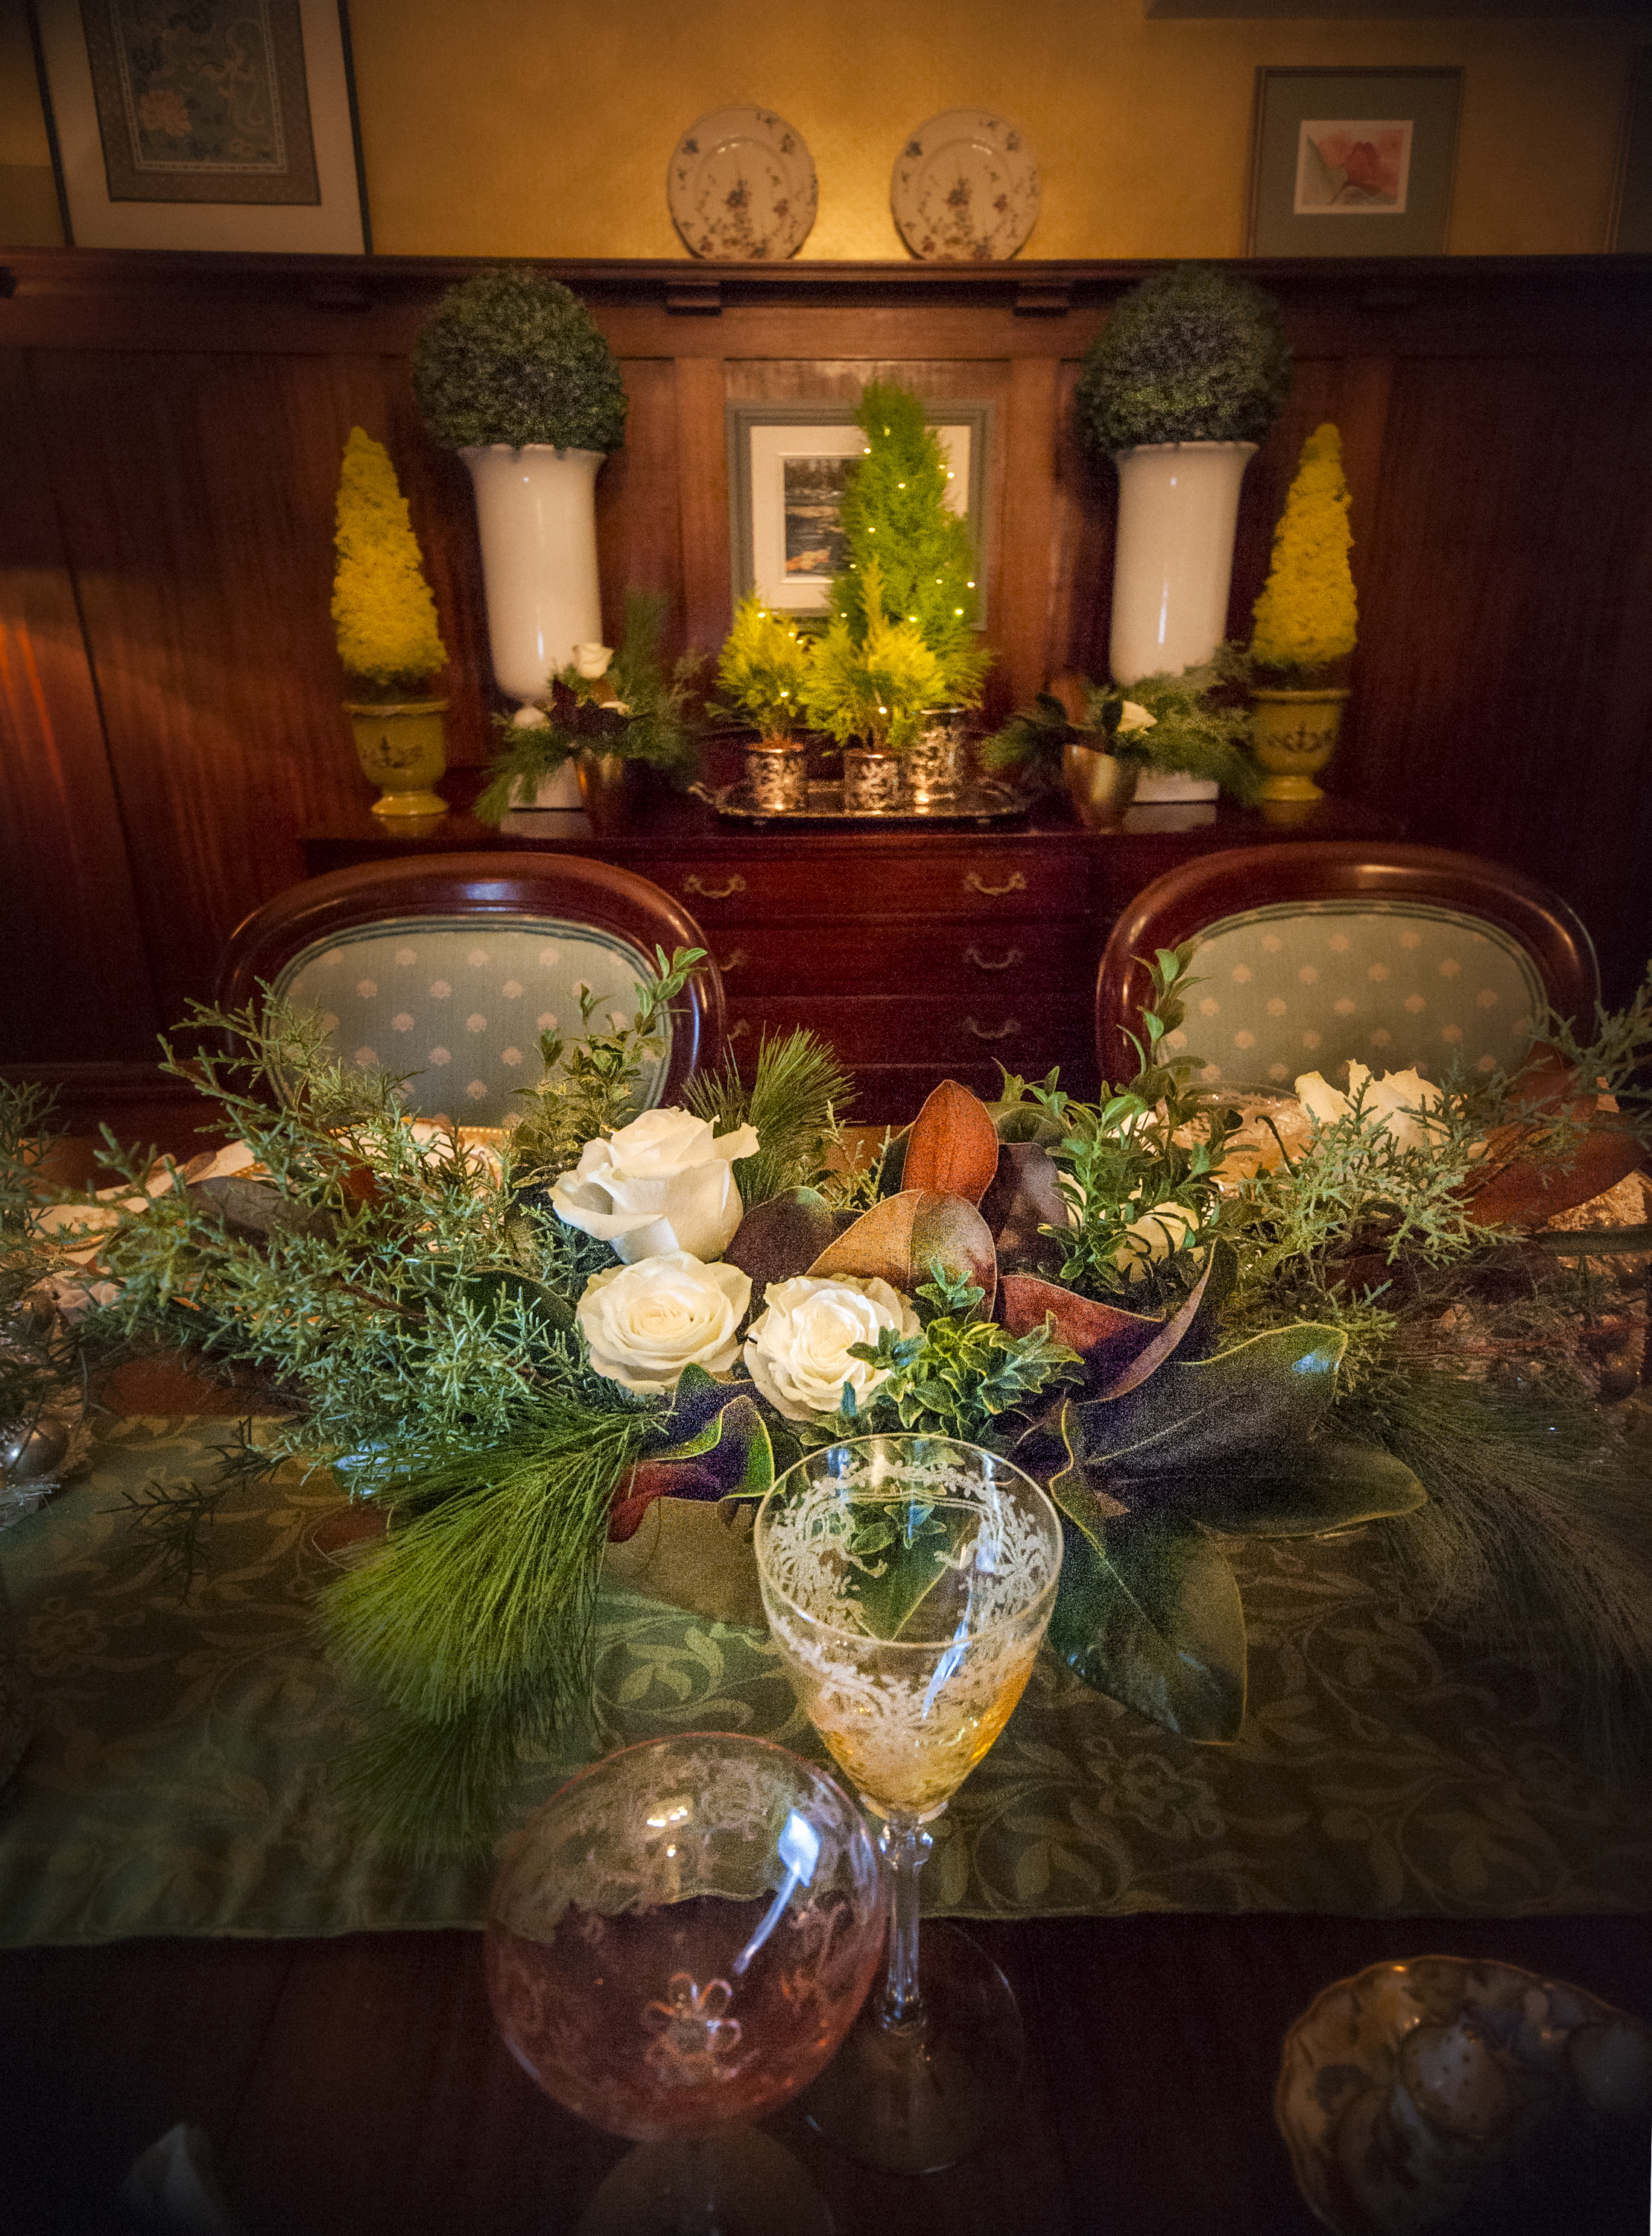
In 2016 I was hired by a local news paper writer to do a photoshoot for a Christmas Decor article in the Winnipeg Free Press. I was teaching photography at Red River College at that time and I decide to bring along two of my students Haley Pischke and Alex Izatt to gain some experience in real world projects. It turned into a long evening, much was learned including meeting tight deadlines, but we had some fun doing the project together.
The home was a century old home in the River Heights area and it was beautiful. The decorations were designed and performed by a local interior design merchant who created a very tasteful classic decor with lots of live botanicals. I recall some amazing aromas as we moved from room to room.
The students received some valuable experience and although the due credits did not appear on the published article they did receive all my fees for their work. My only regret was I wish they had their first published article with their names on it.
As a professional photographer I was so happy to share this experience with my students. I always think back to the days I started out and to have someone share their time early on would have been invaluable to my growth.
One of the details we discussed prior to the day of the shoot was to plan, visualize and coordinate what our shooting style would be and what it might look like. Being beginners I spoke about perspective and to come up with some unique looks based on that. We shot from on top of the tables, to high on a ladder, to reflections in a mirror. I showed them that the simplest of equipment can go a long way. We used a remote triggered speed light with a white plastic milk bottle diffuser and it performed admirably. This diffused flash filled enough of the darker areas but allowed the room lighting or candles to show their character.
It was a great experience, the writer was delighted with the results and the printed article looked amazing.
I think it’s a bit misleading to make a claim which vignette is best but let me explain.
“Beauty is in the eye of the beholder” Gramma Kerr
On my Facebook page I thought it would be interesting to share one image with a variety of vignette treatments to see what people think. The responses and assessments that were shared was terrific and a couple of things became clear to me that I will delve into here.
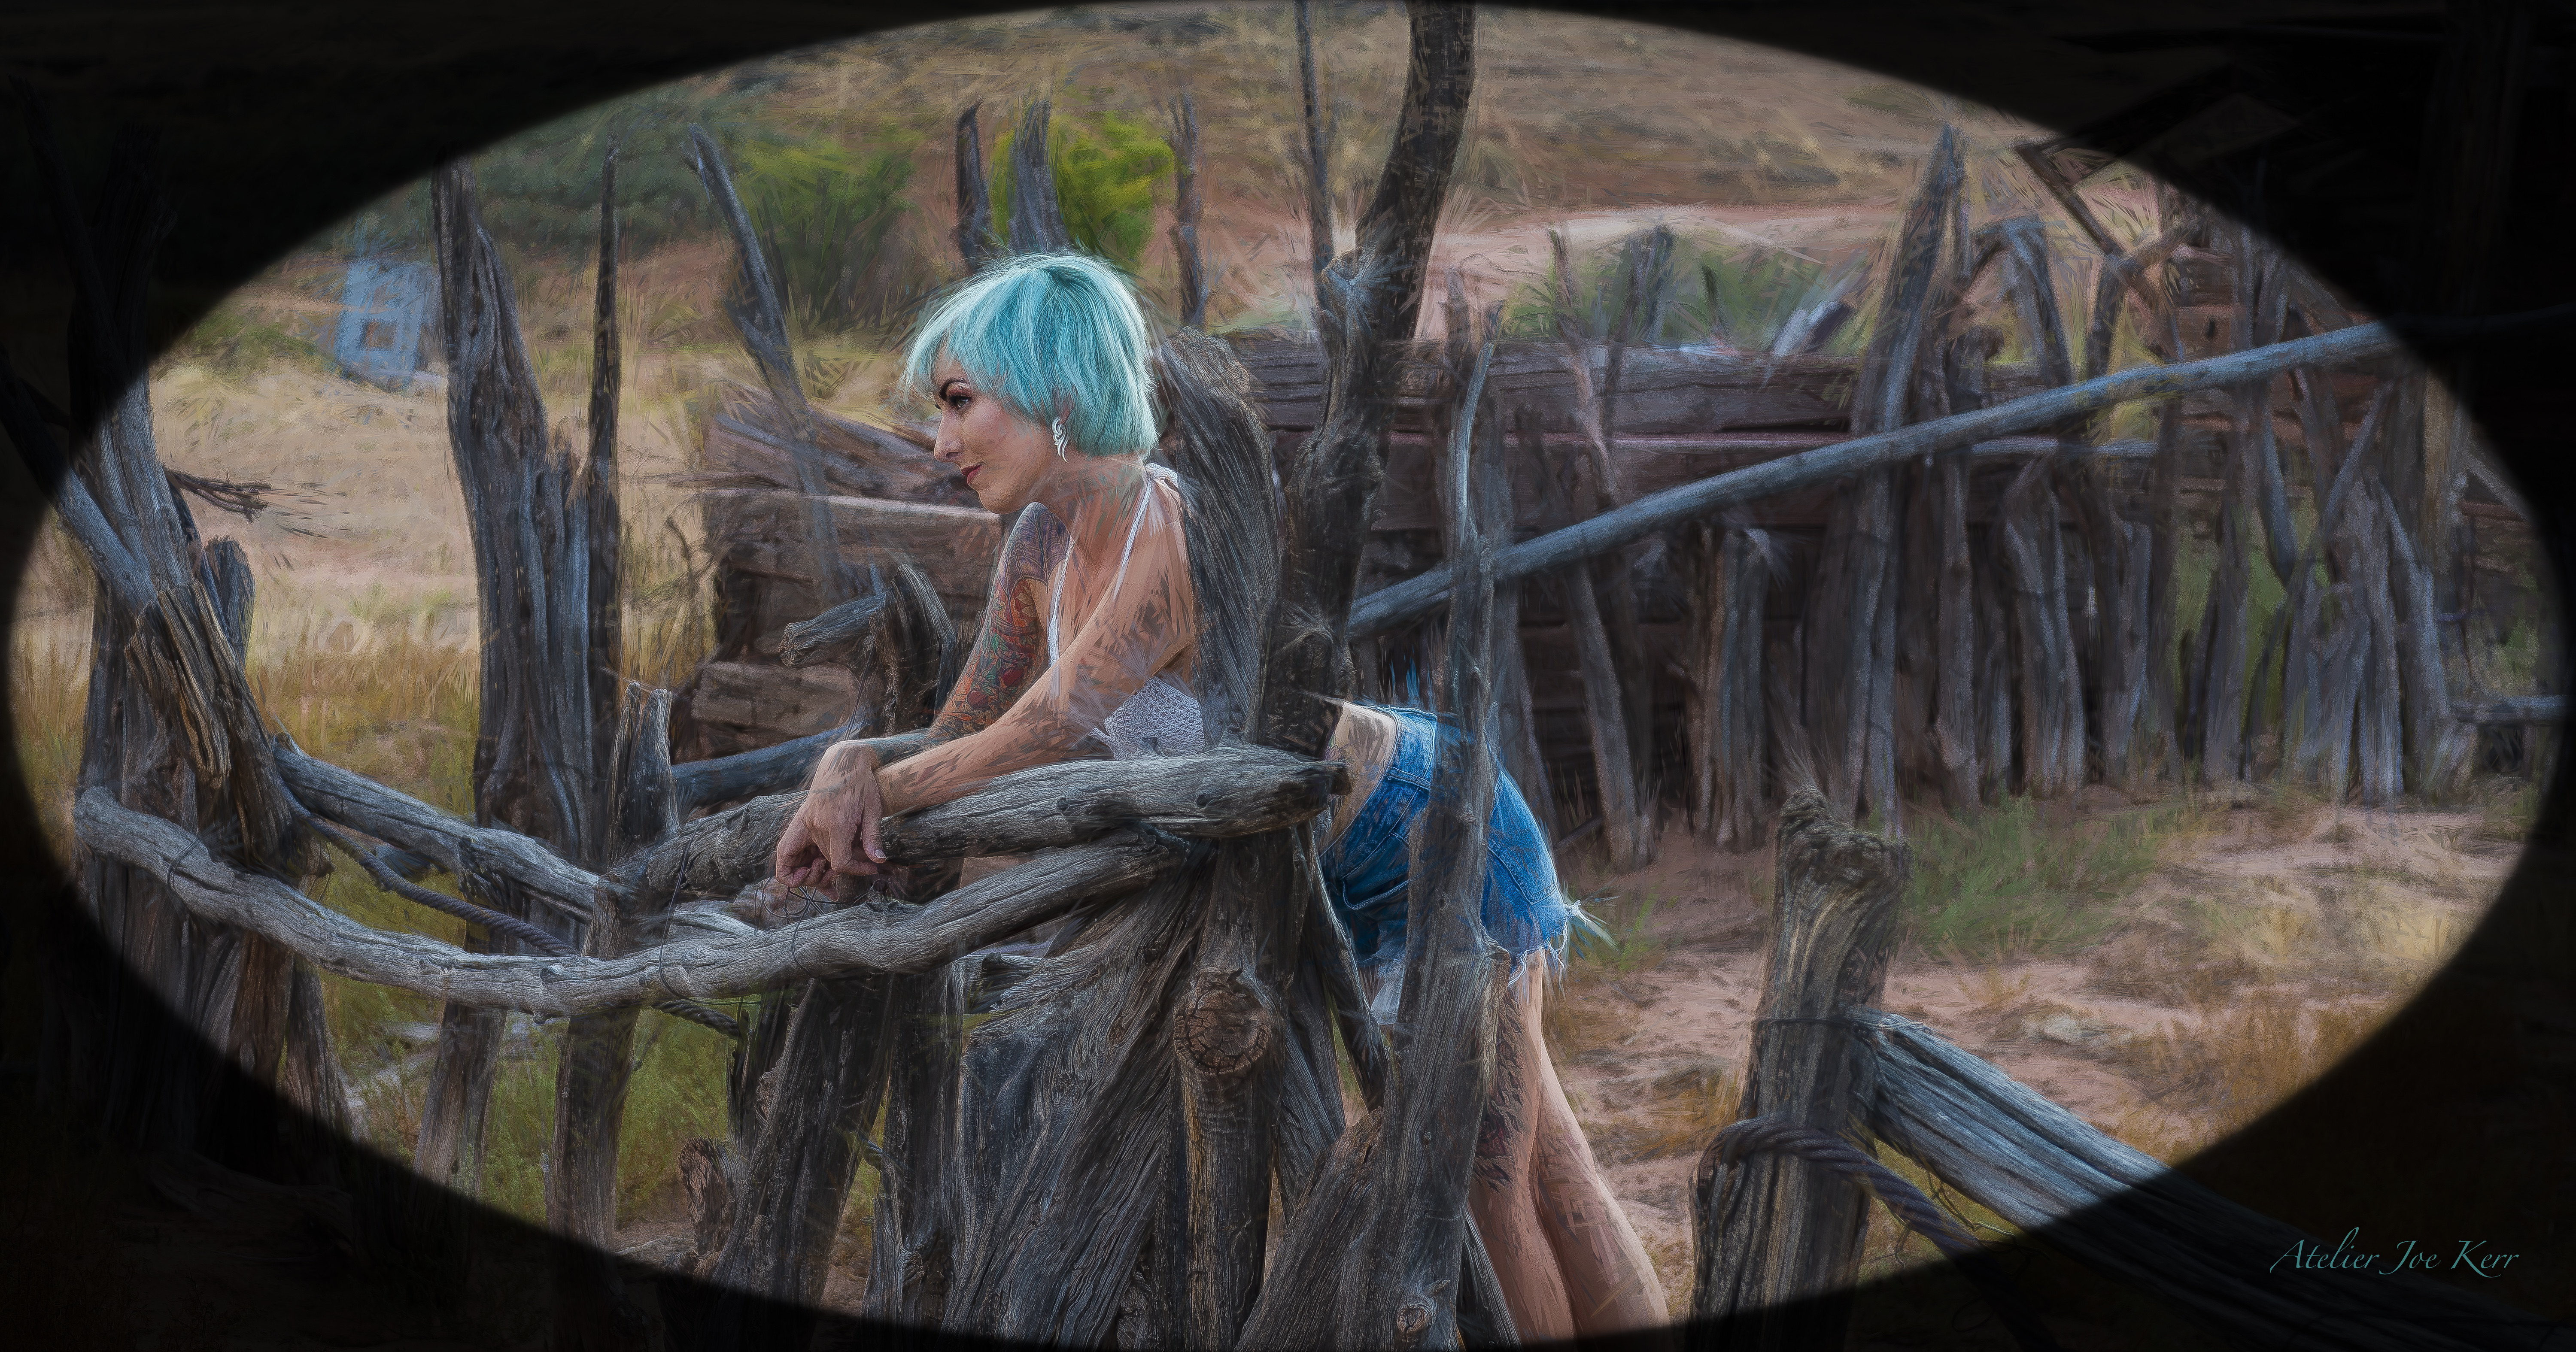
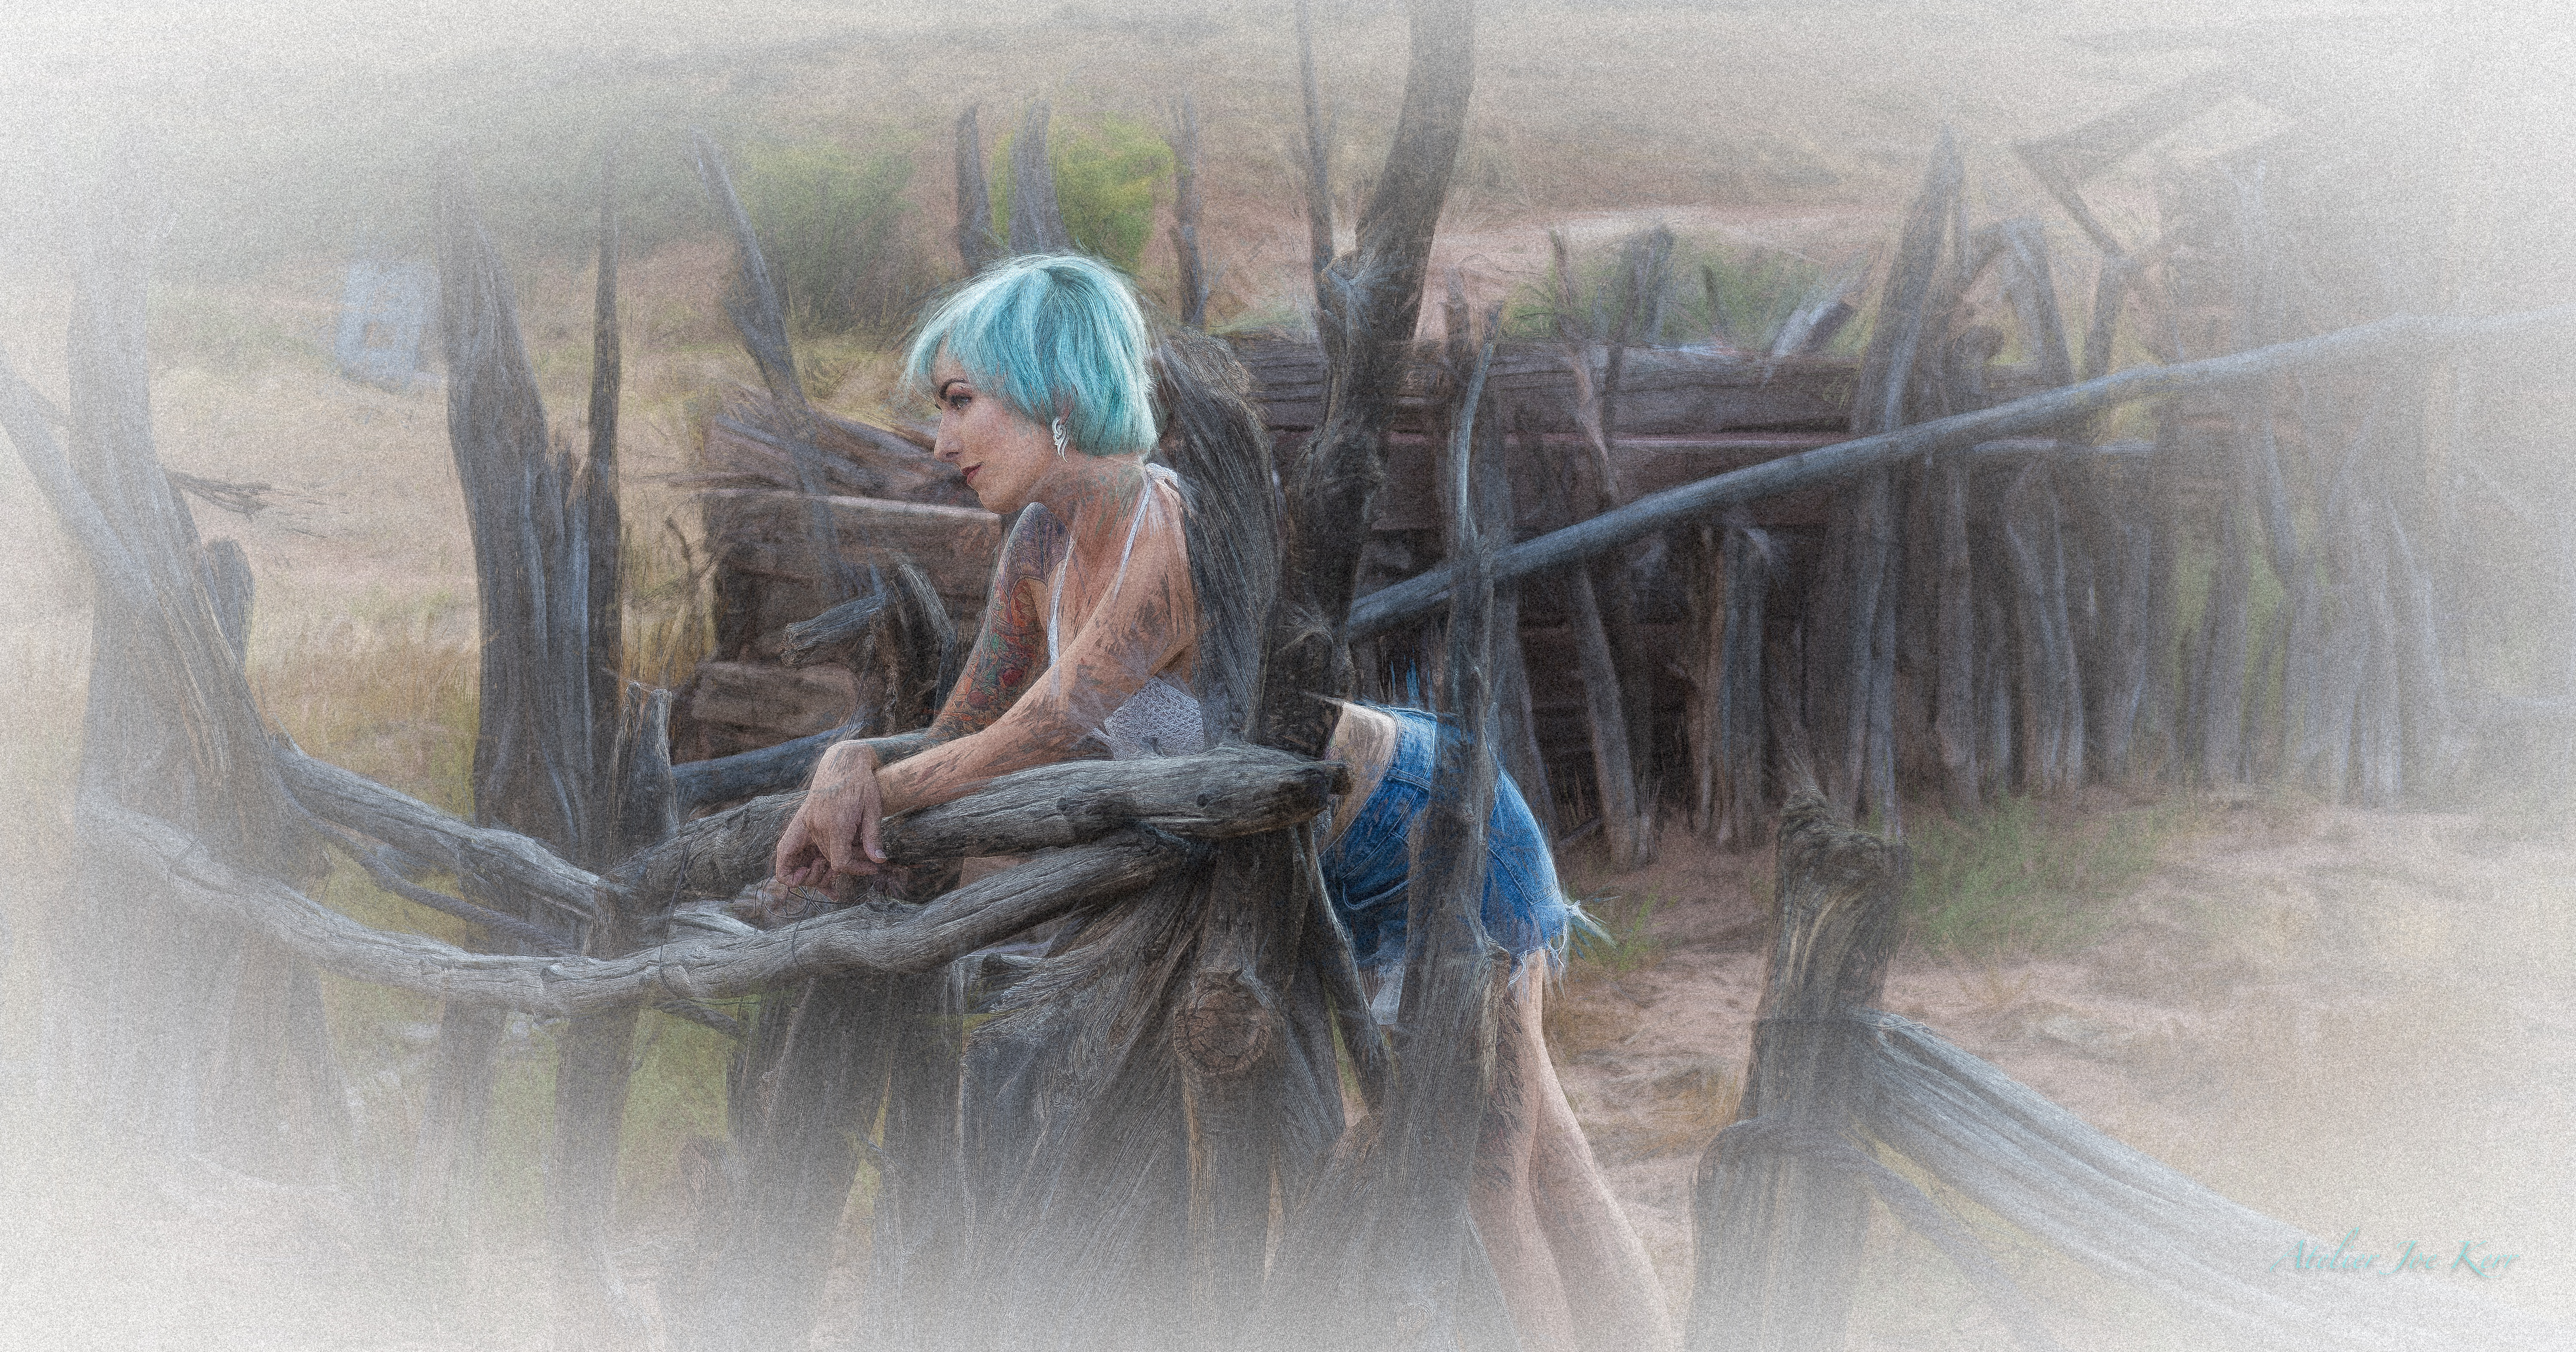
Let us just look back on what was asked for people to asses. Below are the 4 images I shared complete with the descriptors as to the intent of each style of vignette. I was looking to see if with the understanding of the intent and its application to this image would sway people’s opinion.
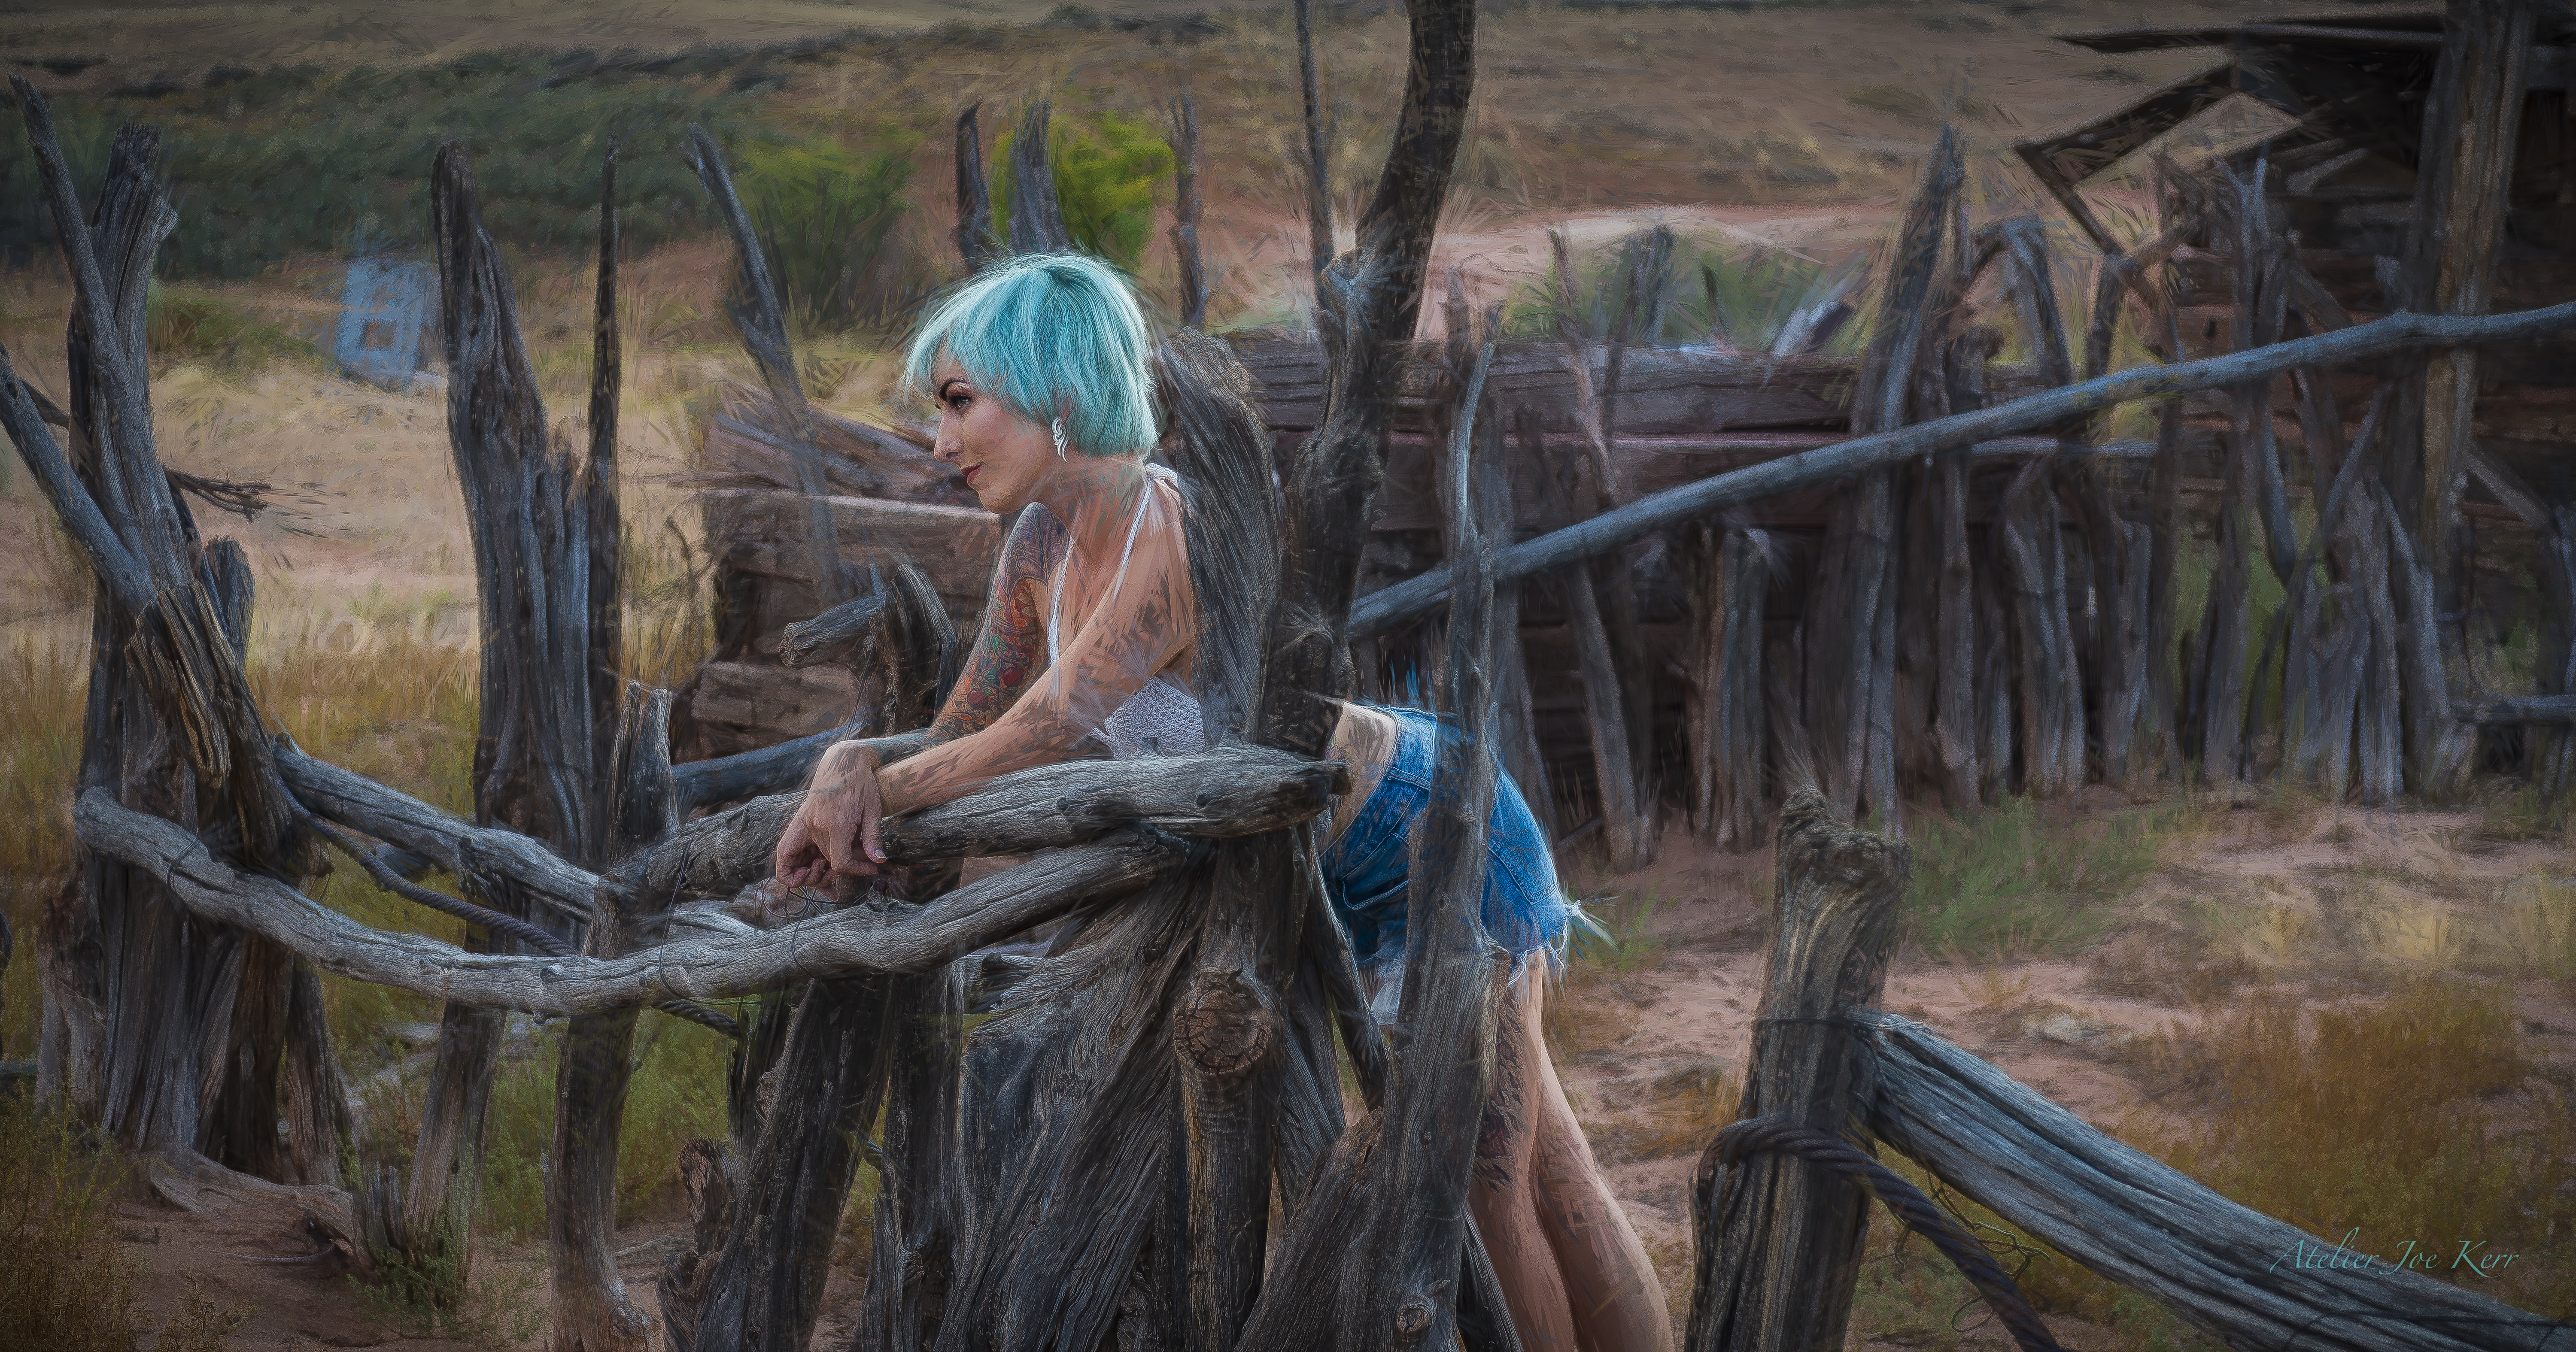
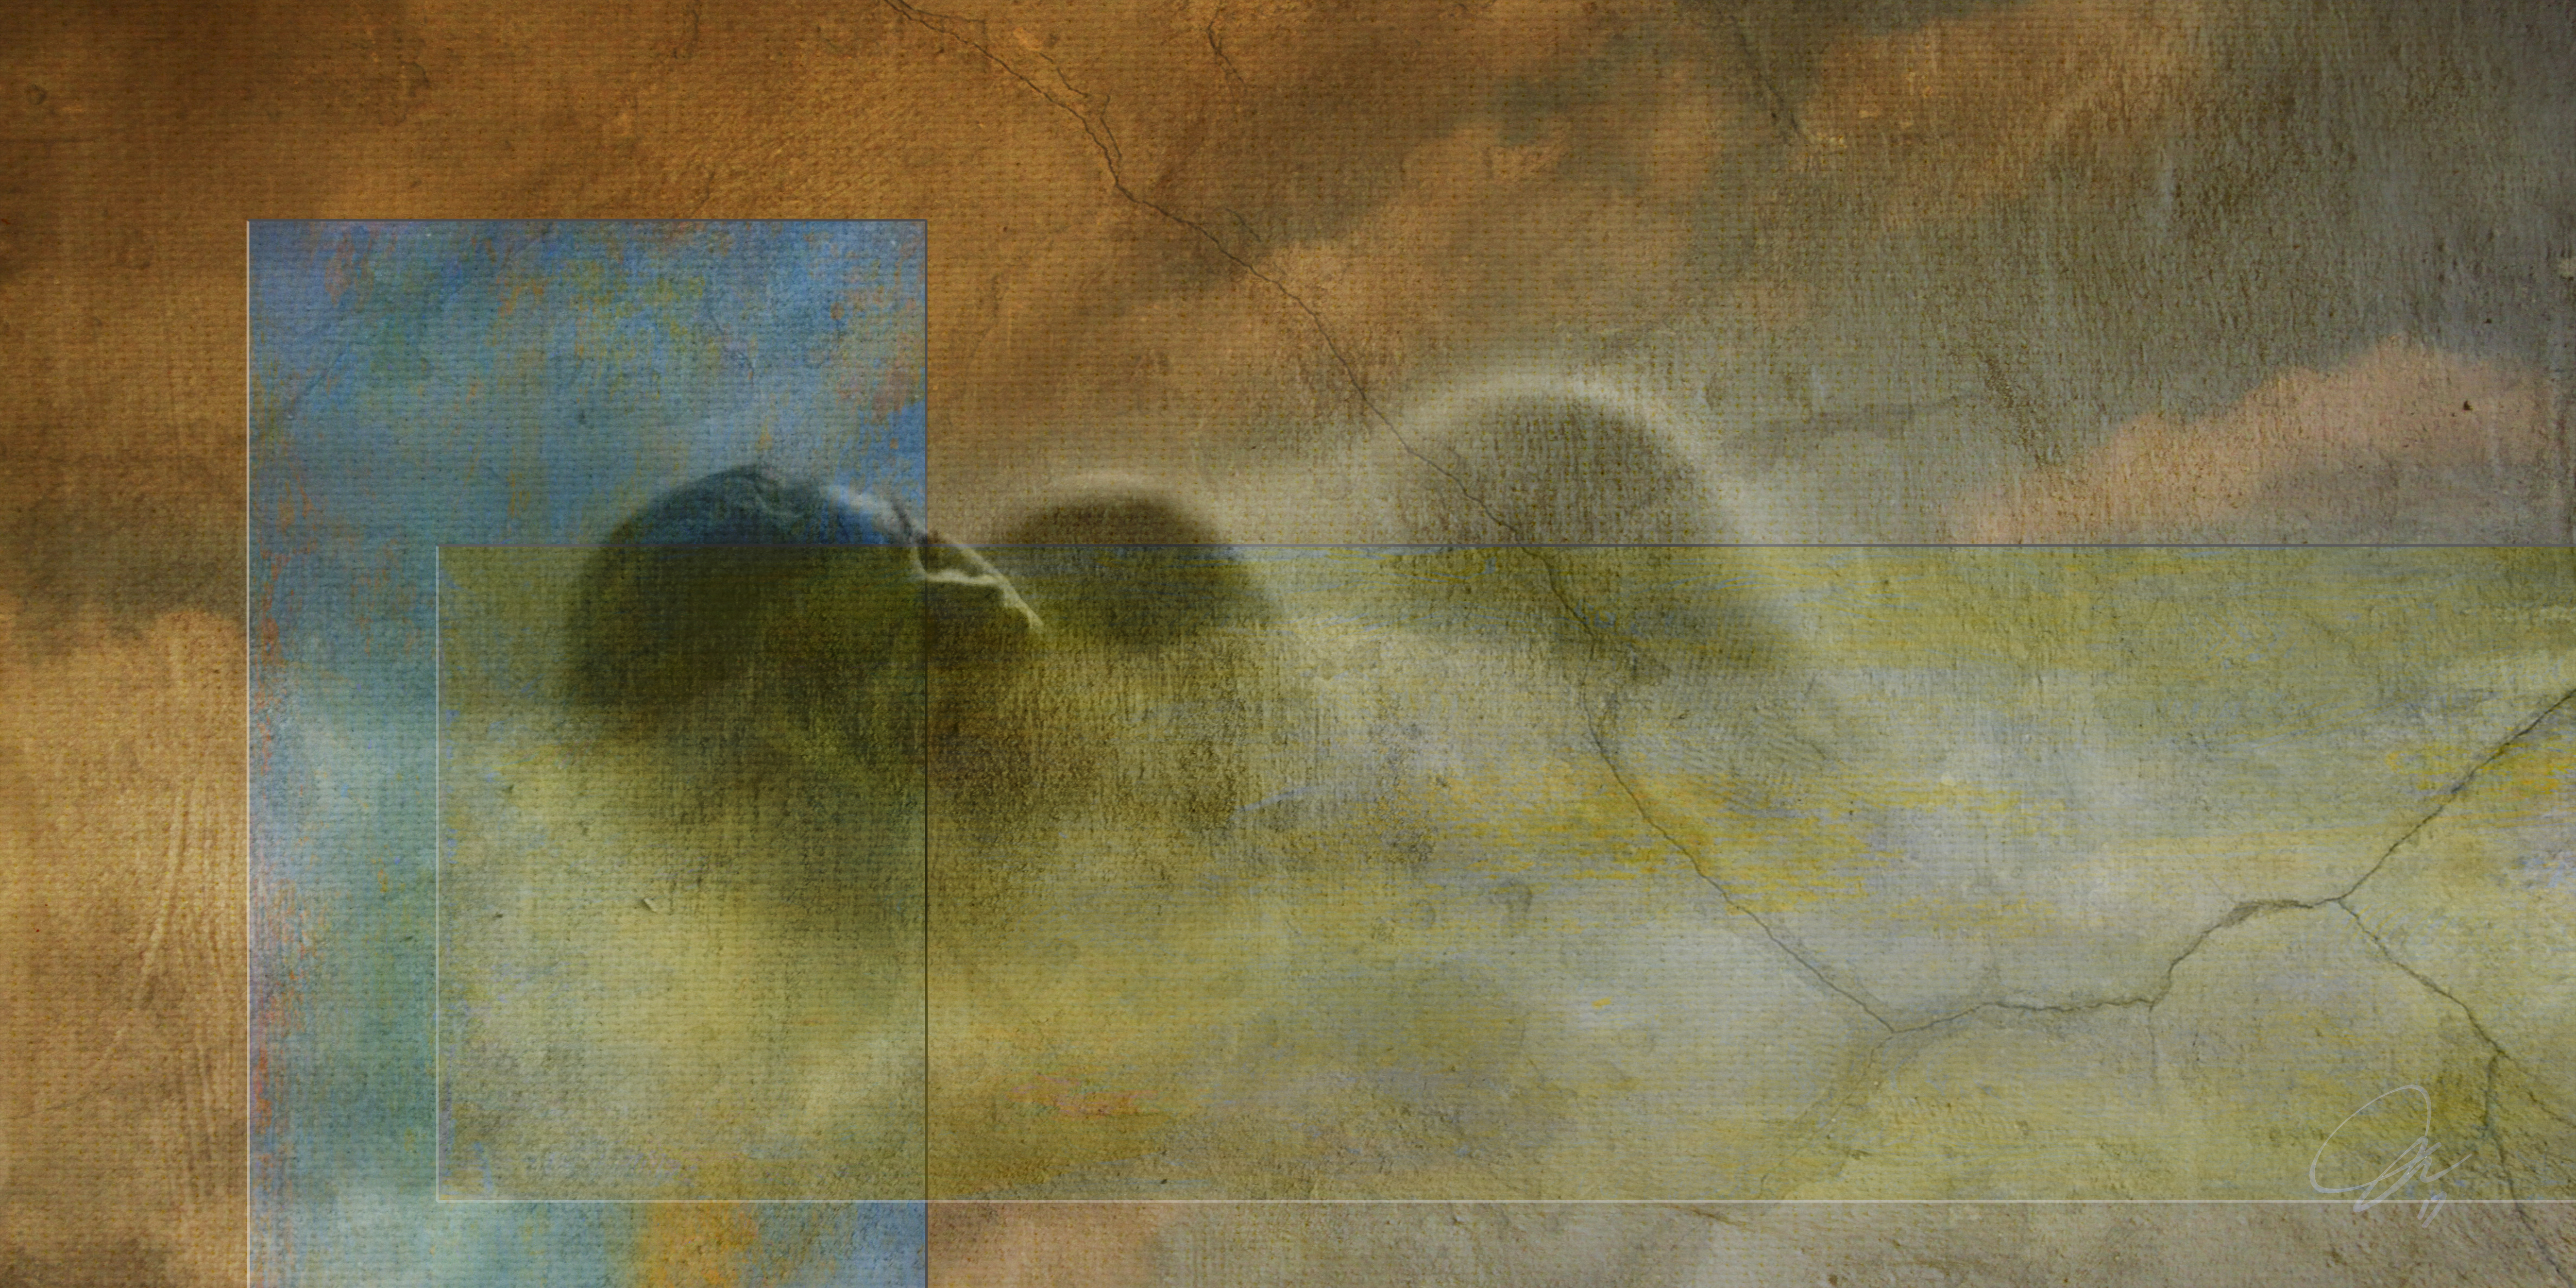
The image I used was taken on a Rodney Braun, Utah Tour, Aug 2018. You may recognize Elizabeth Webster the owner of Beyond Boundaries Academy she is a stunning model who knows how to project a feeling in her posses.
“This was #1” The intent here is a vintage matt appeal. When I was a young boy I remember seeing family photo of my grandparents and they always had this oval matt which resonates with me and I still find them appealing today. “This was #2” The vignette is a soft feathered beige. The intent is to quietly bring your eye to the centred subject. The light to darker contrast draws the eye to the subject in a more traditional way. “This was #3” This vignette is a very large gradient, there is a grain used on the version that mimics the style of the photo. The intent of a vignette like this is to create a dream like feeling. “This was #4” A uniform warm darkening which effectively takes the eye to the lightest area. This technique is quite common today and beautiful.
The four different styles shown here are a small sampling of what can be created with the infinite numbers of software programs available. These were created simply in LR.
So what is the best vignette style here is totally in the eye of the beholder. If you rate it by popularity #4 was by far the most popular. I anticipated that so in my minds eye it was my control image. What popularity has taught me over the years is simple. If you’re going to sell images you almost always need to follow the popular vote, don’t buck the trend. If you are perusing a fine art portfolio image, trust your heart and eye.
If your images talk to you and say it needs a soft dreamy context to help fulfil the desired result then its total your choice. This also may include a host of other possibilities like colours or textures.
The opportunities are boundless but be careful not to over step the need for a skilled assessment of your intent and how best you can enhance your image.
The choice is always yours don’t be swayed by others believe in your own instincts, it is the only way you can become artistically liberated.
“How long are you willing to wait before you dig deep into what’s creatively fulfilling ?”
As a photographer you need to study to instinctively understand, comprehend and execute the techniques of photography. But, the pictorial artists needs to evolve these rules, to be able to release themselves of the limiting confines of ridged techniques in order to be creatively free but with a sound foundation.
This sense of freedom to perform at an artistically free level is resting within most of us. It will only come forward if we truly want it. As human beings we habitually place limits on that freedom and restrain ourselves creatively falling back to what is safe for us and acceptable by our peers.
How then are we going to overcome a lifetime of limitations to suddenly become a wiser, stronger, more confident and ultimately a free thinking artists? Well, it’s not going to be sudden or easy. It’s going to be an evolutionary process that evolves through patience, learning, focus, determination and an understanding want of that liberation.
As you start this journey you may feel like you’re backing up, worrying if it is going to be acceptable, but accepting who you are, working through the learning curve you will find a persona or inner you coming together. For me this is when the hardware and software actually mean less and a tropic cascade of image evolution becomes your reality. You will find you are driven and genuinely motivated to fulfill this style that reflects you, one that is comfortable, intuitive but understood. You must trust it when it happens, let it flow through you and learn to get other peoples impressions out of the way so it can shine clearly.
Moving forward on your vision, your development of capture and processing techniques will become much stronger and more clear, actually feeling simple. With a strong mind set, you will no longer fear technical limitations and the ever changing treadmill of software regiments. Your experiences and knowledge will confirm your ability to perform at levels that will set you apart and free.
Given that reality, it’s now within your ability to minimize the effect of limitations and to allow yourself to evolve. Doing so, you must work on developing your own mind-set and psyche to perform. But, most importantly, you must develop and recognize what is your vision and define it within your given style. Believing in your own techniques releases the confidence to move past previous limitations, to continue explore any new found potentials.
Lastly dwelling on nagging critiques will fade away and be forgotten. What were once challenging obstacles will soon become a natural sustainable pace. Fears of acceptance will be replaced by an excited anticipation of exhibiting your latest exploration regardless of any consequence. Impending projects will no longer be a source of dread, but, become opportunities to rewrite your personal creative exploits.
Feel the joy and learn to fly. Only then will you have the true freedom to create.
Taking great photographs used to be based on how sharp the capture was with good composition and light. Today, with literally millions of images taken every day, that’s just not good enough. You need to dig much deeper.
Today you need your images to be more compelling, you want your audience to be there with you, feeling the moment, drawing them into your vision. In today’s world of photography this is just the first step in creating good photographic art.
The artist must understand the complex world of post production. How to create a look that can define who they are and establish it as a brand for them selves. A formidable task maybe but if your dedicated to your art its a life time journey worth exploring.
In addition the photographic artist needs to have an understanding of who he or she is and who their desired audience is. He or she needs to study exactly how they will either fit into that profile or better still how they can create a new genera that is distinctly their own. This is likely the most difficult task and it doesn’t happen with out a lot of commitment to their work. Most will never get this far and that’s OK as long as you enjoy the art of photography.
“How long are you willing to wait before you dig deeply into what’s creatively fulfilling for you?”
After spending more than a decade processing and evolving images in Lightroom its time to share these skills in a more comprehensive program. The many awards and honours bestowed upon my images and the over whelming support of the many club invitations for my talks has inspired me to open my door and share my inner thoughts and techniques on a more personal one on one level.
The “Image Mentoring Group” has been a concept under development for the past 3+ years. I’ve thought long and hard about how this would look and function but most importantly how each artists would thrive under my support and tutelage. The past years of informal private tutoring and mentoring revealed my existing circle of artists could achieve and exceeding their goals, with some achieving provincial, national and even international recognition.
Recently recognized by my colleagues and the photographic community for my dedication to the development of the photographic arts in Manitoba was a great honour. I’ve been collaborating with an amazing group of photographers development and teaching a new photographic program at Red River College. I was thrilled by this opportunity of a clean slate, open mind and to be on the ground level of exploring and developing a leading edge photographic curriculum for the collage.
These recent developments became the catalyst to complete the image mentoring concept and announce that January 2016 is the right time to launch “The Image Mentoring Group”.
The Image Mentoring Group
This is your invitation to join the first “Image Mentoring Group – Level 1 or 2”
The studio is all set and ready to go, the resources have been refined so the stage set for both creative and technical demonstrations that will help you take your work to the next level. This is not only about gaining a greater understanding about Lightroom, its more about learning how within LR you can developed a stronger creative process. Its about strengthening your vision so you can produce more dynamic images. Its about exploring innovations which will generate more ideas. This workshop is designed to help you conceptualize, visualize and execute more creatively with clarity and effectiveness.
These concepts will be developed through utilizing your own personal body of work with the goal of enhancing your own unique personal style.
Objectives:
To hone your image development skills within the Lightroom environment.
To develop a greater understanding of your images and how you can bring them to life as interpreted by you within Lightroom.
The images used are exclusively from your own portfolios and will be developed by you with my guidance.
Upon completion you will have a greater confidence of creative composition and in your own abilities within Lightroom.
You will gain a better understand of your own images and how best to process them effectively creating your own unique style.
In Level 2 once the files are completed you will learn to proof and print your image on a large format 44″ printer. The completed print is yours to take home and enjoy.
Each attendee will have 1 year hot line for any further questions once the course is completed. In addition you will receive a monthly newsletter on new developments, tips and tricks and other cool information.
Sessions:
Session #1 is now open for booking. I’m looking for groups of 3-4 who will meet once a week for 2.5 hours over 5-6 consecutive weeks, this is first come is first served. If you have friends and want to form your own group on a specific day and time that’s more than welcome.
Each group session group creates a “circle”. On the first circle meeting a through group discussion will determine the over all direction of the Lightroom curriculum. Each sessions scheduled has a 30-40 min curriculum study on LR and associated programs with the balance of 2 hours spent on individual person development.
The studio has undergone renovations and there are four work stations ready to go. The environment has a comfortable creative feel with inspiring images to help motivate you. All the network and print equipment is top professional standards.
Prerequisites Level 1 – 2:
Level 1
This is step one on learning Lightroom and composition. No previous knowledge of LR is needed but an understand of you computer and OS is required. PC and Mac are both covered. Wifi enabled is required.
Level 2
This is an intermediate level. A basic knowledge in Lightroom, from LR4 forward is needed. A good understanding of your computer is required we don’t want to spend time on technical issues its all about learning the artistic craft of photography. Wifi enabled is required.
Level 3
For professional and semi professional photographers looking to streamline their workflows and to create dynamic images within a solo file, file batch, collection or series. How to quickly asses image development requirements. Tether shooting for studio and commercial drone studies by mid summer 2016.
Starting dates are as follows:
Level 1 Beginner Studies in image composition and Lightroom development techniques.
Starting Sat. Jan 9, 2016 and five consecutive Saturdays ending Feb. 6, 2016. Times 9:30 sharp to 12:00 noon, door opens at 9:00
Level 2 Intermediate studies and mentoring of your images and thorough customization of Lightroom studies relative to your work.
Starting Sun, Jan. 10, 2016 and six consecutive Sundays ending Feb.14, 2016 Times 9:30 sharp to 12:00 noon, door opens at 9:00
Level 3
Starting January private sessions booked at the convenience of the photographer.
At the current time there are only 2 Mac work stations in my studio so having your own laptop is an asset.
Fees:
Level 1 $300 for 5 weeks Includes all LR & Circle documentation.
Level 2 $375 for 6 weeks includes all LR & Circle documents and printing materials.
Level 3 fee determined by the needs of the photographer based on $200 per hour.
The courses are now full. Once completed I will set up a date for the next session likely end of April or beginning of May. If you want to book ahead send me a note via email and you’ll receive the advance notification.
Fees are due on entry and the first four confirm your position in the program.
On Tues. Sept 15, 2015 at the Manitoba Camera Club presentation I was invited to do a presentation on B&W conversions with the intent of showing some of the artistic capabilities of Lightroom. The audience was asked to bring image files that I would process live. We had a lot of fun but unfortunately I ran out of time so I promised I would post them at a later date, well here they are.
Let me preface this document by saying that all the images are the copyright of the individuals who kindly submitted them for this particular talk and demo. I want to thank those that shared their files for this purpose of the demonstration and I hope that I did them justice on the conversions. So lets begin, the images appear in no particular order.
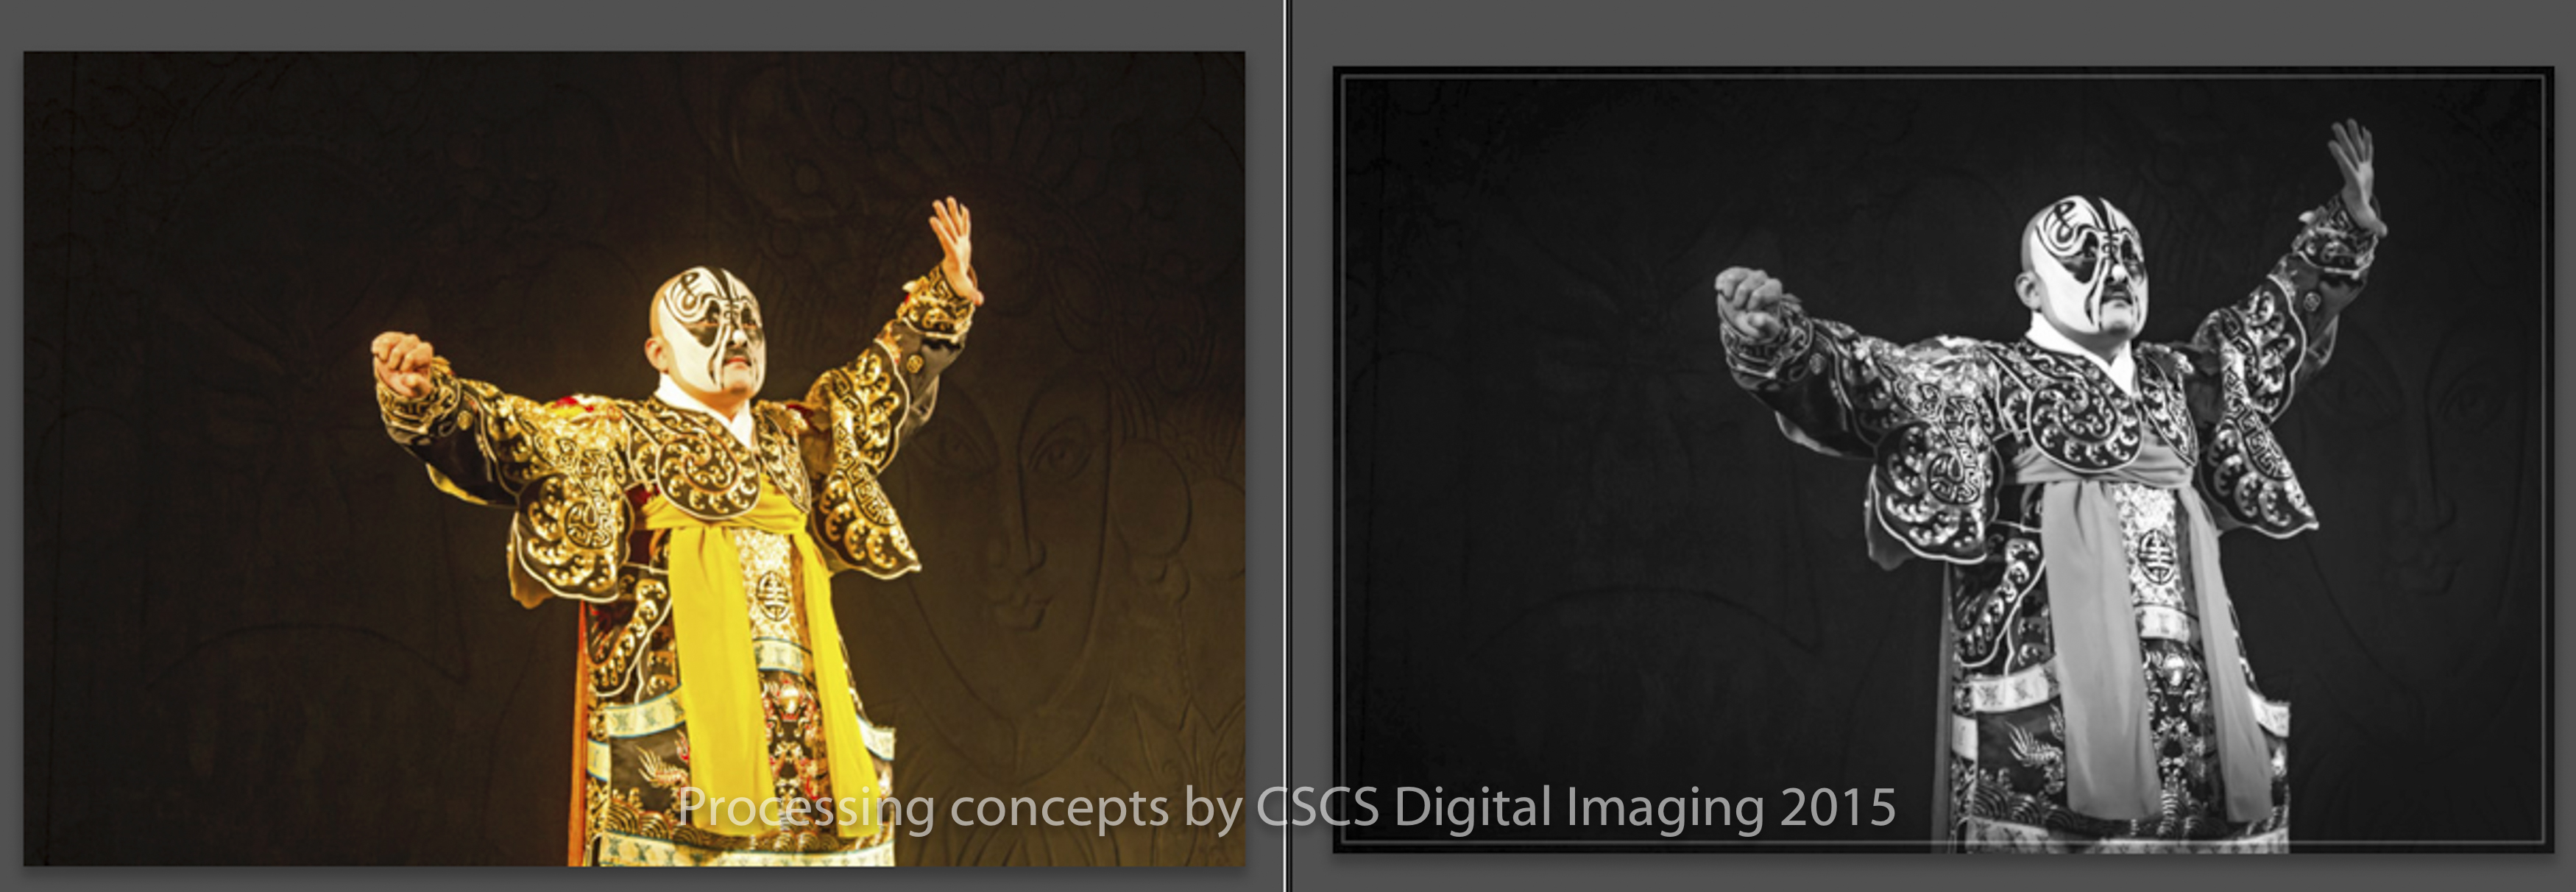
The Actor
This is a nicely exposed stage shot of an Asian character. There is a strong colour cast from stage lighting so its important to start with colour correcting the image to obtain the correct grey scale tones. Once completed, using the “HSL module”, each colour was desaturated. This technique allows for a luminance adjustment of each colour in the scene. In the “Basic module” a minor exposure and shadows adjustment completed this conversion. A border was added in OnOne FX.
Street Dancer
This was a challenging image because of the complex nature of the capture. Quite a busy street scene didn’t allow for a simple B&W conversion so it was produced as a hybrid to help isolate the subject in an interesting way. Utilizing the radial tool in LR6 set to 100% desaturation was the starting point. In LR6 the new brush selector within the radial tool was chosen and set at 100% desaturation erase all the remaining colour. The dancer, now the only colour, stands out against an other wise busy background. A lightening of her and a slight saturation and its done. Border was added in FX.
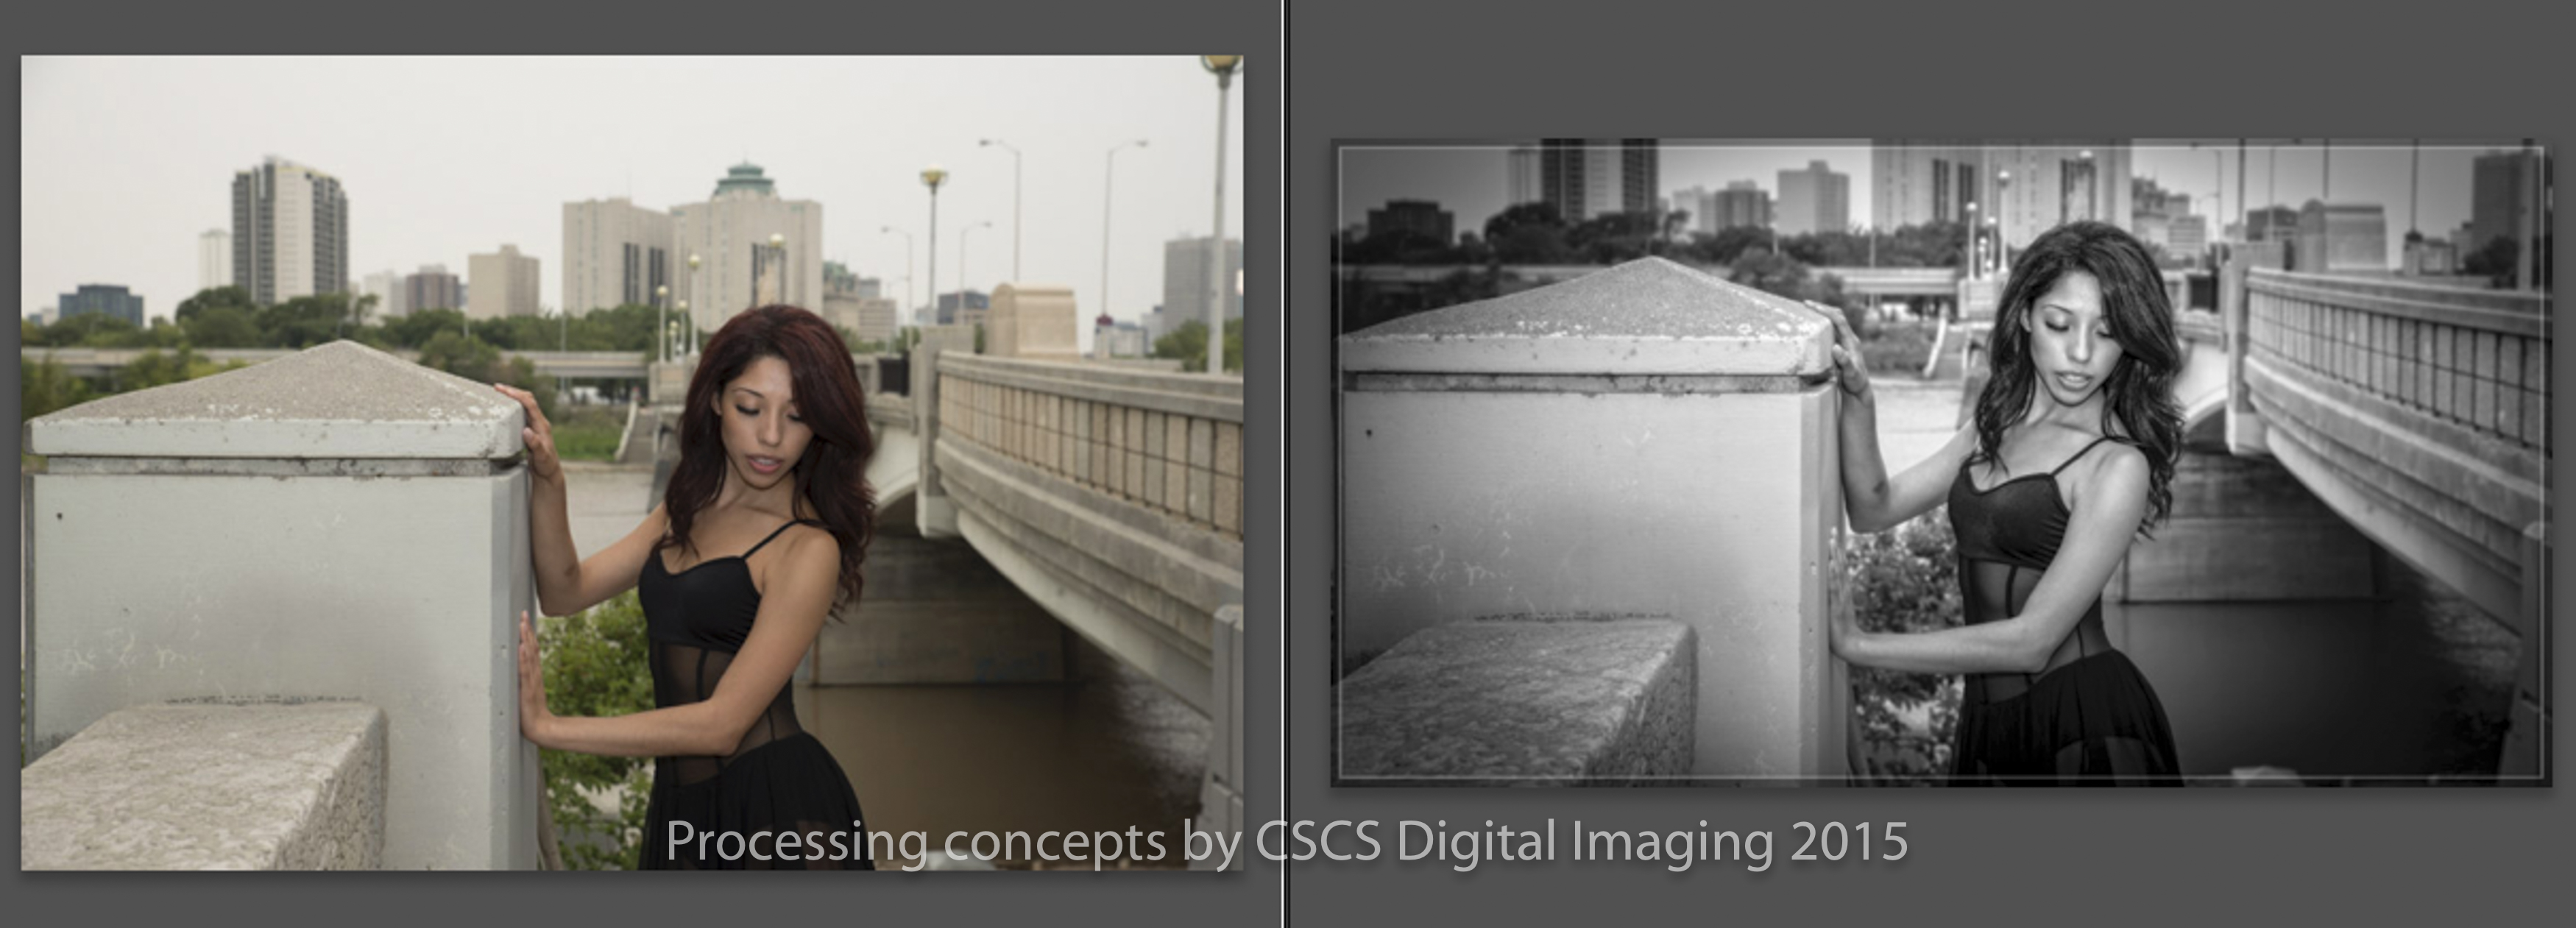
Environmental Portrait
A nice urban portrait but the subject is a bit lost and not the true focal point. Starting with a crop to remove some of the bright area that catches the eye, in addition it make the image more cinematic. Using the HSL and removing all colour with the sliders allows minor adjustments of all the grey tones. Then added an elongated horizontal radial adjustment of exposure, – highlight and clarity. A second vertical radial adjustment with the same sliders of varying settings completed the look. A vignette was added and a frame in OnOne FX.
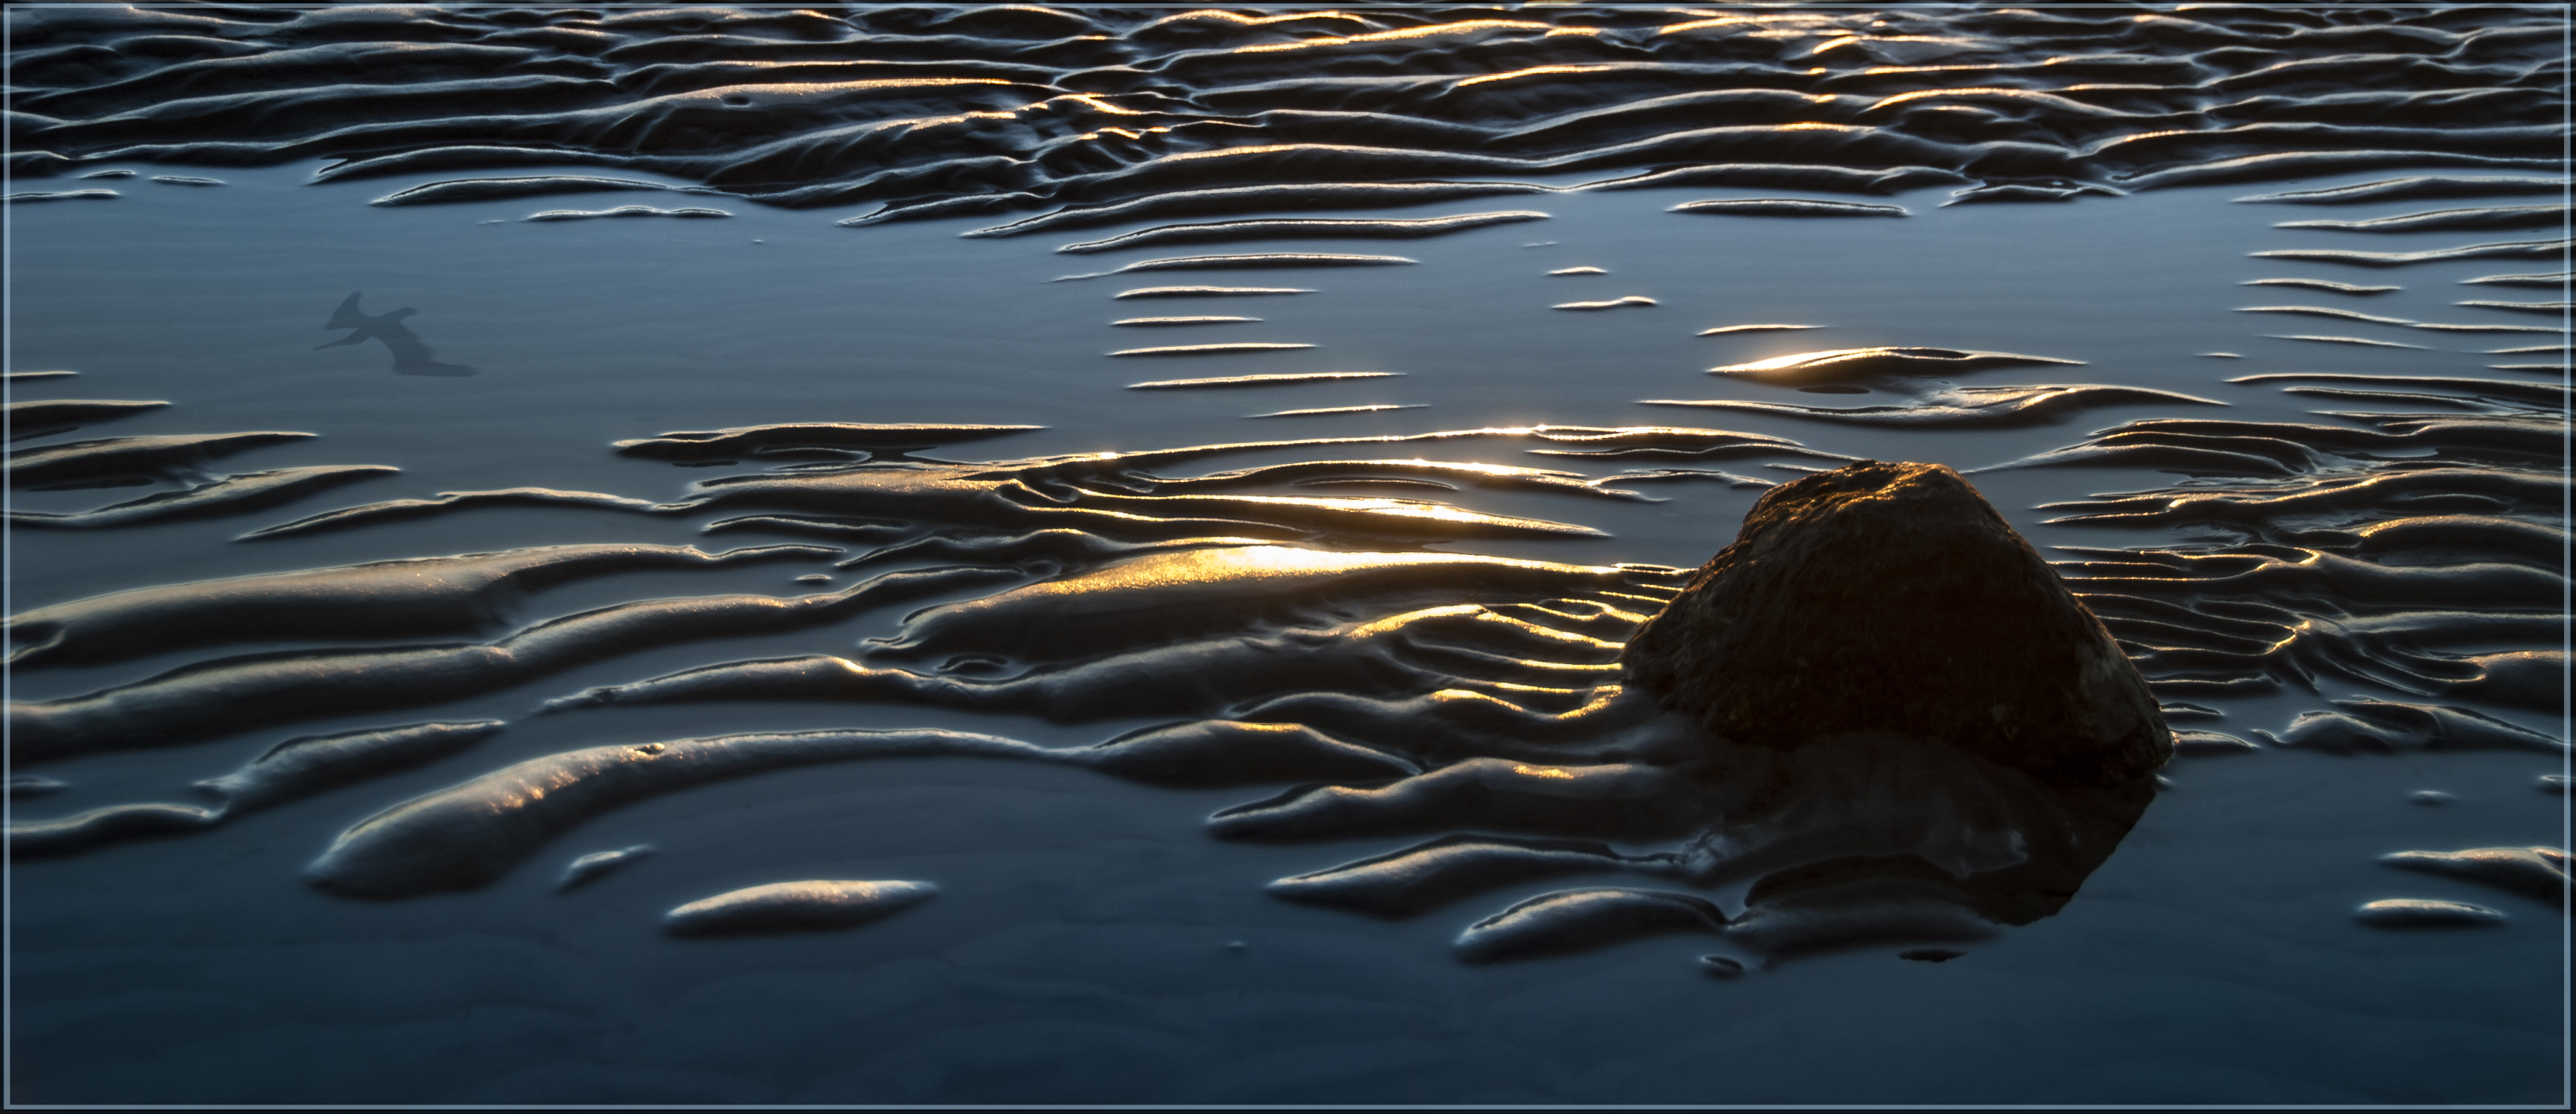
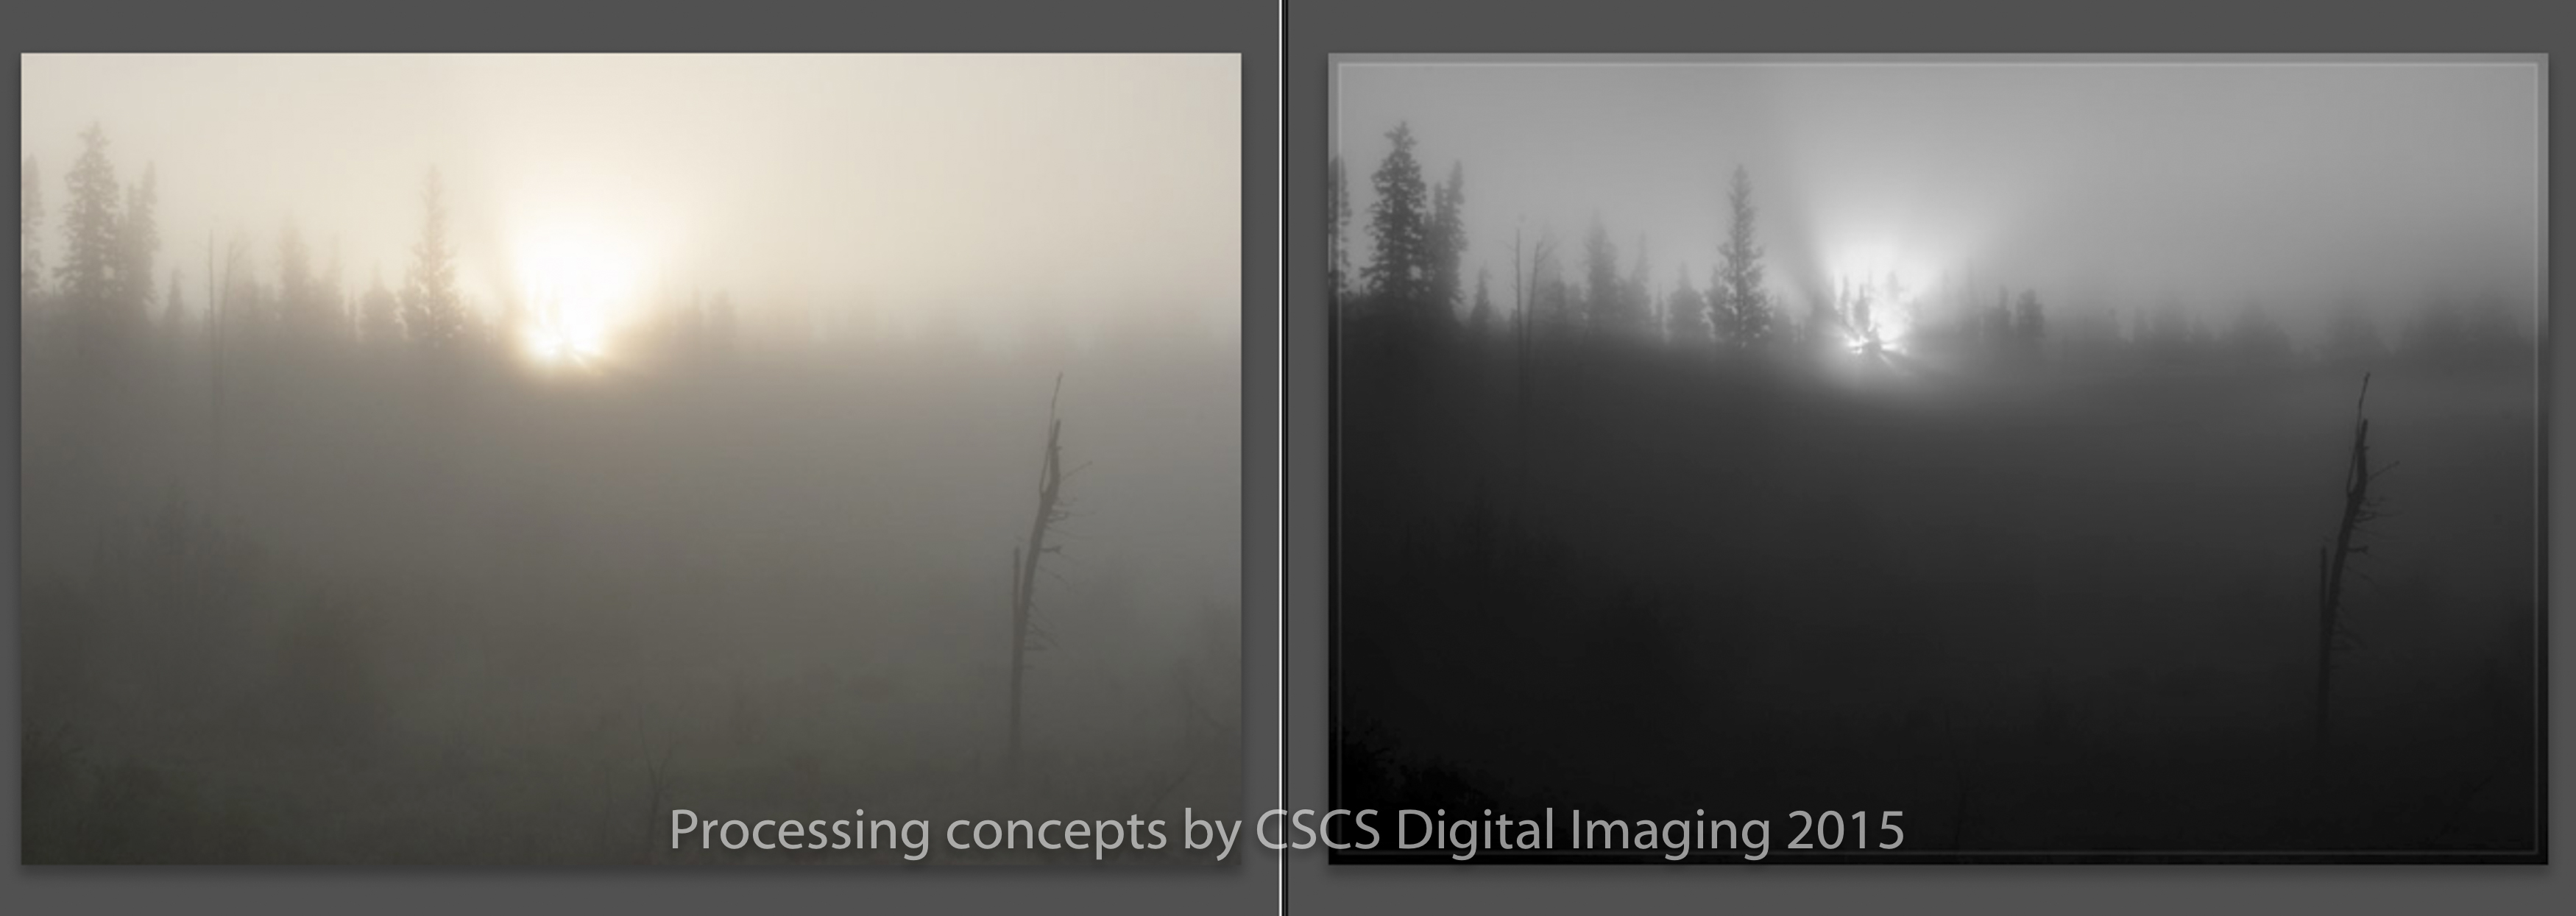
Sunrise Fog
A challenging fog image. Start with the HSL desaturation conversion to B&W. A gradient tool with a strong clarity selected was dragged down from the top and it revealed details at the brightest point. Switched to a radial tool with a strong clarity setting revealing as much detail as possible with out creating unwanted banding effect of the gradient. Two more radial adjustments were set on each side adding more treeline details. Lastly a gradient tool, set with clarity, dragged from the bottom up to expose the dark details in the for ground. Fine details were added with a brush tool, dodging and burning the stick in the foreground. Frame added in OnOne FX.
High Key Portrait
Studio portrait converted with a moderate high key look. Global HSL desaturation colour conversion, a radial tool adjustment with clarity and slight +exposure showed a nice opportunity to go high key. The final has a pushed white and exposure adjustment with some added contrast to retain the details.
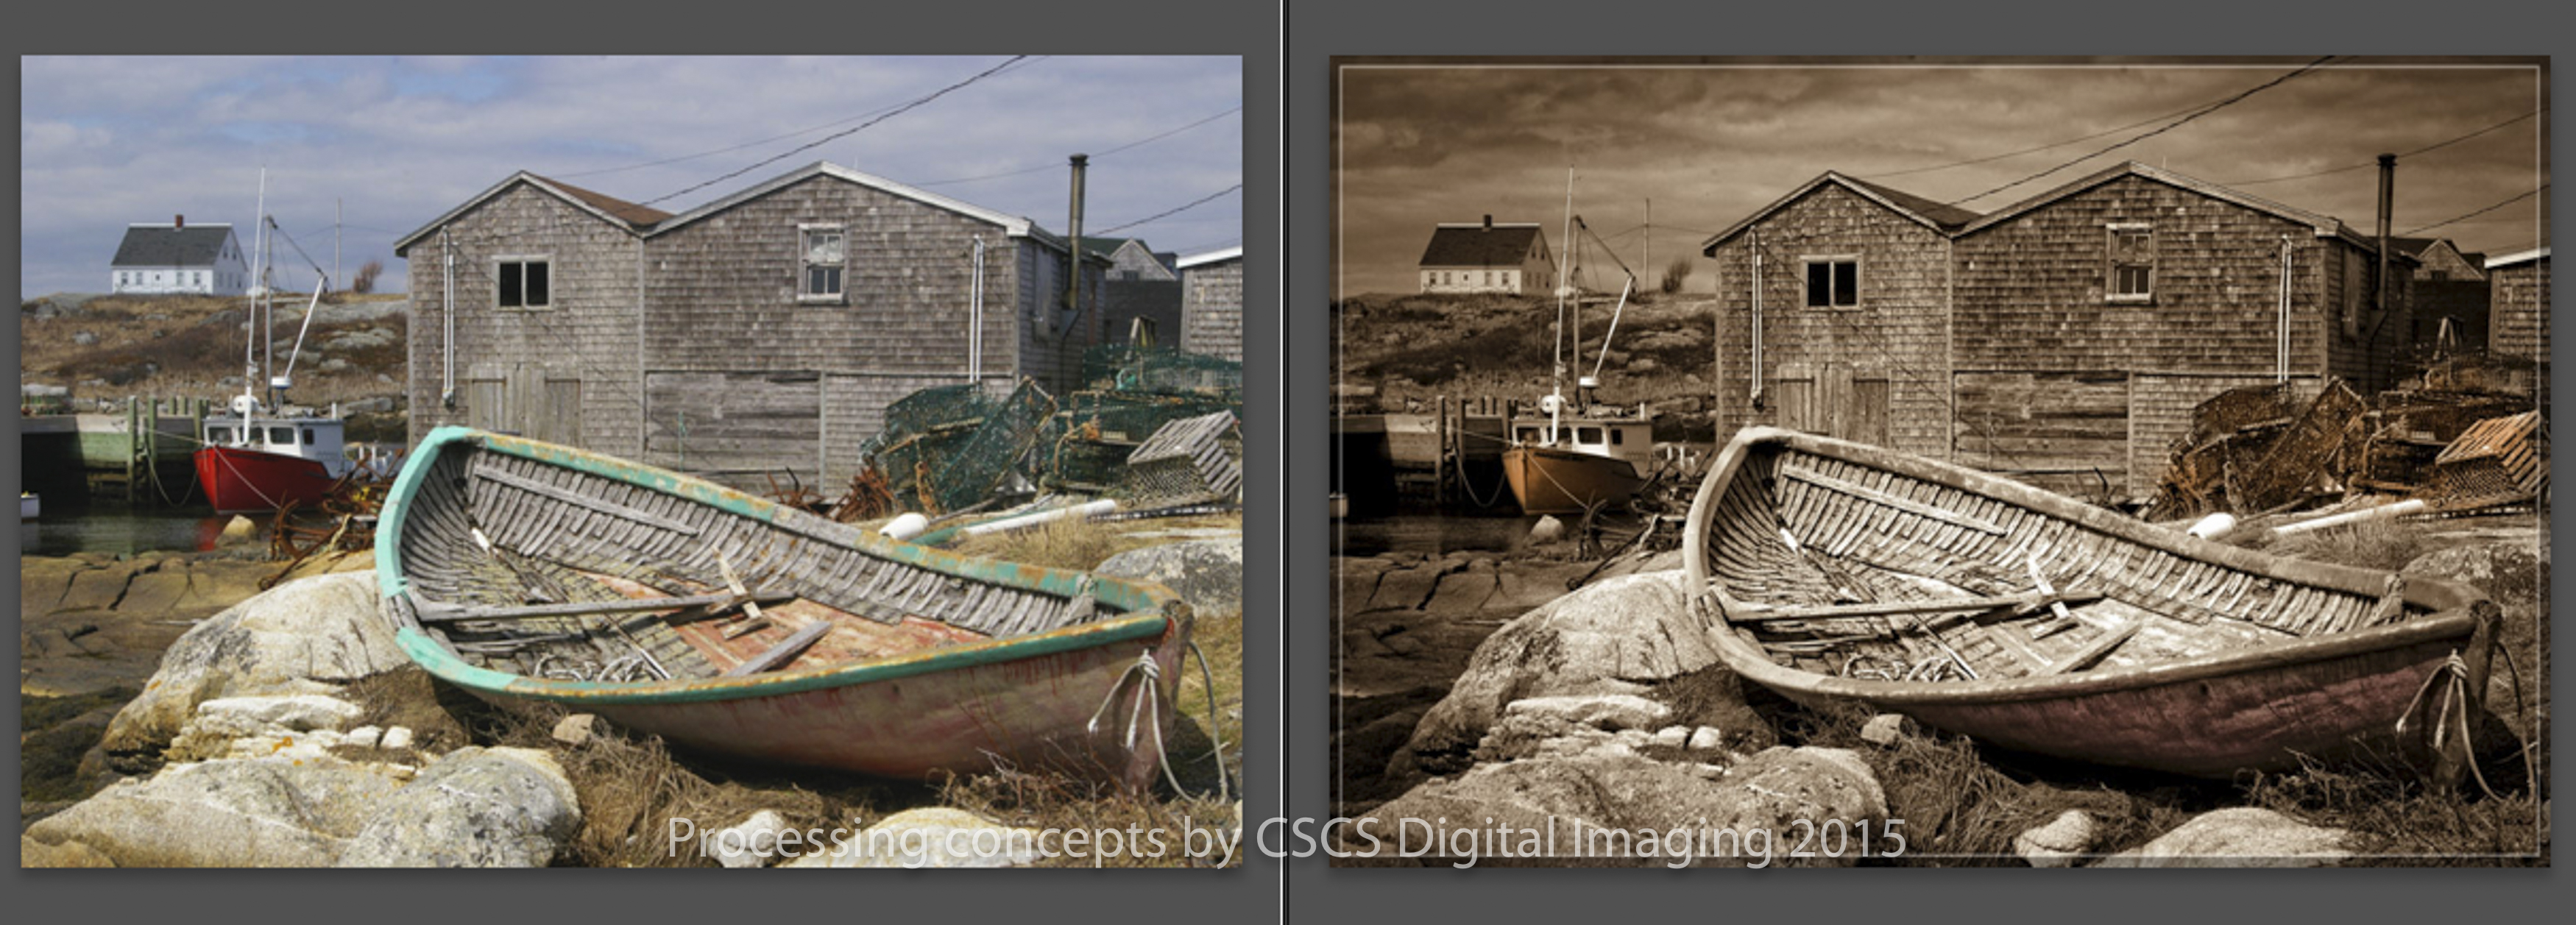
Fishing Boat
This beautiful fishing scene cried out for a sepia monochrome conversion. The HSL desaturation technique was used as a baseline. Dodge and burning was used to bring out some of the details and the brightening of the boat in the foreground to give it more prominence. In LR6 presents there is a sepia that works very well. A deepening of the colour was added and using a brush some defined pastel colouring was added with a brush tool. Within the brush tool select temperature and adjust sliders to obtain the tone your looking for, select flow and density high to see the effect, you can adjust it back once you see the correct colour your looking for. Vignette and a frame were added at the end.
Soft Portrait
Another beautiful studio portrait this time made into a warmed soft conversion. HSL desaturation conversion with luminance adjustments to highlight key facial structure. Radial tool with slight exposure and dropping of the highlights a push on the shadows and sorted by a negative clarity. Select the brush within the radial tool and erase this effect on the eyes mouth and hairline to bring back the contrast as previously created. Framed in OnOne FX.
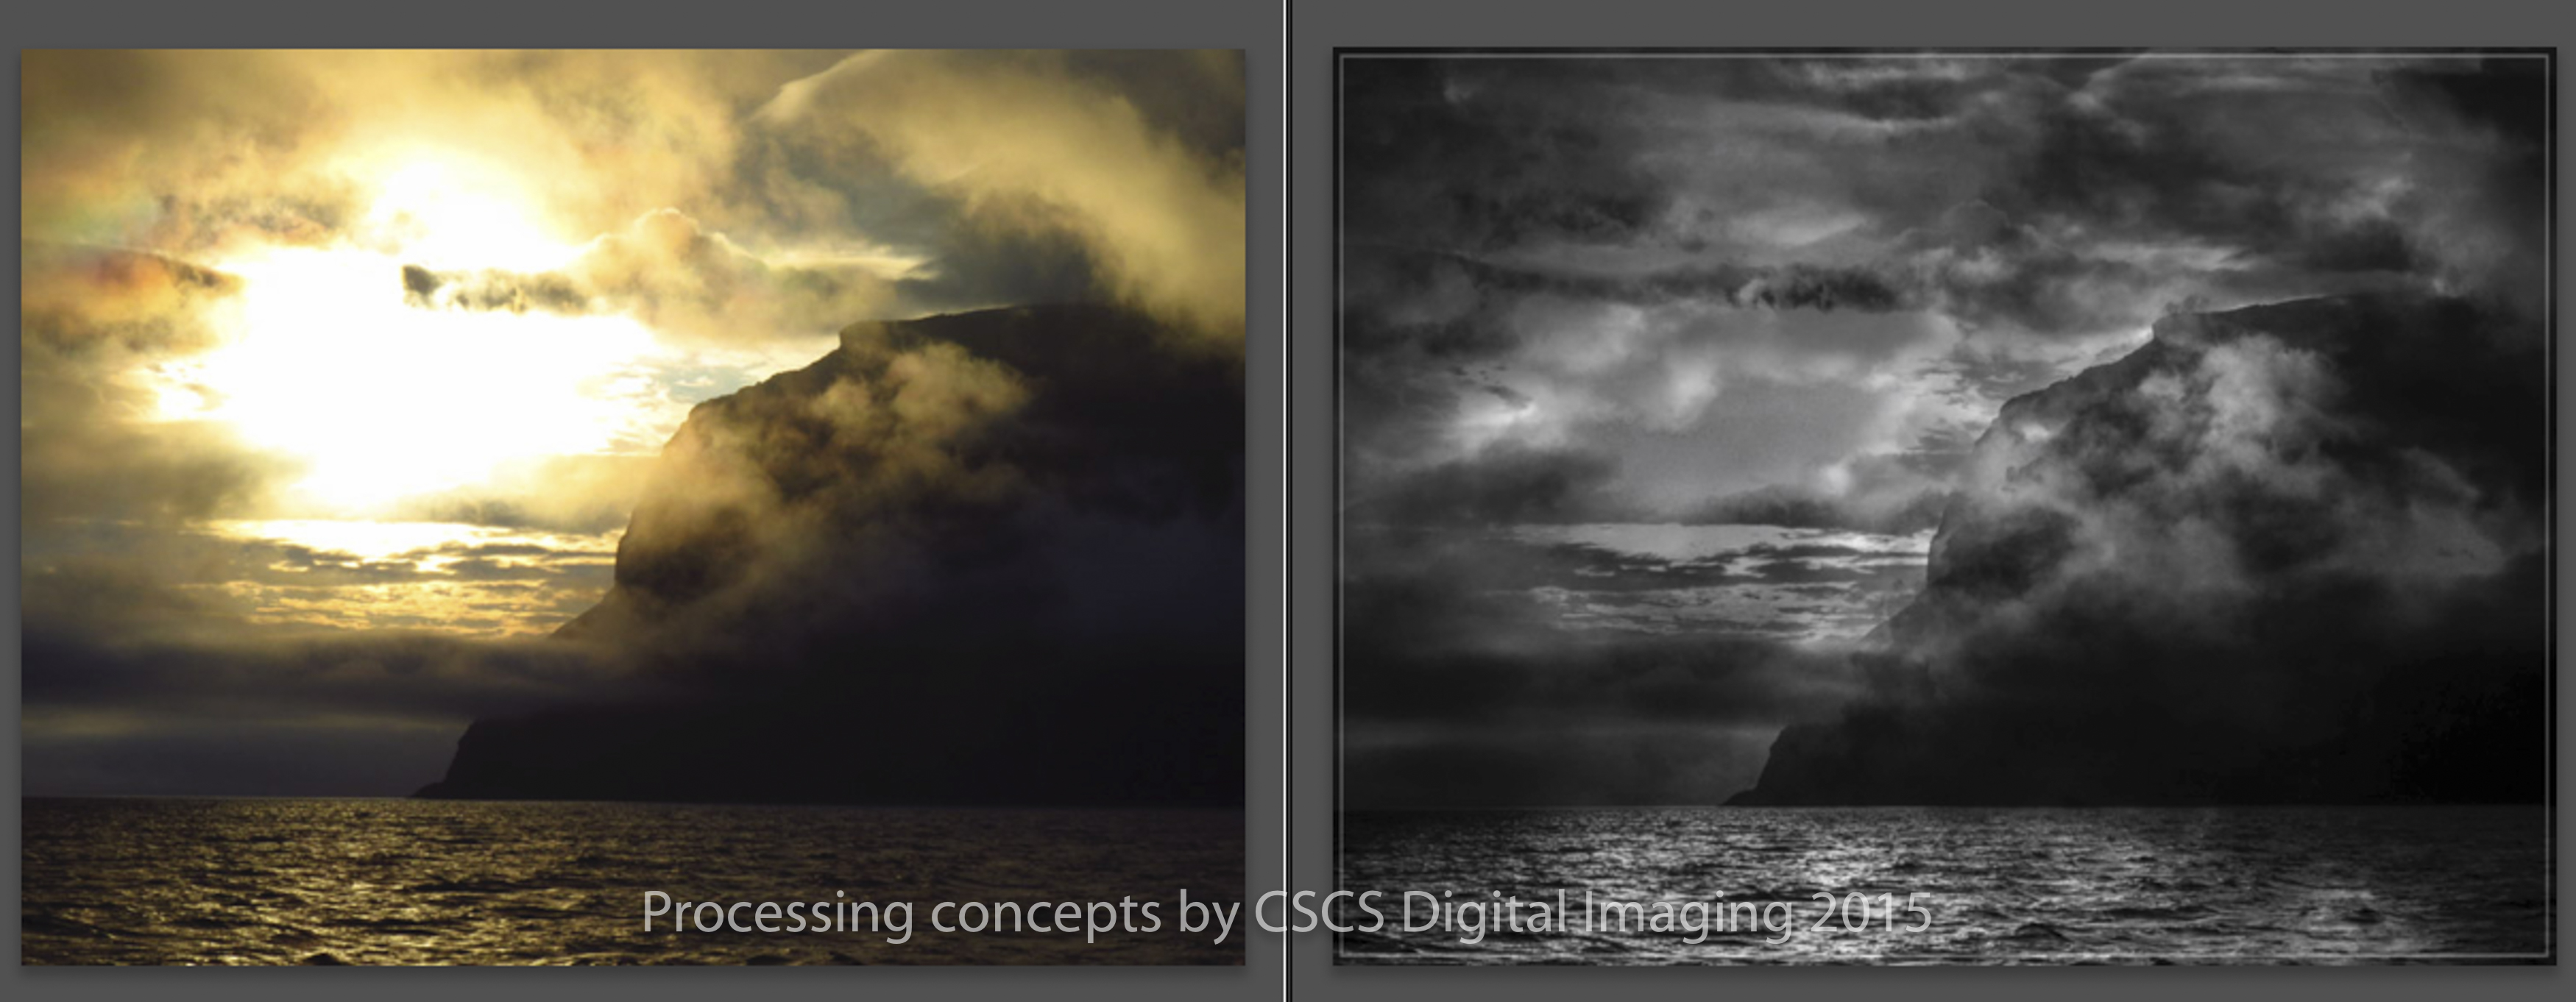
Steep Rock Shoreline
A nice shoreline scene with an overcast nondescript sky. When one sees a shoreline of water and rocky cliff we conjure up a storm or a dramatic sunset, well in this case a storm prevailed. HSL conversion allow some amazing detail to be revealed in the waters and cliff in the foreground, the sky however remained nondescript. Clarity added more detail and some dodge and burning pretty much completed the majority of the foreground. The sky needed further help and that was accomplished in OnOne FX. A trick I use is to add multiple layers of sky set at different opacities and scale to make it more believable. I also like to invert the dominant sky and use that to create some highlights in the water. Brought back into LR and a slight dodge and burn and that completed this image.
Vintage Aircraft
Another image that cried out to be a monochromatic sepia image. In this case the HSL conversion technique really helped to find details in this image. Really play with the luminance sliders to find out which once work best for the given image, remembering the colours of the original image are key. Lastly a soft white glow was added to the window with the radial tool and the chair was erased from that glow.
Glowing Sunrise
A soft glow of an early morning light with a detailed silhouette of trees and their reflection. Does this defy the basic definition of B&W being one part black and one part white, well, yes it does. HSL adjustment helps to define this automatically. There is a strong black that is obvious but its the subtle grey tones that become just as obvious. This is a great example to use for the sharpening technique with the masking tool. When sharpening for fine detail use a small radius, meaning a smaller pixel cluster, add detail to the amount of your liking but here is the real key. You don’t need or want to sharpen the clouds, sky or refection in this image so use the Masking slider. Press option in Mac and at the same time slide the controller, only the white highlighted areas are being sharpened, nun of the black is being effected. On this image it was set at 100 so only the tree edges were sharpened and nothing else, perfect. No white exists and when the greys were adjusted there was a shore line detail that came to light that was not seen in the original image.
The Storm
In all due respect to the maker of this image this is one that you don’t want to spend much time on because you know it takes to long. Well here we go. HSL is my starting point in B&W workflow. Try and find any detail in the blown out area -100 in highlights, white clipping -40, try clarity and contrast. It all still leaves this white abyss with no detail. Next is to clone some cloud into the space, not everywhere, just where there could be a strong cloud. Then take the image to a second software package, in this case OnOne FX, and layer in a cloud layer or two. Its the only solution and is left to a whole world of interpretation.
The Bridge
This was sent to me as a B&W image so I had a chance to play. I did a minor crop to add a more linear feel to this image. Took it into OnOne FX and added a texture, frame. I returned back to LR and took the brush with a blue temperature and colourized the bridge, it was intended to be a bit sloppy as an urban grunge.
Vintage Farmstead
I saved the best for last, well in my books anyway. This is a the B&W conversion using HSL with hand colouring two or three pastel colours. A high key conversion is the base. The colours are added with the brush tool and in effect, select a temperature colour you like, add some clarity and brush over the area you want coloured. A last adjustment of exposure to find that right high key look.
Conclusions.
Introduction to artistic B&W conversions.
• study the image well before you start.
• what is the content
• what is the mood
• what are the compositions strong points
A good understanding of the image goes a long way in creating an artistic rendering.
The different ways to convert RGB images to B&W in LR6.
1 – “Basic” – use the B&W tab for an automatic conversion.
The RGB channel percentages should theoretically add up to 100% (i.e. 50% Red + 40% Green + 10% Blue = 100%). More than 100% means lighter images and less than 100% means darker images, so it’s really up to you.
The default option is 100% Red, 0% Green, 0% Blue, but 30% Red, 60% Green, 10% Blue is a good starting point.
2 – “HSL” – desaturate all the colours individually. By using the luminance colour sliders you can adjust the grey scale of every individual colour zones.
4 – Radial Tool drop down – desaturation set at -100.
5 – Brush Tool drop down- desaturation set at -100.
6 – Gradient Tool drop down – desaturation set at -100.
7 – B&W Presets in LR6 are many, each having a variety of interpretations.
There are a lot more ways to do this in LR6 use your imagination and have fun. Lastly Remember: If you’ve spent a lot of time working with a certain image, take a break for a while and then use a fresh set of eyes to look at it again. Over concentration can be easy to do, if you’ve looked at it for too long taking a break will often help you identify what needs to be done.
B&W conversions should be a lot fun so enjoy yourself.
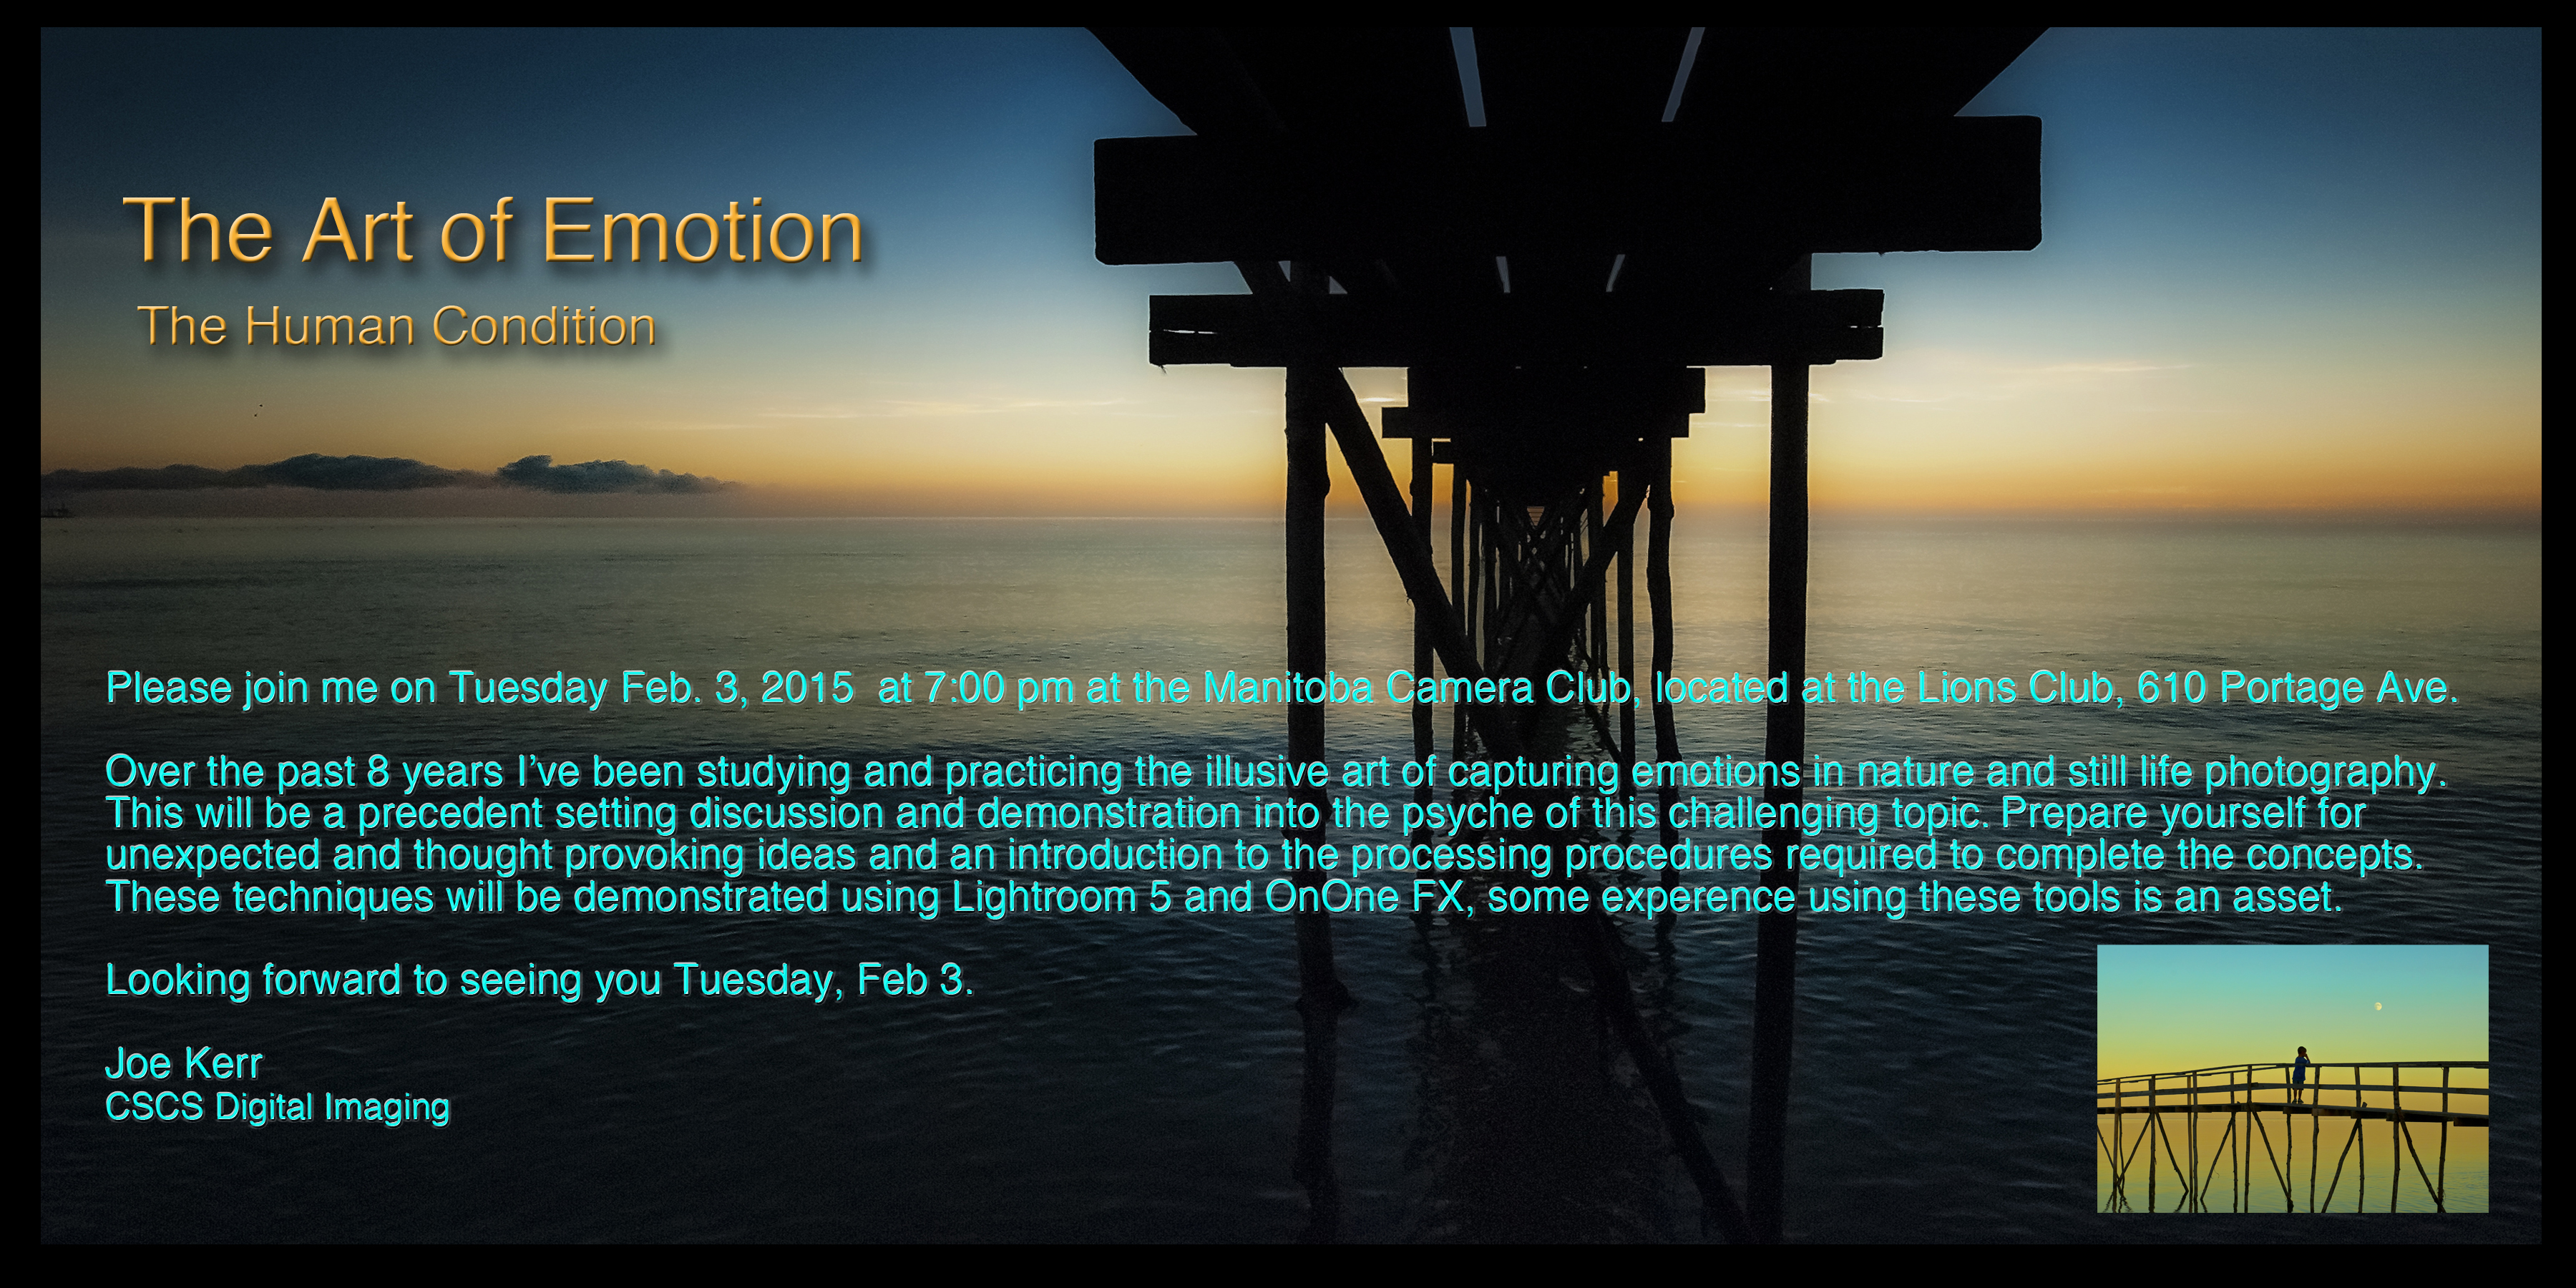
This was a talk presented to the Manitoba Camera Club, February 3, 2015 and The Winnipeg South Photo Club, March 18, 2015.
Tonight we are about to embark on a journey to try and gain a deeper understanding of photography. We are going to delve into the mysteries of capturing emotions and feelings in two dimensional digital images. Can a photograph depict and evoke feelings that are deeper than say a raw journalistic capture of a shooting, accident or riot. We know how those make us feel. My hope is we’ll have some understand of these subtle dynamics by evenings end and how you can apply it to your images.
One of the gallery experiences I enjoyed over the past 5 years allowed me to interact with photographers both local and from around the world. These conversations allowed for the sharing of ideas and concepts, combined with my continued work and studies in processing images, I began to formulate a theory on the understanding of how emotions can be comprehended and applied. Within this presentation I will try to explain some of these intricacies which I have applied to my work.
So sit back and enjoy this journey to your inner emotions.
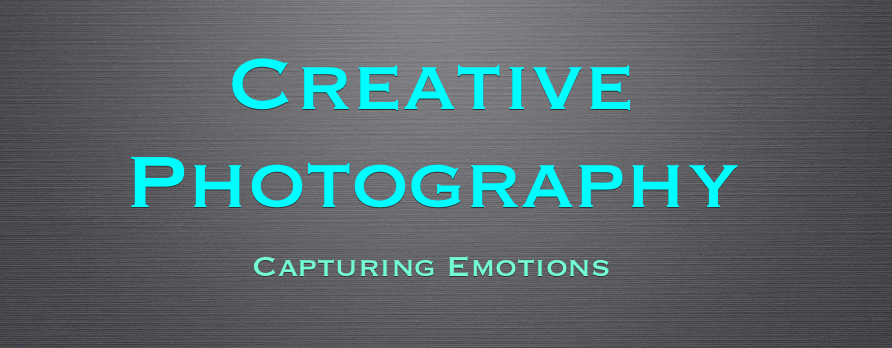
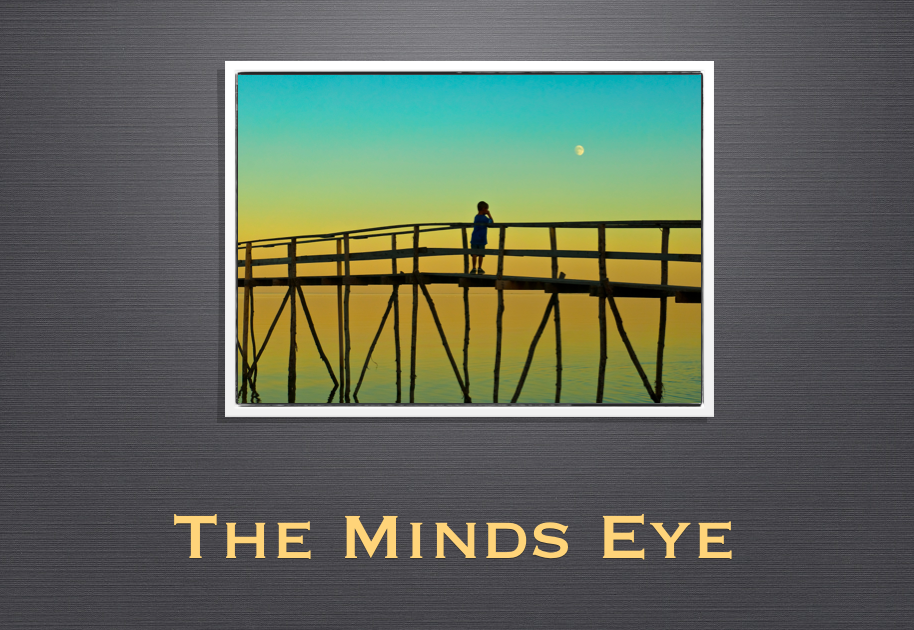
Creative Photography.
The Human Condition
This is the first in a series of articles that will be posted on my bog Joe Kerr Photography under the subject titled “Creative Photography”.
I would like you to close your eyes and listen to these sound bits and see if you can visualize the scenes you are about to hear. So relax and open your minds eye.
Here are a couple of questions to help open your minds eye:
Did your visions easily flow from one sound bit to the other ?
Do you have a favorite ?
Were your thoughts in B&W or Colour ?
How did each sound bit make you feel ?
Great images all begin at the capture, so here are some critical issues and influences when going out to capture amazing images: Remember this is about the human condition and gaining an understanding of capturing emotion in images.
Lets start from the very beginning.
How did your day start out ? Are you looking forward to your shoot ? Do you have a plan on what your shooting ? Is weather or sunlight a factor in you deciding to shoot today ?
Is today an optimum day to capture that subject ?
These and many more questions all influence how well your shoot will go but ultimately how you will feel about it. It is my opinion that how you feel is the most important key to capturing great emotional images.
Putting yourself in a mindful space that is relative to what you are shooting is inherently difficult. This is one of the most important and influential characteristics of great photography and that is to actually feel your potential images before you even hit the shutter.
Here is a situation that may help you understand this. Do you remember the most amazing sunrise opportunity you’ve ever had and how you felt when it presented itself. Can you also remember another morning that was equally beautiful but for some reason it just didn’t pan out. You see the differences in your images but do you remember how each of those days started out and how you felt.
This is not a contemporary thought process lets take a step back in history for a minute and learn from two masters.
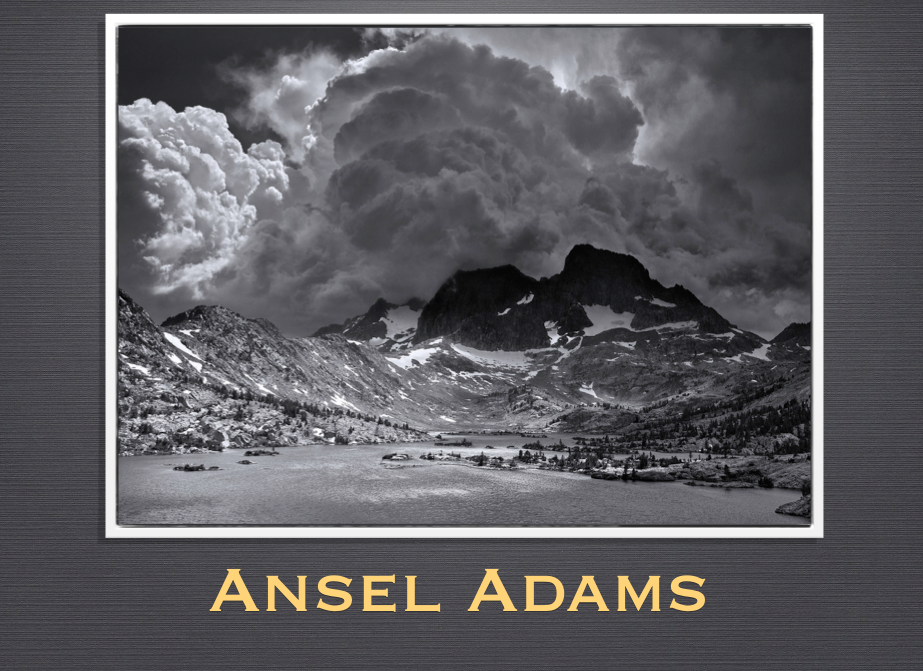
Ansel Adams immersed himself in his environments and became so in-tuned he even named trees and rocks in around his cabin near Yosemite. He followed and created trails that became his home under the sky, yet, he understood that nature only allowed him a moment of opportunity, they weren’t his, but his photographs were, and he could share them. He became much more philosophical about what he was feeling while capturing images and constantly wrote in his journals his thoughts. He clearly understood how his images could and would effect his viewers and how his emotions would influence each capture. Because the print was what everyone would see, Ansel spent enormous amounts of time perfecting his prints in the darkroom so that they were perfect portrayals of what was in his minds eye not just a capture of a scene. He wrote about having a vision of his print before capturing them, and though these images were very personal to him, as a viewer you can see and feel that.
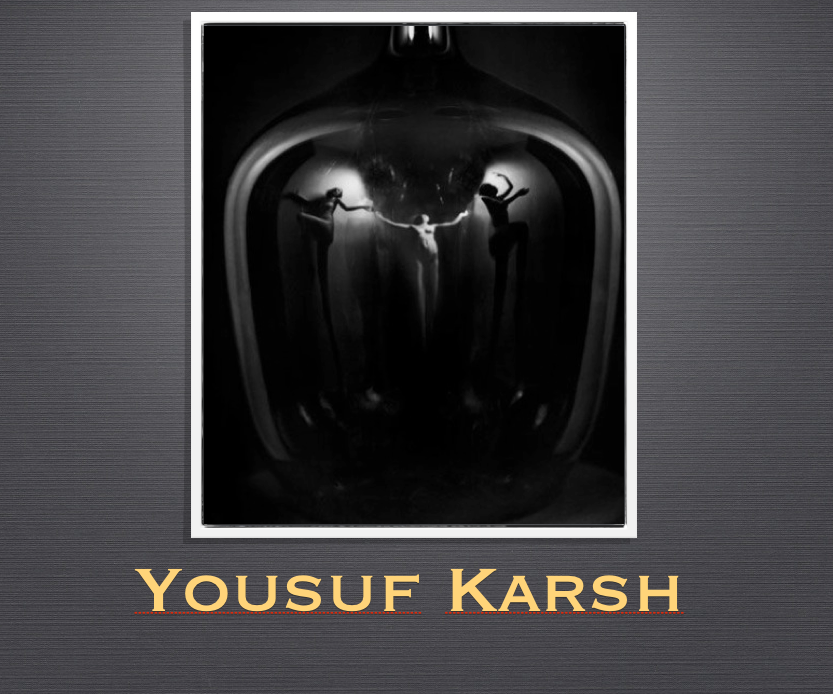
In a completely different photographic genre there’s Yousuf Karsh. He was another artists that lived through his photography. As a portrait photographer he didn’t have the lighting sophistication that we enjoy today. Still, he enjoyed shooting on location, the most challenging portraits of the time. His innate sense and feel of natural light combined with his in camera skills he created images that are astonishing even today. With those simple techniques he created outstanding portraits that brought his subjects to life. Yet, I think most importantly, he took time to study and understand his subject first. He then visualized and executed sitting techniques that both relaxed them and yet brought out their personalities knowing something of who they were. Upon studying his work you can actually feel their personalities come out of the prints. His compassion to execute what was in his minds eye made him a world renowned photographer during that era and even today?
I referenced these two artists because most of you know of them, and, they are masters whom we can relate to through their images but also as human beings. Although uniquely different they shared an inner bond of an innate sense of a divine intervention that helped to create their art. I certainly don’t profess to be in the same league of either of these famous photographers, yet, I do understand what they were trying to convey in their memoirs. Theirs and other similar concepts have been my inspiration for years and I will try to convey to you tonight what that means. No this is not a religious intervention but it is a deeper understanding of what made them tick and create amazing images.
The Capture:
On that note let me express to you what I’ve learned and have adopted as my usual or unusual process in capturing.
How I shoot varies greatly. example: If I’m with a group or with another person I rarely do what I truly like to because the dynamics will not allow. If the moment feels right though, I may disappear from the group to find my own space knowing that time will allow me to explore what is being presented to me.
Here is what I like to do as a solo shooter and I think the difference will be self explanatory. During solo shoots I take a lot of time, I’m not a run and gun type of photographer. Again, I’m going to talk about the human process behind the camera.
Nature or Scenic Shooting:
I chose this genre of photography because its one that most of you can relate to. Here is a list of things I do in preparation to taking that first shot.
Clearly pack all that is need for that day, the night before. One bag and a tripod.
Pack snacks for me and the creatures.
Look up some creative websites that inspire you.
Leave early with plenty of time to spare so your not feeling rushed.
Listen to music or other inspiration audio bits en-route.
Once I arrive I will find a trail off the beaten track, people are everywhere these days and personally I don’t want a shot that everyone else has.
Arrive and chill. Stop, look and listen. This is how I begin the process of interacting.
Until I’m feeling what I’m about to interact with I will not begin, take deep breaths and relax and survey my surroundings.
I like to feel a sense of perspective of who I am in this environment and how I could be perceived by those who live in this environment.
Feel the time of day, maybe its the warmth of the sun as it begins to lighten the morning skies, get a feeling of the trees wakening as the winds begin to blow, listen as the birds begin to sing and as life begins to stir in the forest.
Listening I can hear and feel life all around me and by being still, for sometime now, the forest will begin to reveal itself.
Over time you will learn the rhythm of nature and understand how it will react to the foreign sounds you create, remember you are the intruder.
Remaining quiet and still is exhilarating to me, I can be here for hours and not think anything of it.
Always be aware of the light, watch its glow illuminate the trees and the meadows, be aware of where it is and isn’t, light is the key to all great shots.
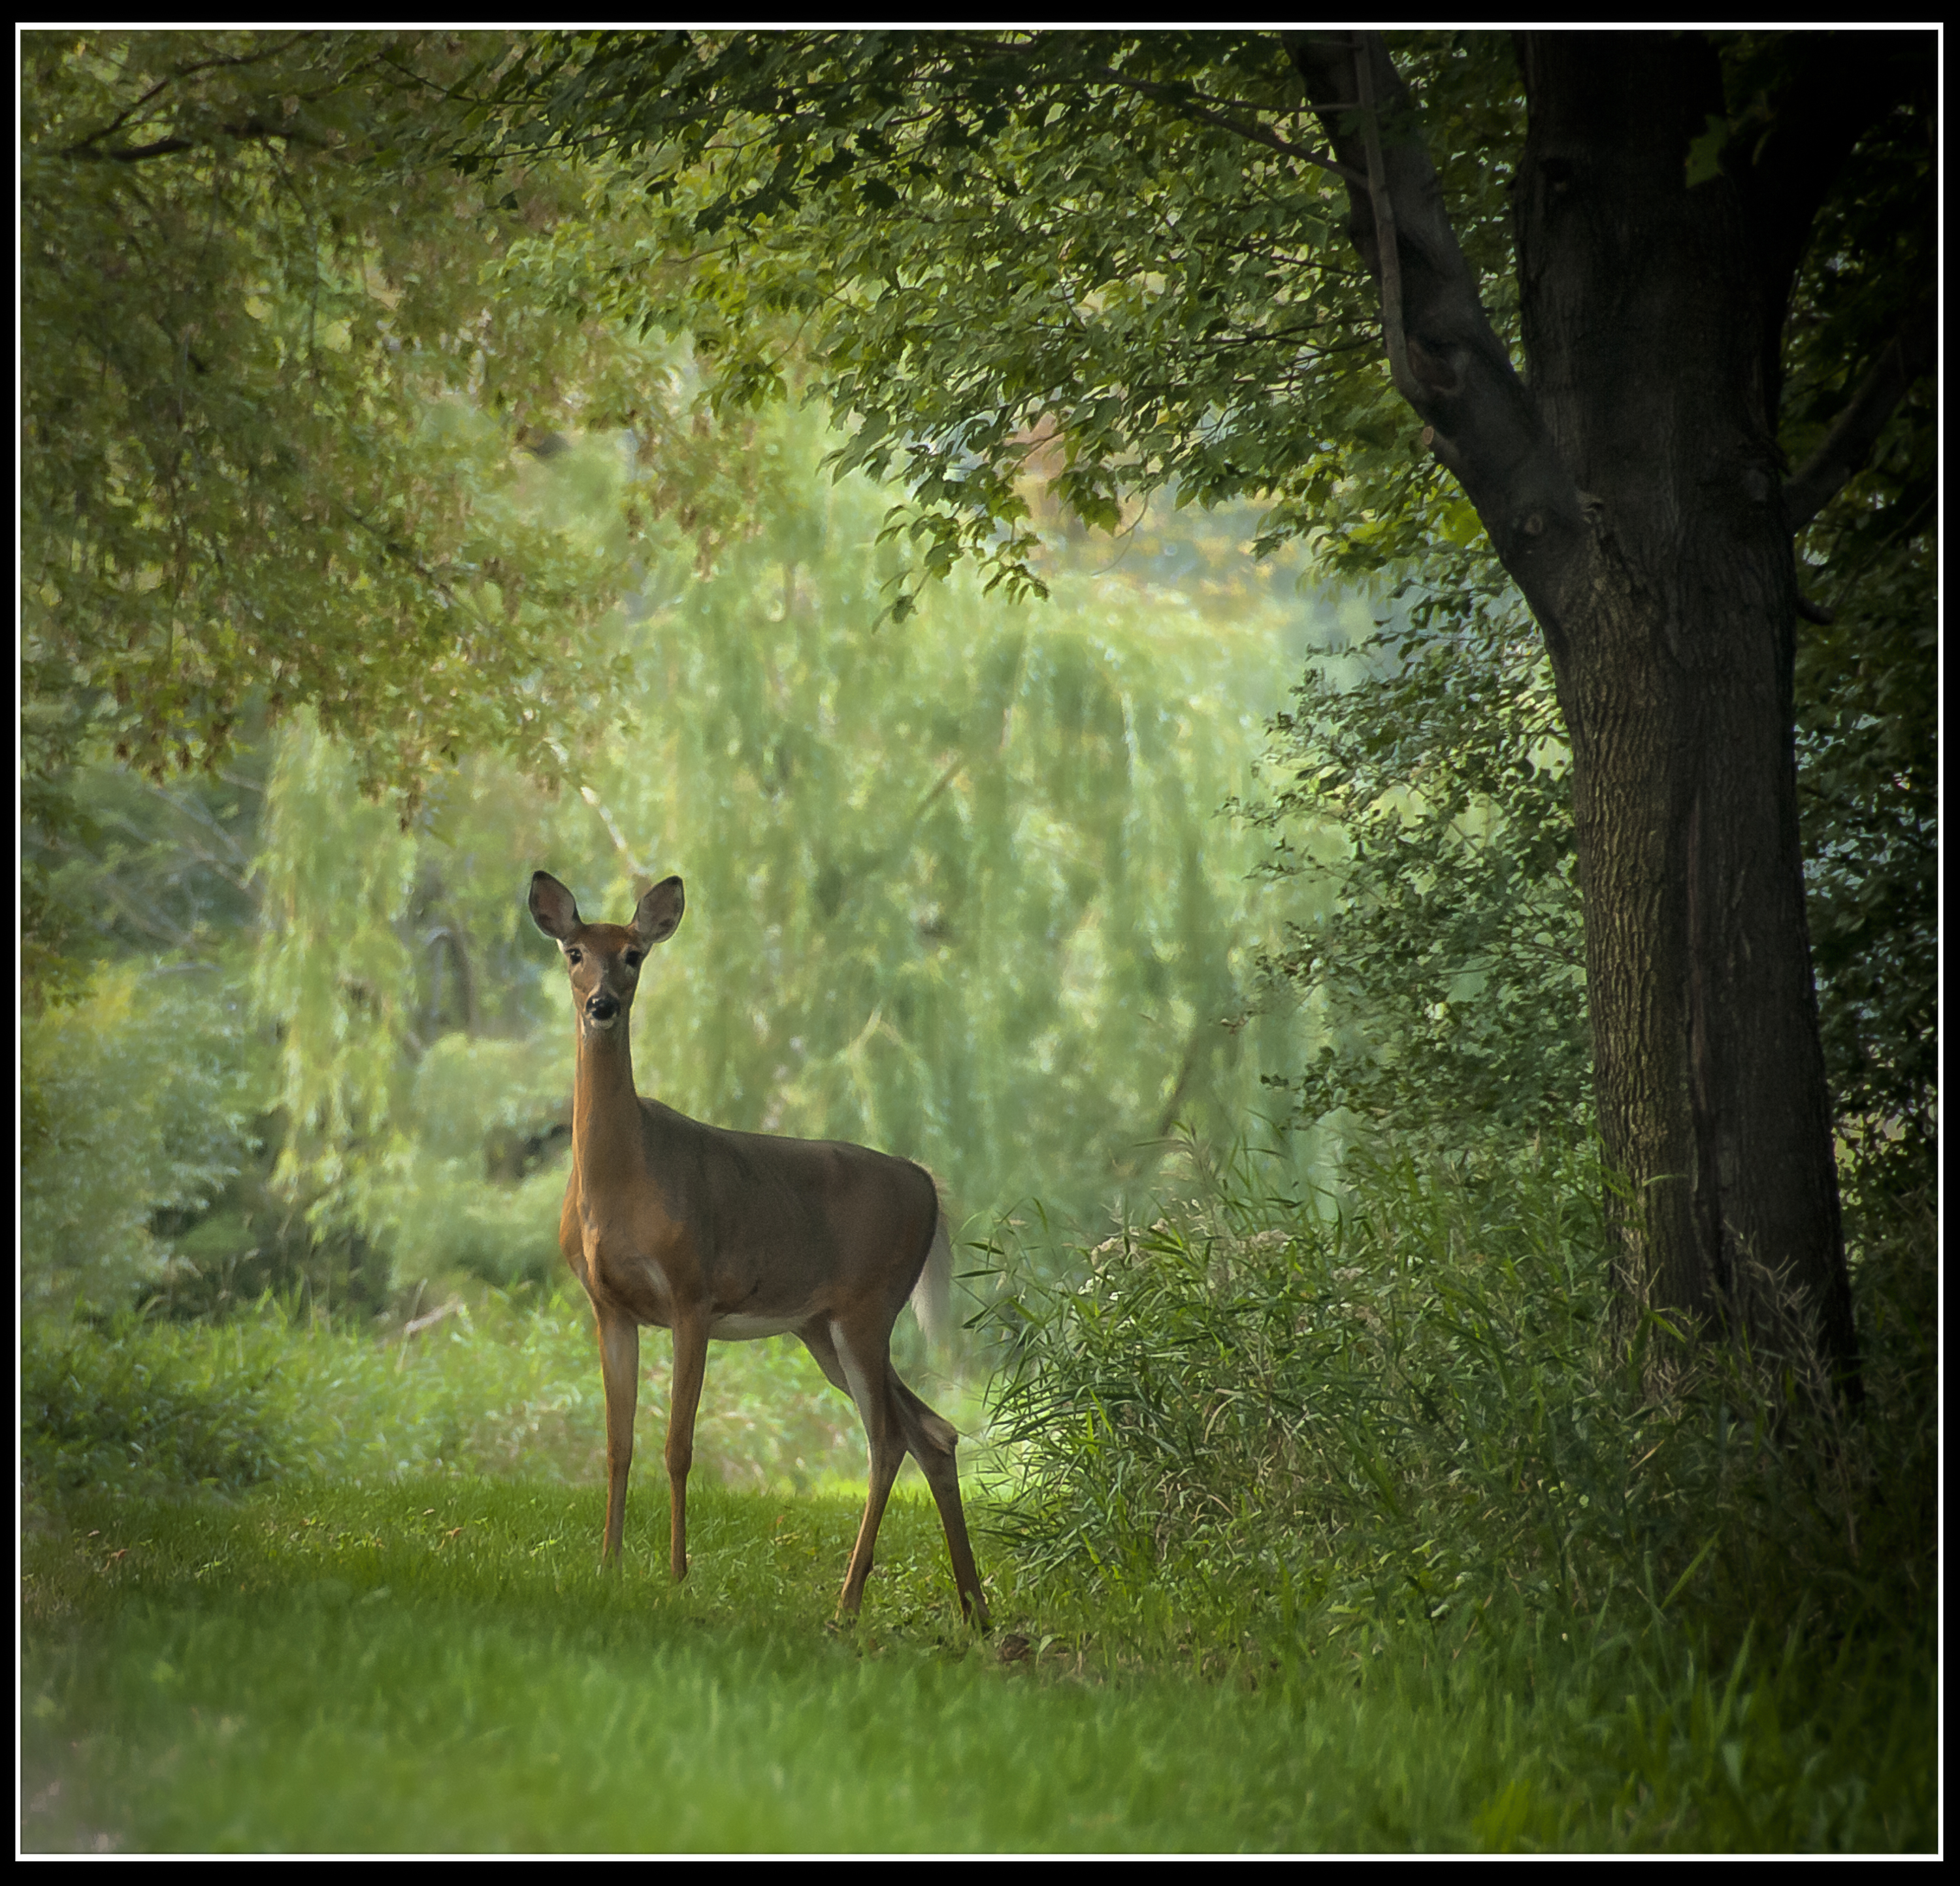
When nature presents itself go slowly, take time to try to understand the creatures in their habitat, see how they react to sounds around it, watch and learn every move, ears, eyes, neck and over-all body language.
Watch every detail, the direction it appears to be going, is there better light coming up, can you time the optimum reaction to the camera, take it in and feel it, until it becomes a part of you.
I can get so involved that I can feel their heart beating and I’ll watch their breathing, a relaxed sigh, a sudden and alert gasp and hold.
Patients and more patients think before you hit the shutter, timing is everything. No paparazzi shooting here.
Given the optimum opportunity I’ll take my shot, stop, silence, then shoot again if possible.
Depending on the creature the timing is different. Deer, first shot, is a waist, its the second and third that count.
Watch in wonder and learn. Can you learn, feel and understand how they are feeling? I think I can. When the creature is relaxed and calm, is that the shot you want, or, maybe its when they are alert with attentive ears perked. What ever the looking your waiting for, watch and learn and anticipate.
Now when I say “Don’t shoot what it looks like. Shoot what it feels like.” can you begin to understand ?
Post Production:
With everyone’s lives full of hustle and bustle I’m sure some of you are thinking this is mambo jumbo by now. As I was preparing my talk I was thinking the same thing maybe I should just do a standard show and tell. Well that’s not me, so lets move on to the next step.
Now let me show you how this continues to relate and what it looks like in the end. I apologize that I don’t have a 14 step action set to sell you that will create amazing results for your images, its not that simple and nor should it be, this is creative art.
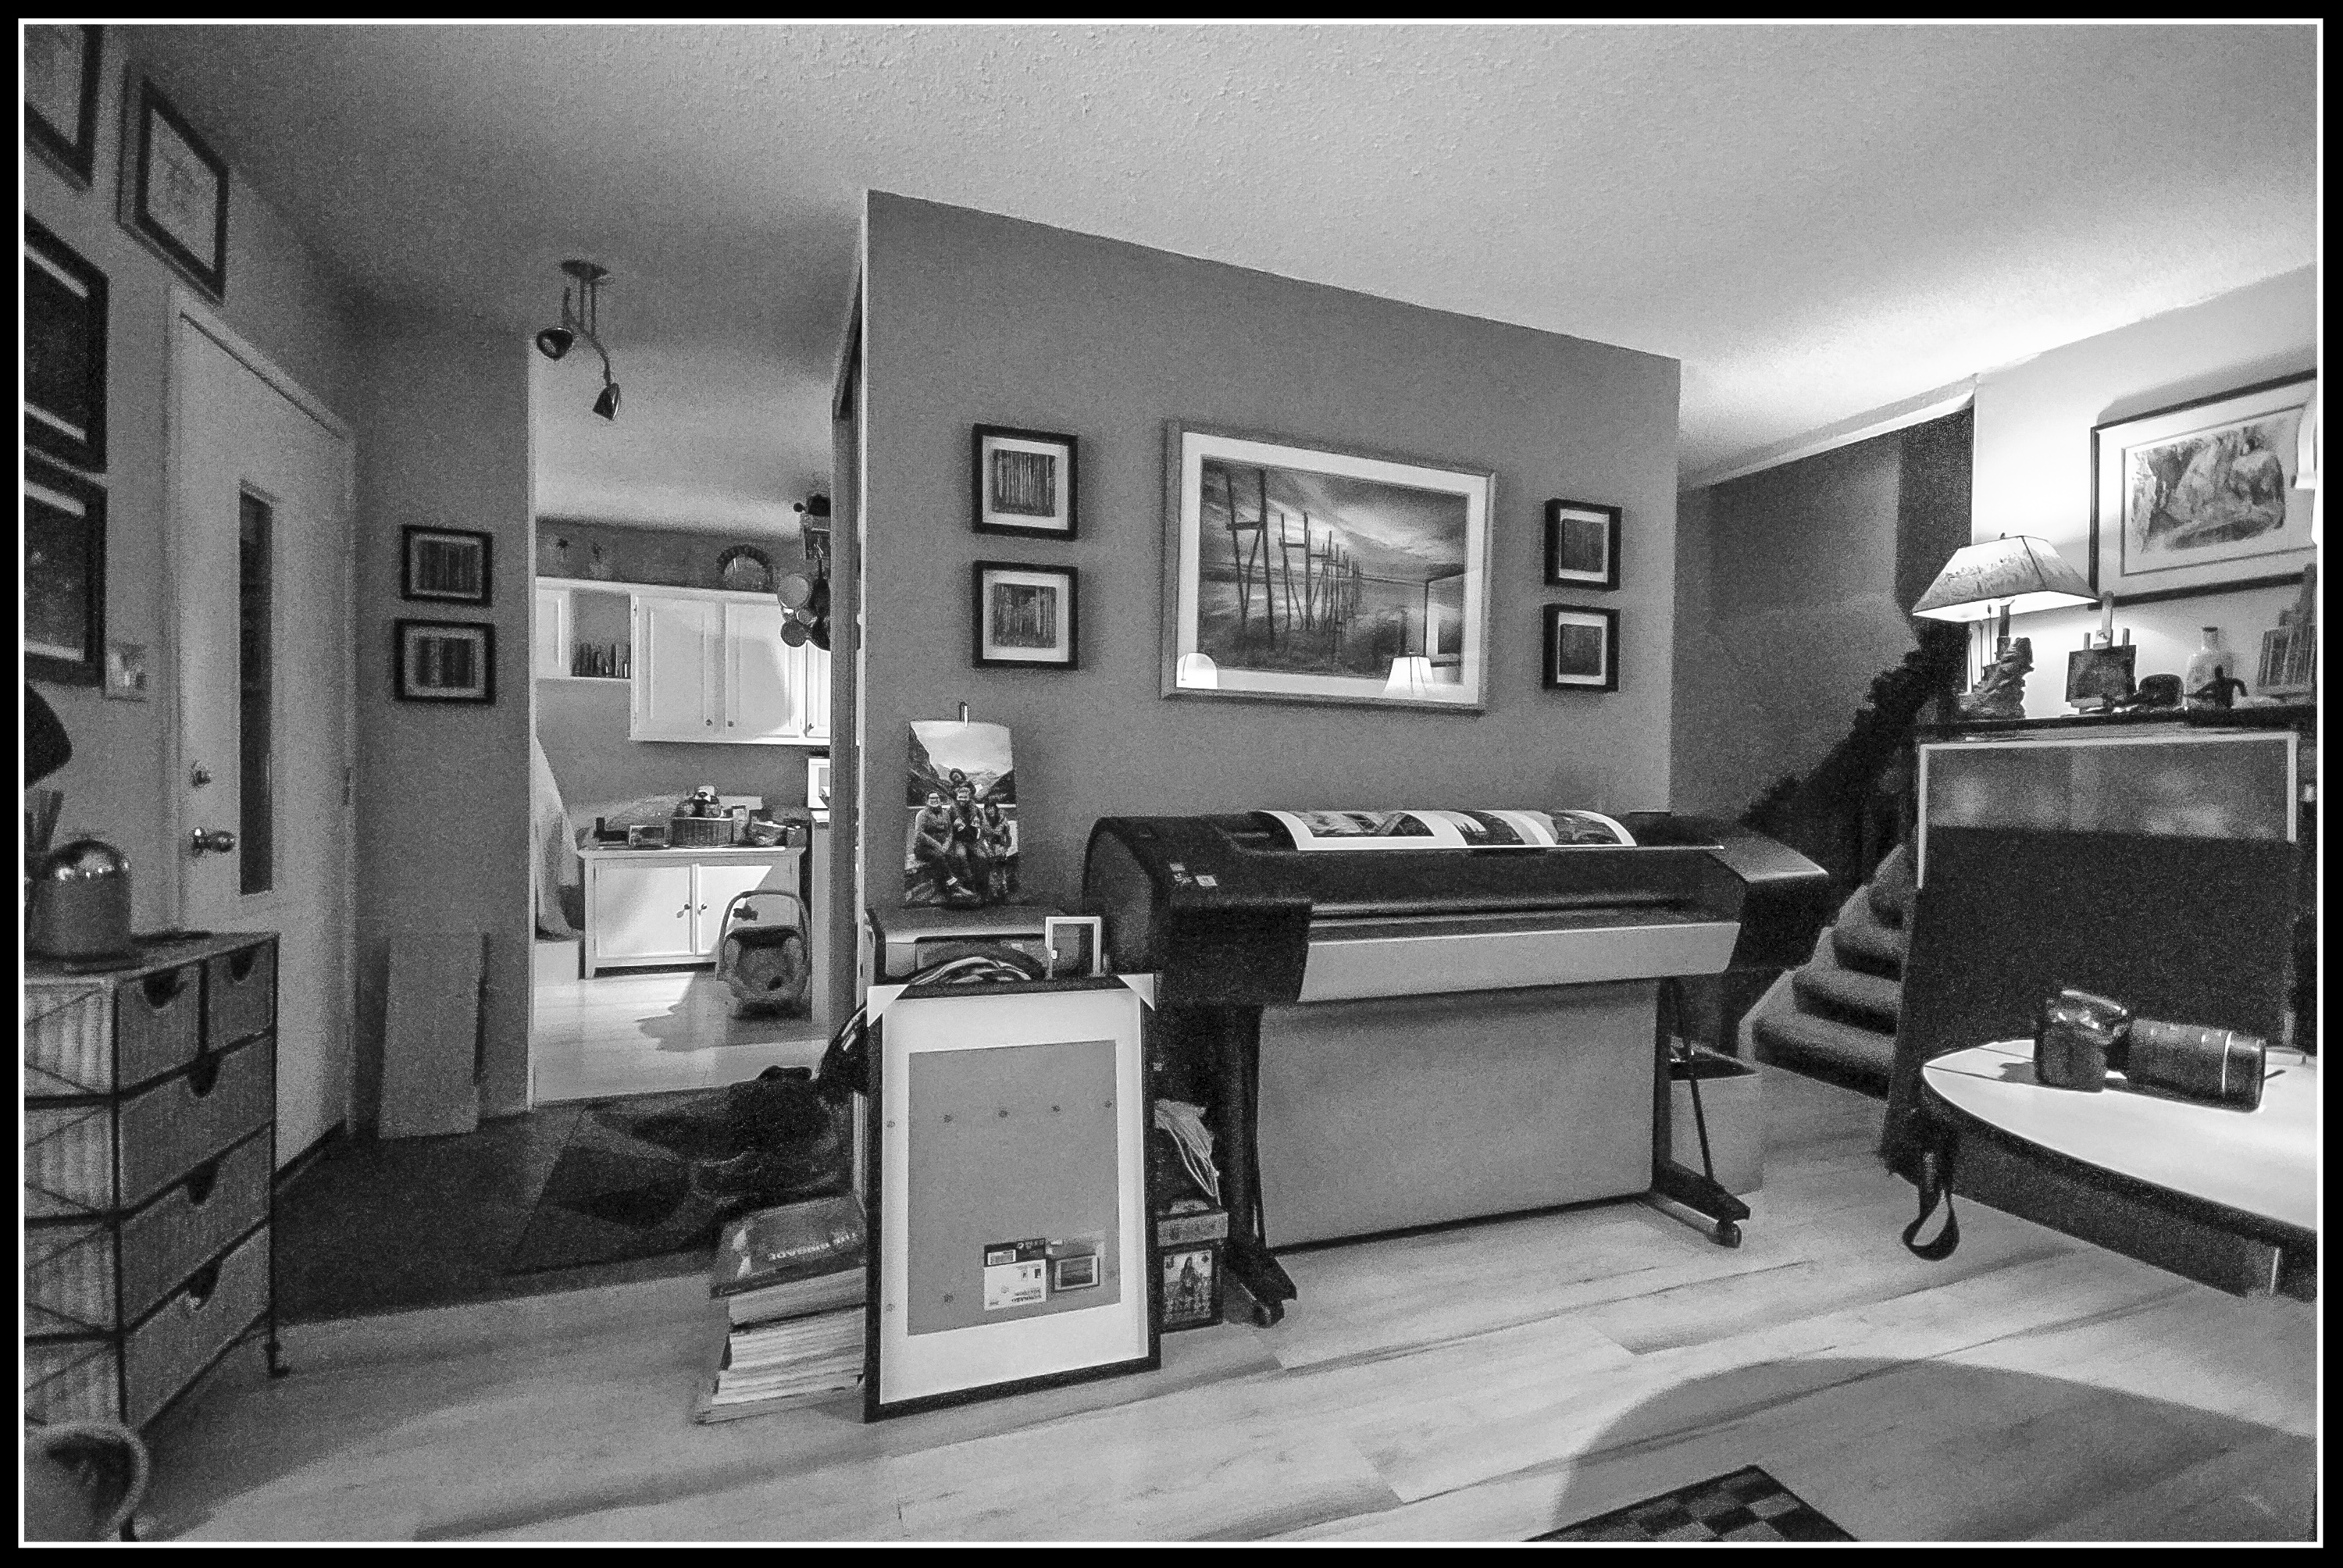
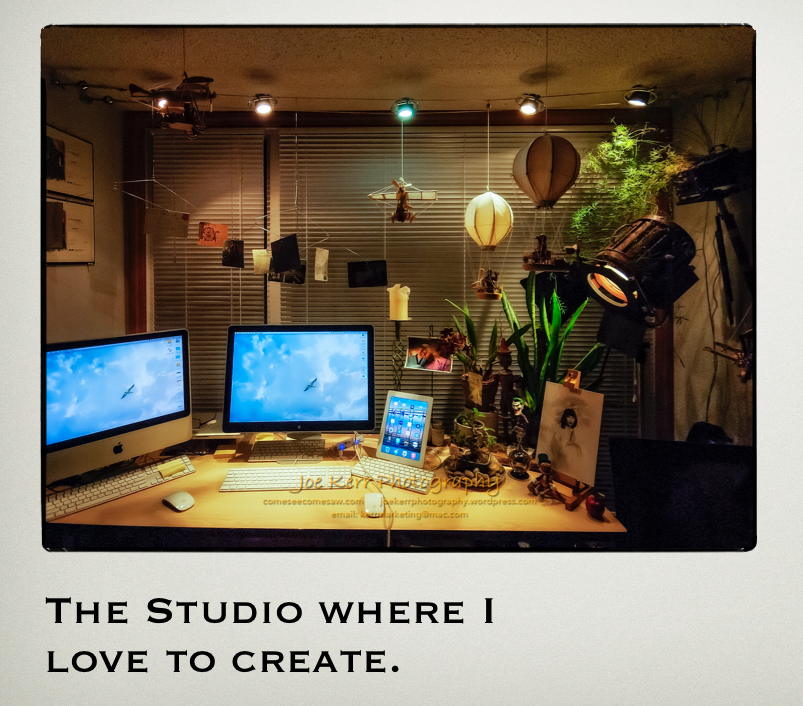
Lets start with your studio. Have you created a special place to create your art. Is your studio a place you enjoy going to and does it provide inspiration for you, or have you even thought about creating a special environment. Does music play a roll in your life and studio ? All this plays a part in how you feel about your photography. I’ve had the privilege of visiting numerous studio’s and the cream of the crop do have a special place to create their work so its fact, not fiction.
Let me walk you through a couple of my photographic opportunities and how I perceived and processed them. My processing actually begins when I’m capturing the image in the field. My mind is already thinking about how these will likely be processed, I’m also not close minded but this is my starting point.
Each photographic concept has a different starting point in the camera settings. Each subject has its own unique feel and needs to be processed that way. There are no single one action fool proof buttons here, this is art and needs that individualistic attention to detail. Here on the blog I’ve attached links to each set of images and the details in capture and processing follow the link to learn more. Each set was a study on its own.
As you work through your processing procedures and begin experiencing the joy of creating a wonderful image, you will find a persona emerge, were the hardware and software actually mean less, it becomes more important to know how the image feels. You will begin to find a style that reflects an inner you, one that is comfortable, intuitive but is understood. You must trust it when it happens, let it flow through you and learn to get out of the way, don’t clutter it with techno mumbo jumbo let it shine clearly.
Inspirations:
So where do your inspirations come from. I think its very important to find outside stimulants that help to fertilize your imagination and keep your creative neurons flashing.
Here are some places I go to find what I need to keep me creative: Cirque du Soleil – the artistic sets but more so the costumes that amaze me Theatre Productions – take a blank stage and transport me to another place and time is crazy how its created with forms and lighting. Movies Productions – special effects and CG environments astound me Attend art shows – art today is an unlimited canvas, explore everything you can Inspirational websites – In the digital realms of the web the world is your oyster Quotes – I look for quotes that inspire me. Google an image topic – This is simply magic at your finger tips at any moment Join and share in different communities. – The more the merrier, share and you will be rewarded 10 fold
There is no wright or wrong places to find inspiration, its what makes most sense to you and what inspires you to create your art.
Keys to Remember
Your eyes need to learn to listen before they look. Patients pays off. Don’t shoot what it looks like, shoot how it feels. Be mindful of the event and while shooting be aware of how you might work it in post production. Create a studio space that is both inviting and inspirational to you.
Be yourself !
What I’ve just expressed to you is my own personal formula on what I’ve learned over the years. To some it will appear goofy, some may like a part of it and others may find this inspirational. For those that found it amazing there are some doctors just outside the room in white jackets that want to talk to you, please have your medical cards ready.
Thank you for your time.
Joe Kerr
Links to Reference Materials
Alan Ross Photography Here is a link to a blog by Alan Ross who was one of Ansel Adams lab assistant. He reveals some amazing insights into Ansel Adam’s daily routines and how he perceived his art. Its a very interesting read.
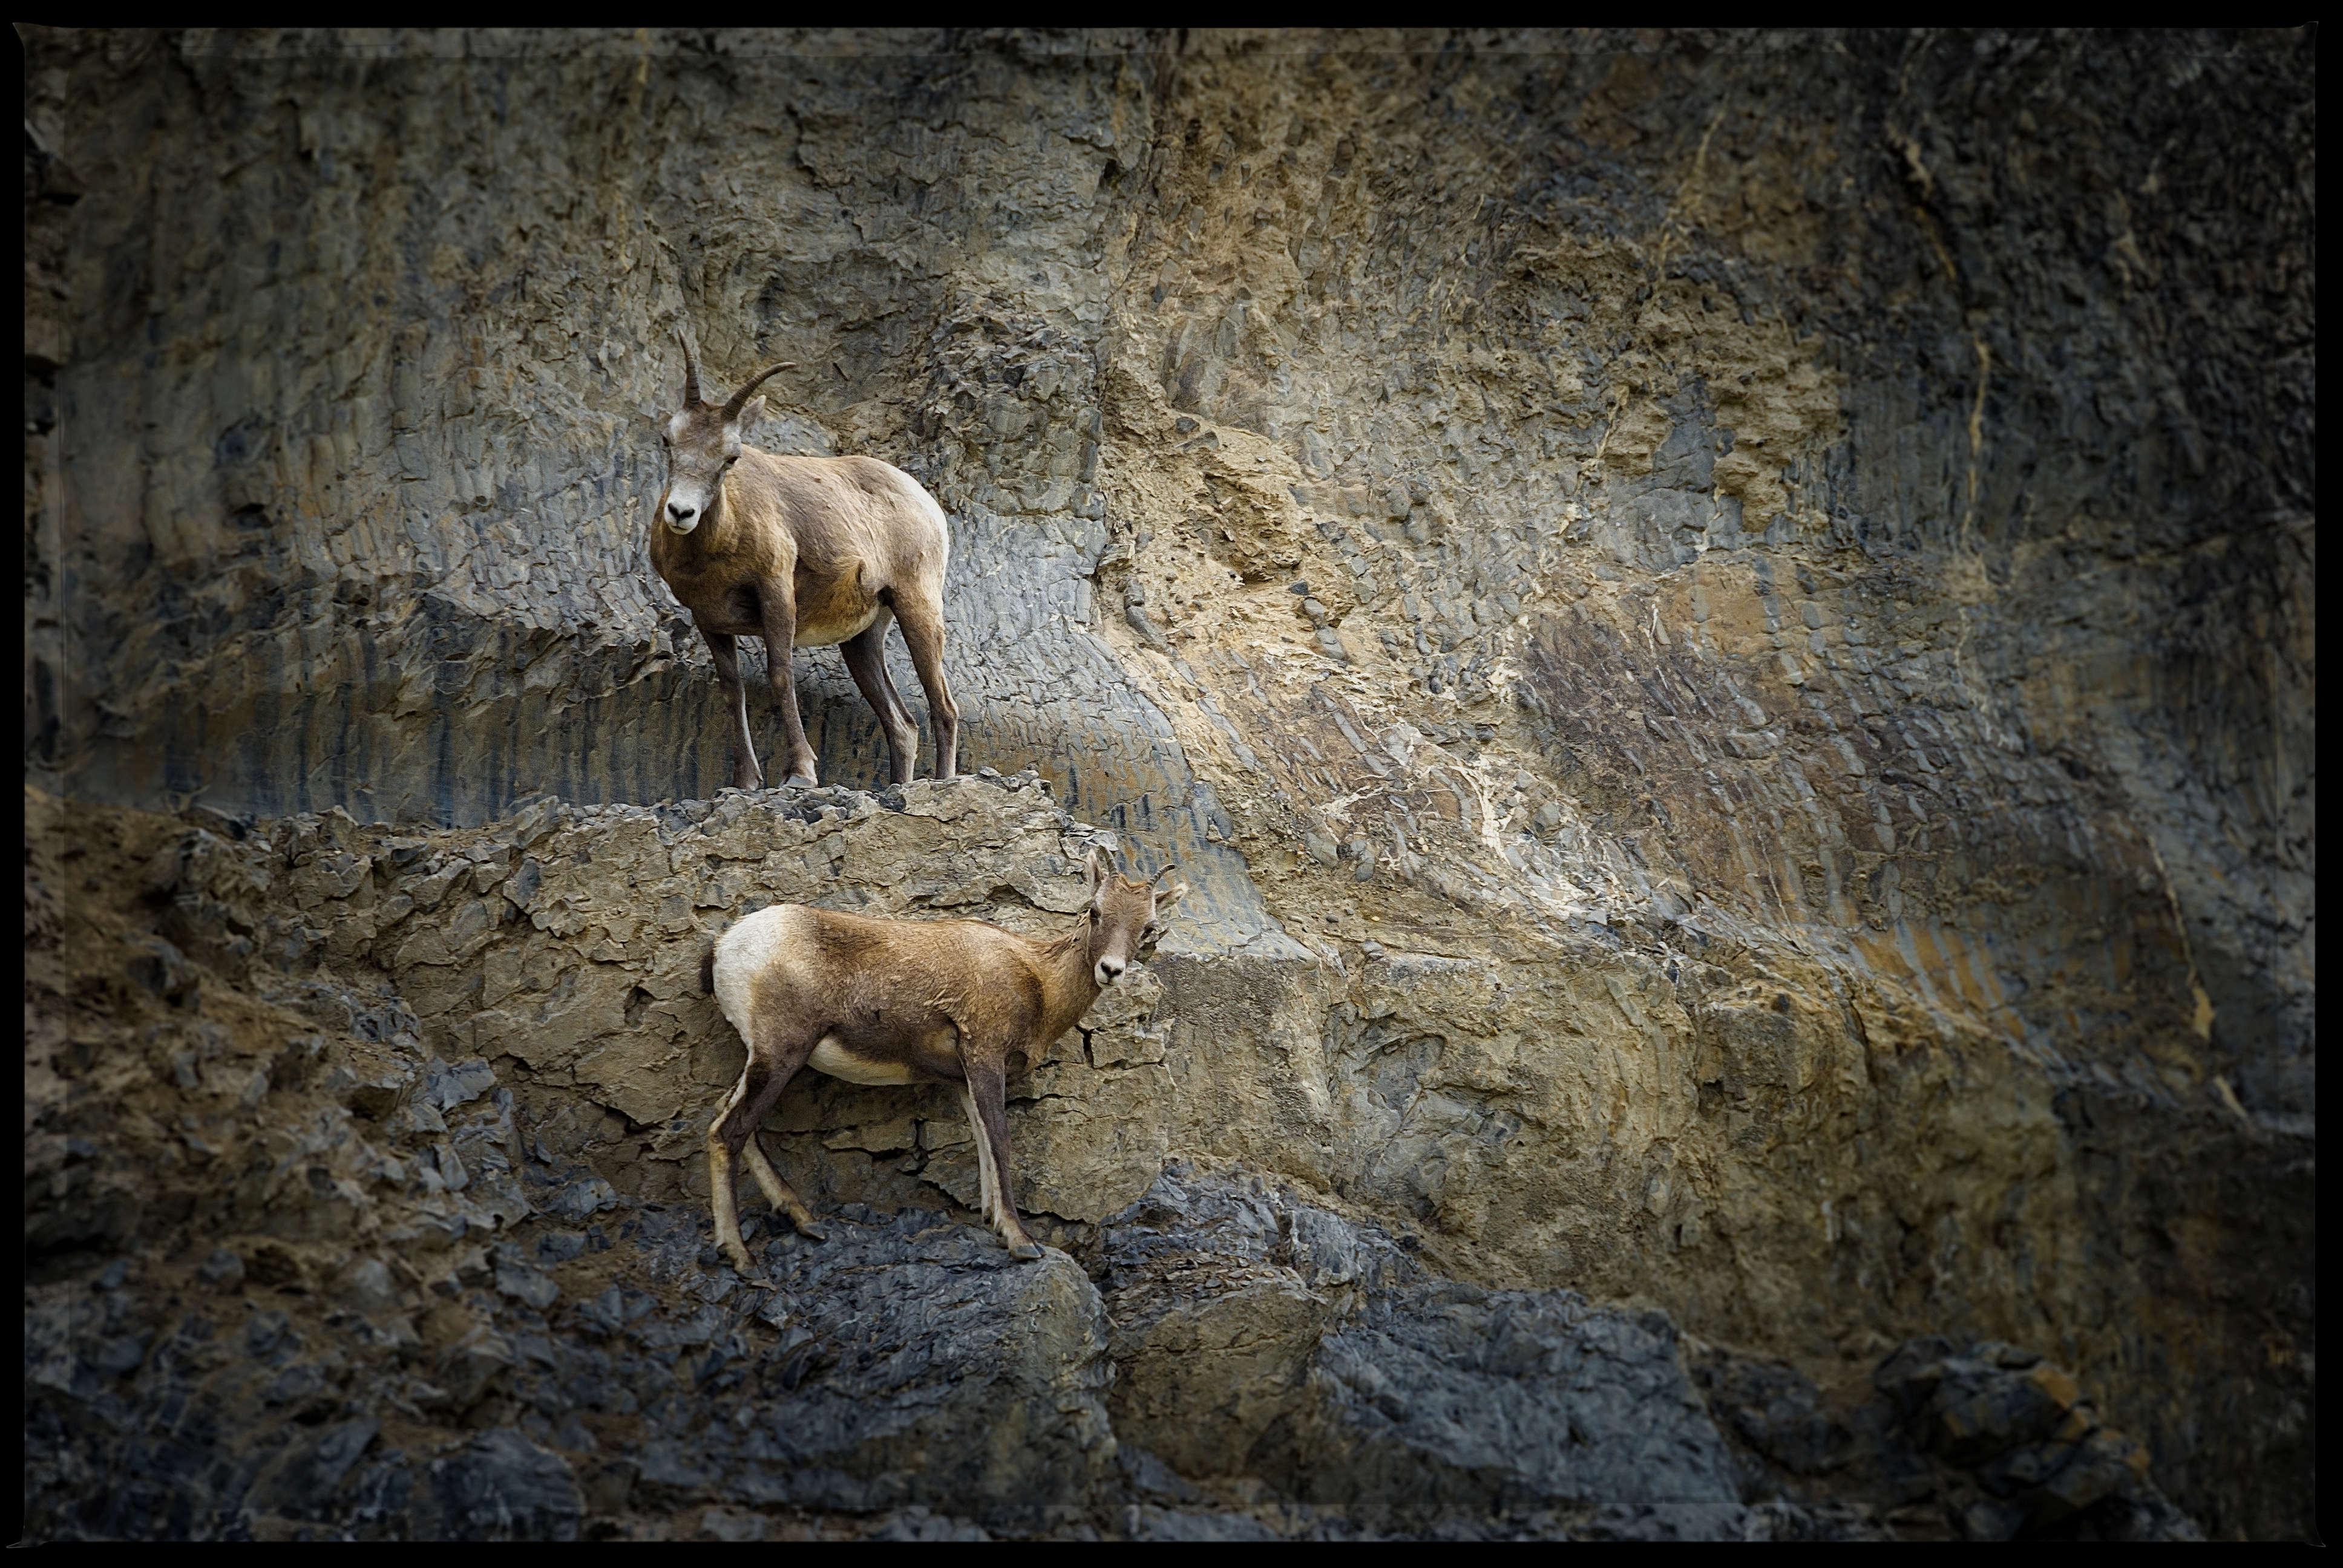
On my Facebook page I posted a sequence of four images of mountain sheep that caught some attention. People were curious about different aspects from capture to post production and I said I would follow up with some additional details on this blog. I hope I’ll cover enough insights here to help you out.
The Shoot
This sequence of mountain sheep images was taken mid August, 2006 during a period when I was deeply involved in observing and capturing wildlife in their natural environment. During my three year quest I was focused on the western foothills of Alberta and the eastern interior British Columbia. I tried to revisit certain areas to capture different seasons which also allowed the possibilities of seeing different migration patterns of the wildlife.
On this mid August trip I was in the Jasper area on a favourite 10 kl. hike that takes me along the Jasper River running adjacent to the Yellow Head Trail near Talbot Lake. August is tourist time and the highway is always busy so I decided to find a more remote back road and head up into the mountains.
I found an East bound gravel road about halfway between Jasper and Hinton that looked to be less traveled and headed East up the mountain. The road ended at an small unmarked gravel pad beside a mountain stream. The stream bed was barely running but I’m sure during the spring or a heavy rain it must swell up given the right circumstances. Looking West there is a deep cut in the rocks with a drop of 20 -30 ft. I thought this would be an amazing water fall with the right flow of water. In any event I started to walk up stream and I found myself in a narrow ravine cradled between to mountains, not exactly sure which mountains these were, I’ve tried to locate the road on satellite maps but to no avail.
There is something to be said about being in a remote area by yourself. You either feel very peaceful or it can scare the crap out of you, this day was a beautiful serine day. One of the first things I like to do is sit a few minutes motionless, maybe feel the warmth of the afternoon sun and just listen, listen to the birds, hear the occasional rock falling in the distance and the trickle of the water just below my feet. Higher up in the mountains there is are unique weather patterns and this day had scattered rain showers that were a joy as the sun continuously broke through illuminating the drops on there decent.
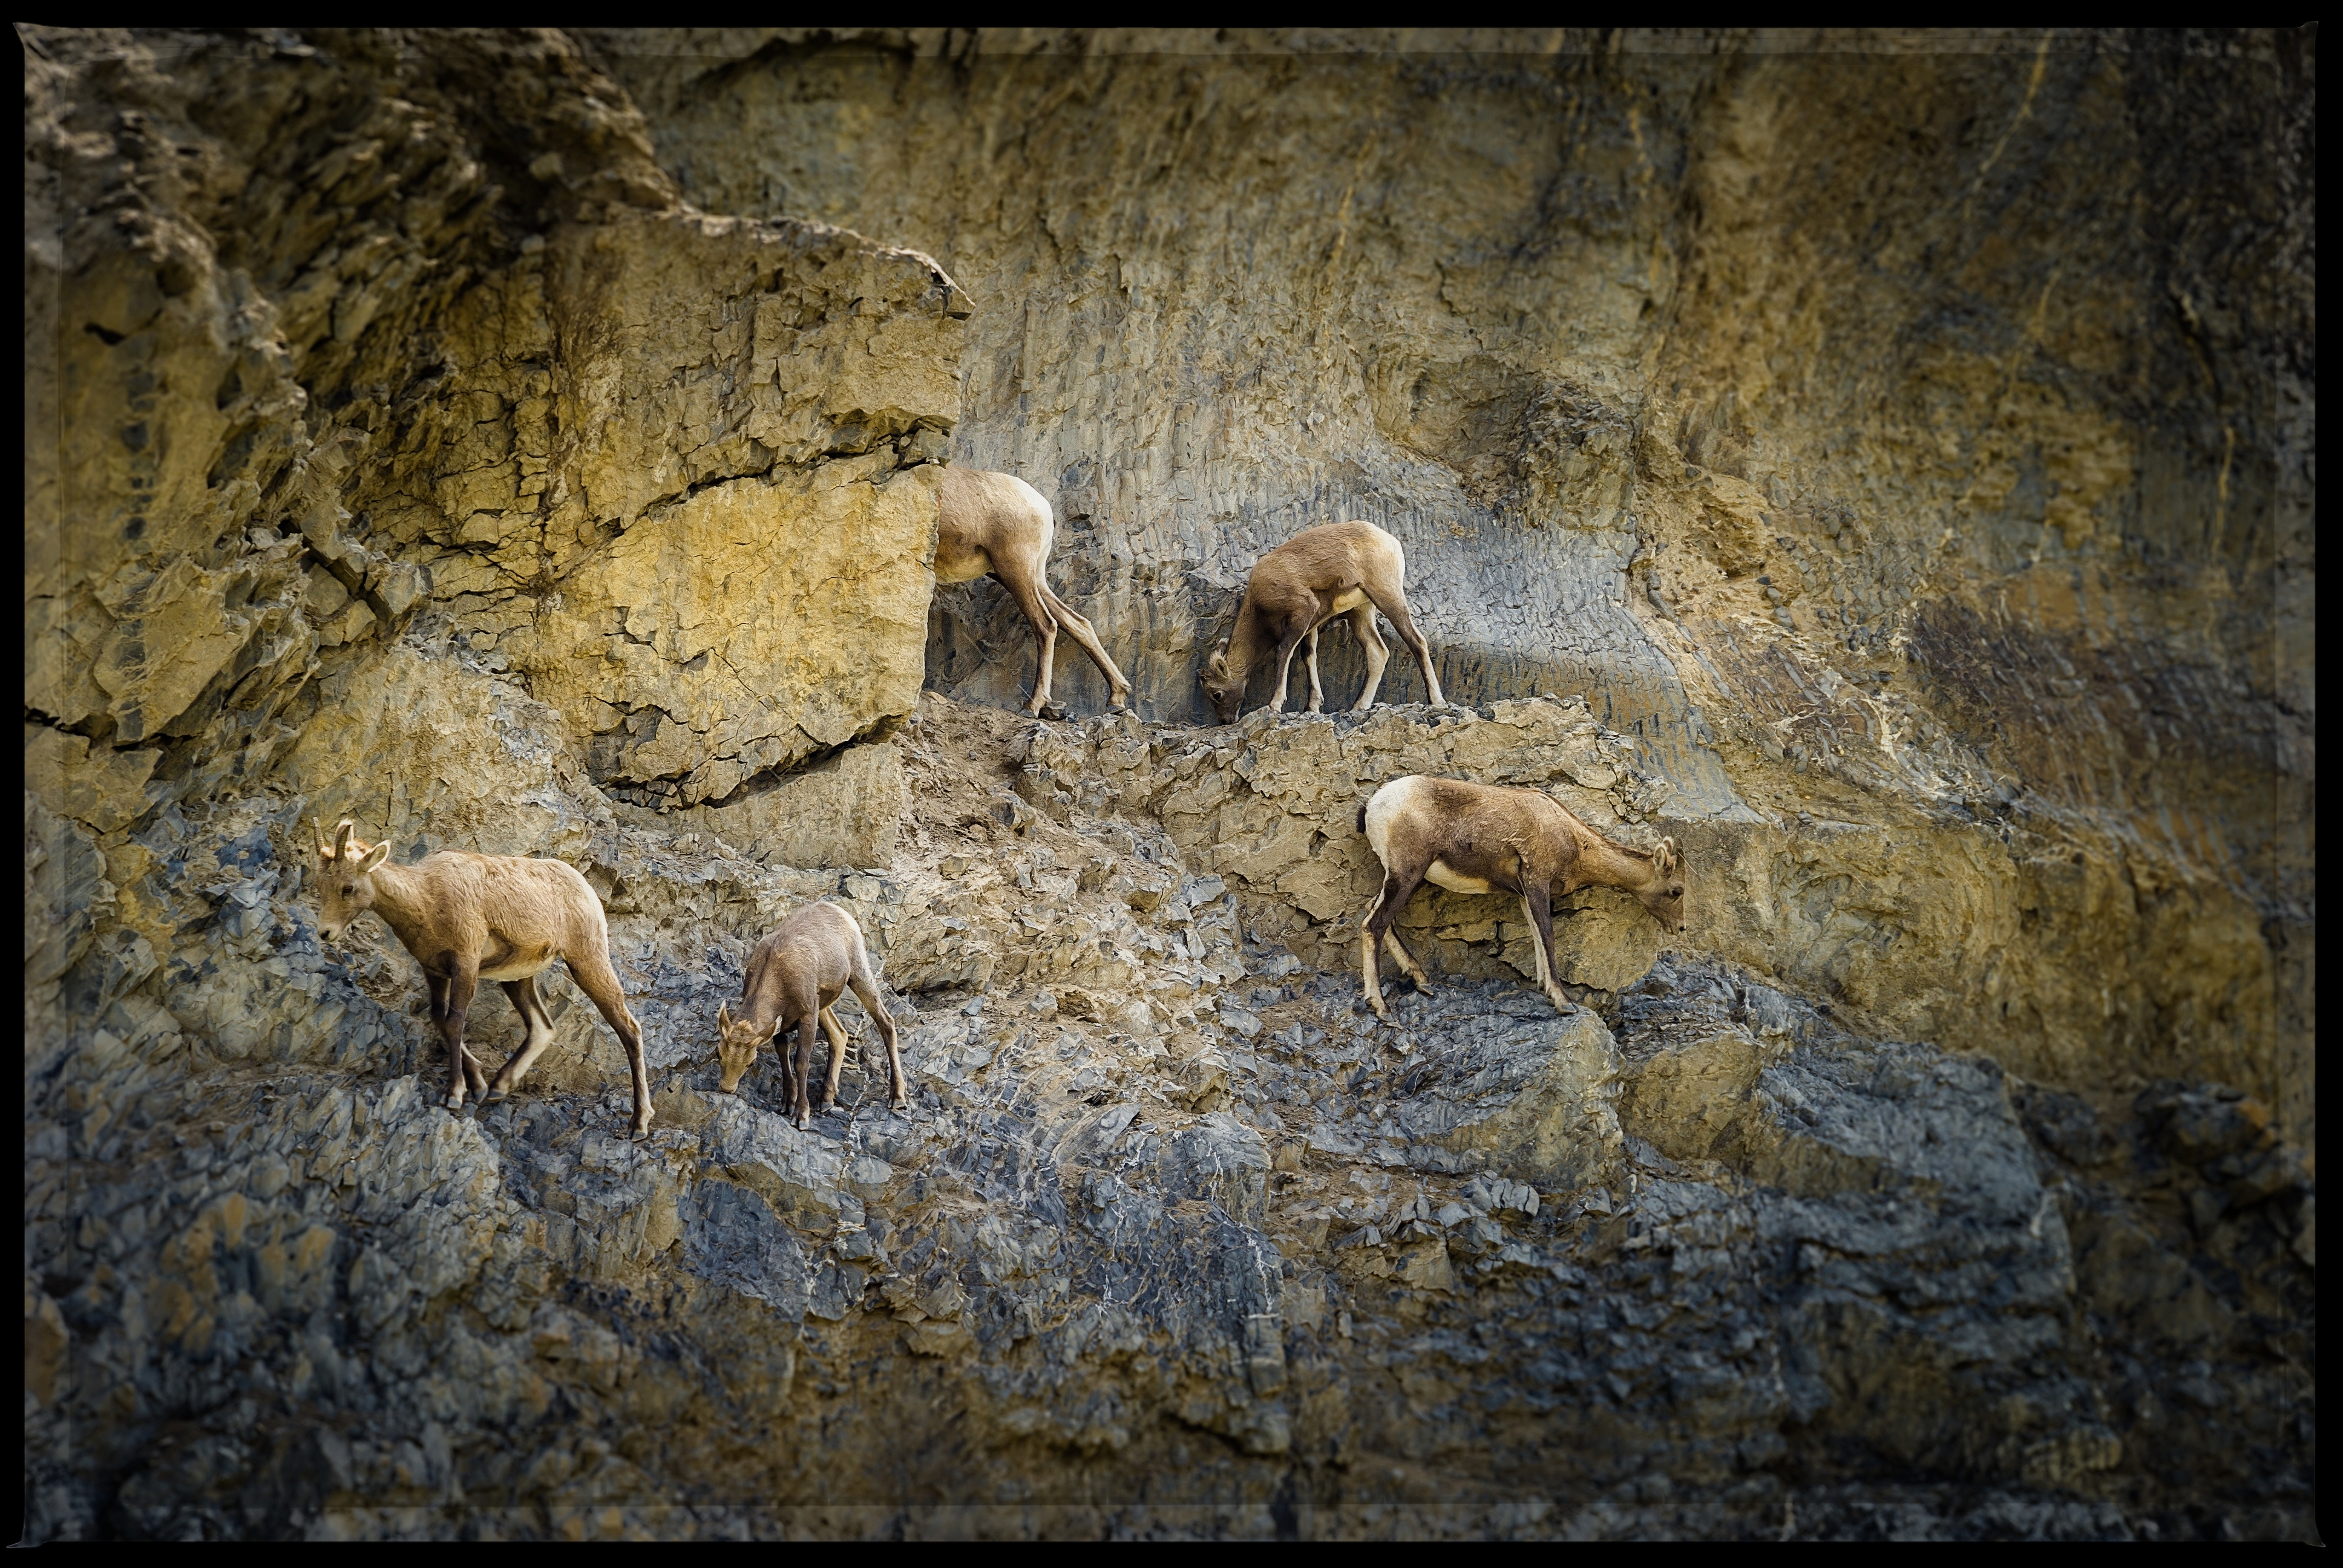
It was the sound of some frequent rocks falling that caught my attention. I looked in that direction and saw this small herd of sheep on the opposite side of this ravine. They appeared from behind a rock cut as if they were magically appearing from the rock face. I surveyed possible vantage points that wouldn’t disturb them and slowly made my move. I ended up slightly higher than them but as it turned out it was exactly the right spot as they eventually wandered past just below me. The light source was slightly behind them which allowed for a nice rim lighting effect that worked well in the post production work. I was careful to watch my camera setting so as not to blowout any highlights. According to my metadata the total sequence lasted 3:48 sec so it was quite quick but it was well worth the climbing to this precarious perch I shot from.
Post Production:
Lightroom 5 does the vast majority of my post production work. There is no specific workflow that I do its always done by perception and having a sense of what each image portrays to me. At capture I shoot manual and change my settings quite regularly almost frame by frame. When looking through the viewfinder and framing the image, I almost always I have a particular idea how I want the image to look when its done and printed. In this case almost every frame has some in camera adjustment as I shot from splendid warm highlights to high contrast shadow. This one facet of shooting causes me to adapt my post production so that a sequence of images can translate into a similar look and feel, if a sequence is what I desired.
I started using OnOne software just over two years ago and its used mainly to finish and to render a more dynamic look in an image. There is an amazing set of filter that can evolve images in an endless number of ways and with each filter there is a complete set of control to customize the effect. In my images a softer more natural look with a slightly greater dynamic range is what I was trying to accomplish here.
This a before, completed in LR5 and after using OnOne software.
When studying processing I surf the net visiting a variety of photographic and photo competition sites. I look for trends that I like but mostly dislike. I’ve found there is a strong tendency to have images with over pushed sharpening which makes them loose there reality and become to digitized in their feel. When I analyze its more to confirm what I’m visualizing for my images thats important. One must consider and recognize with any desired processing technique it really boils down to beauty is in the eye of the beholder.
I just participated in the “fivedayblackandwhitechallenge”. This event took place on Facebook and the idea was to create a chain of willing photographers to share 5 images from their portfolios and to invite 5 other photographers into challenge to perpetuate the event. On Oct 21 I was invited in by Anil Sud a good friend and mentor who is an amazing photographer in his own right. A special Thank You for that.
Observations and Objectives:
So the question became what will I bring to the table. On a weekly basis I share a fair bit on Facebook so what would be the idea behind the images I was about to show for this challenge. My thoughts became one of newness. I spent time and looked at some of the images that people were post I realized they were from all over the world so I knew there was a larger audience pool. I decide to share some new images and processing concepts to see what comments this broader audience would yield.
My Submissions:
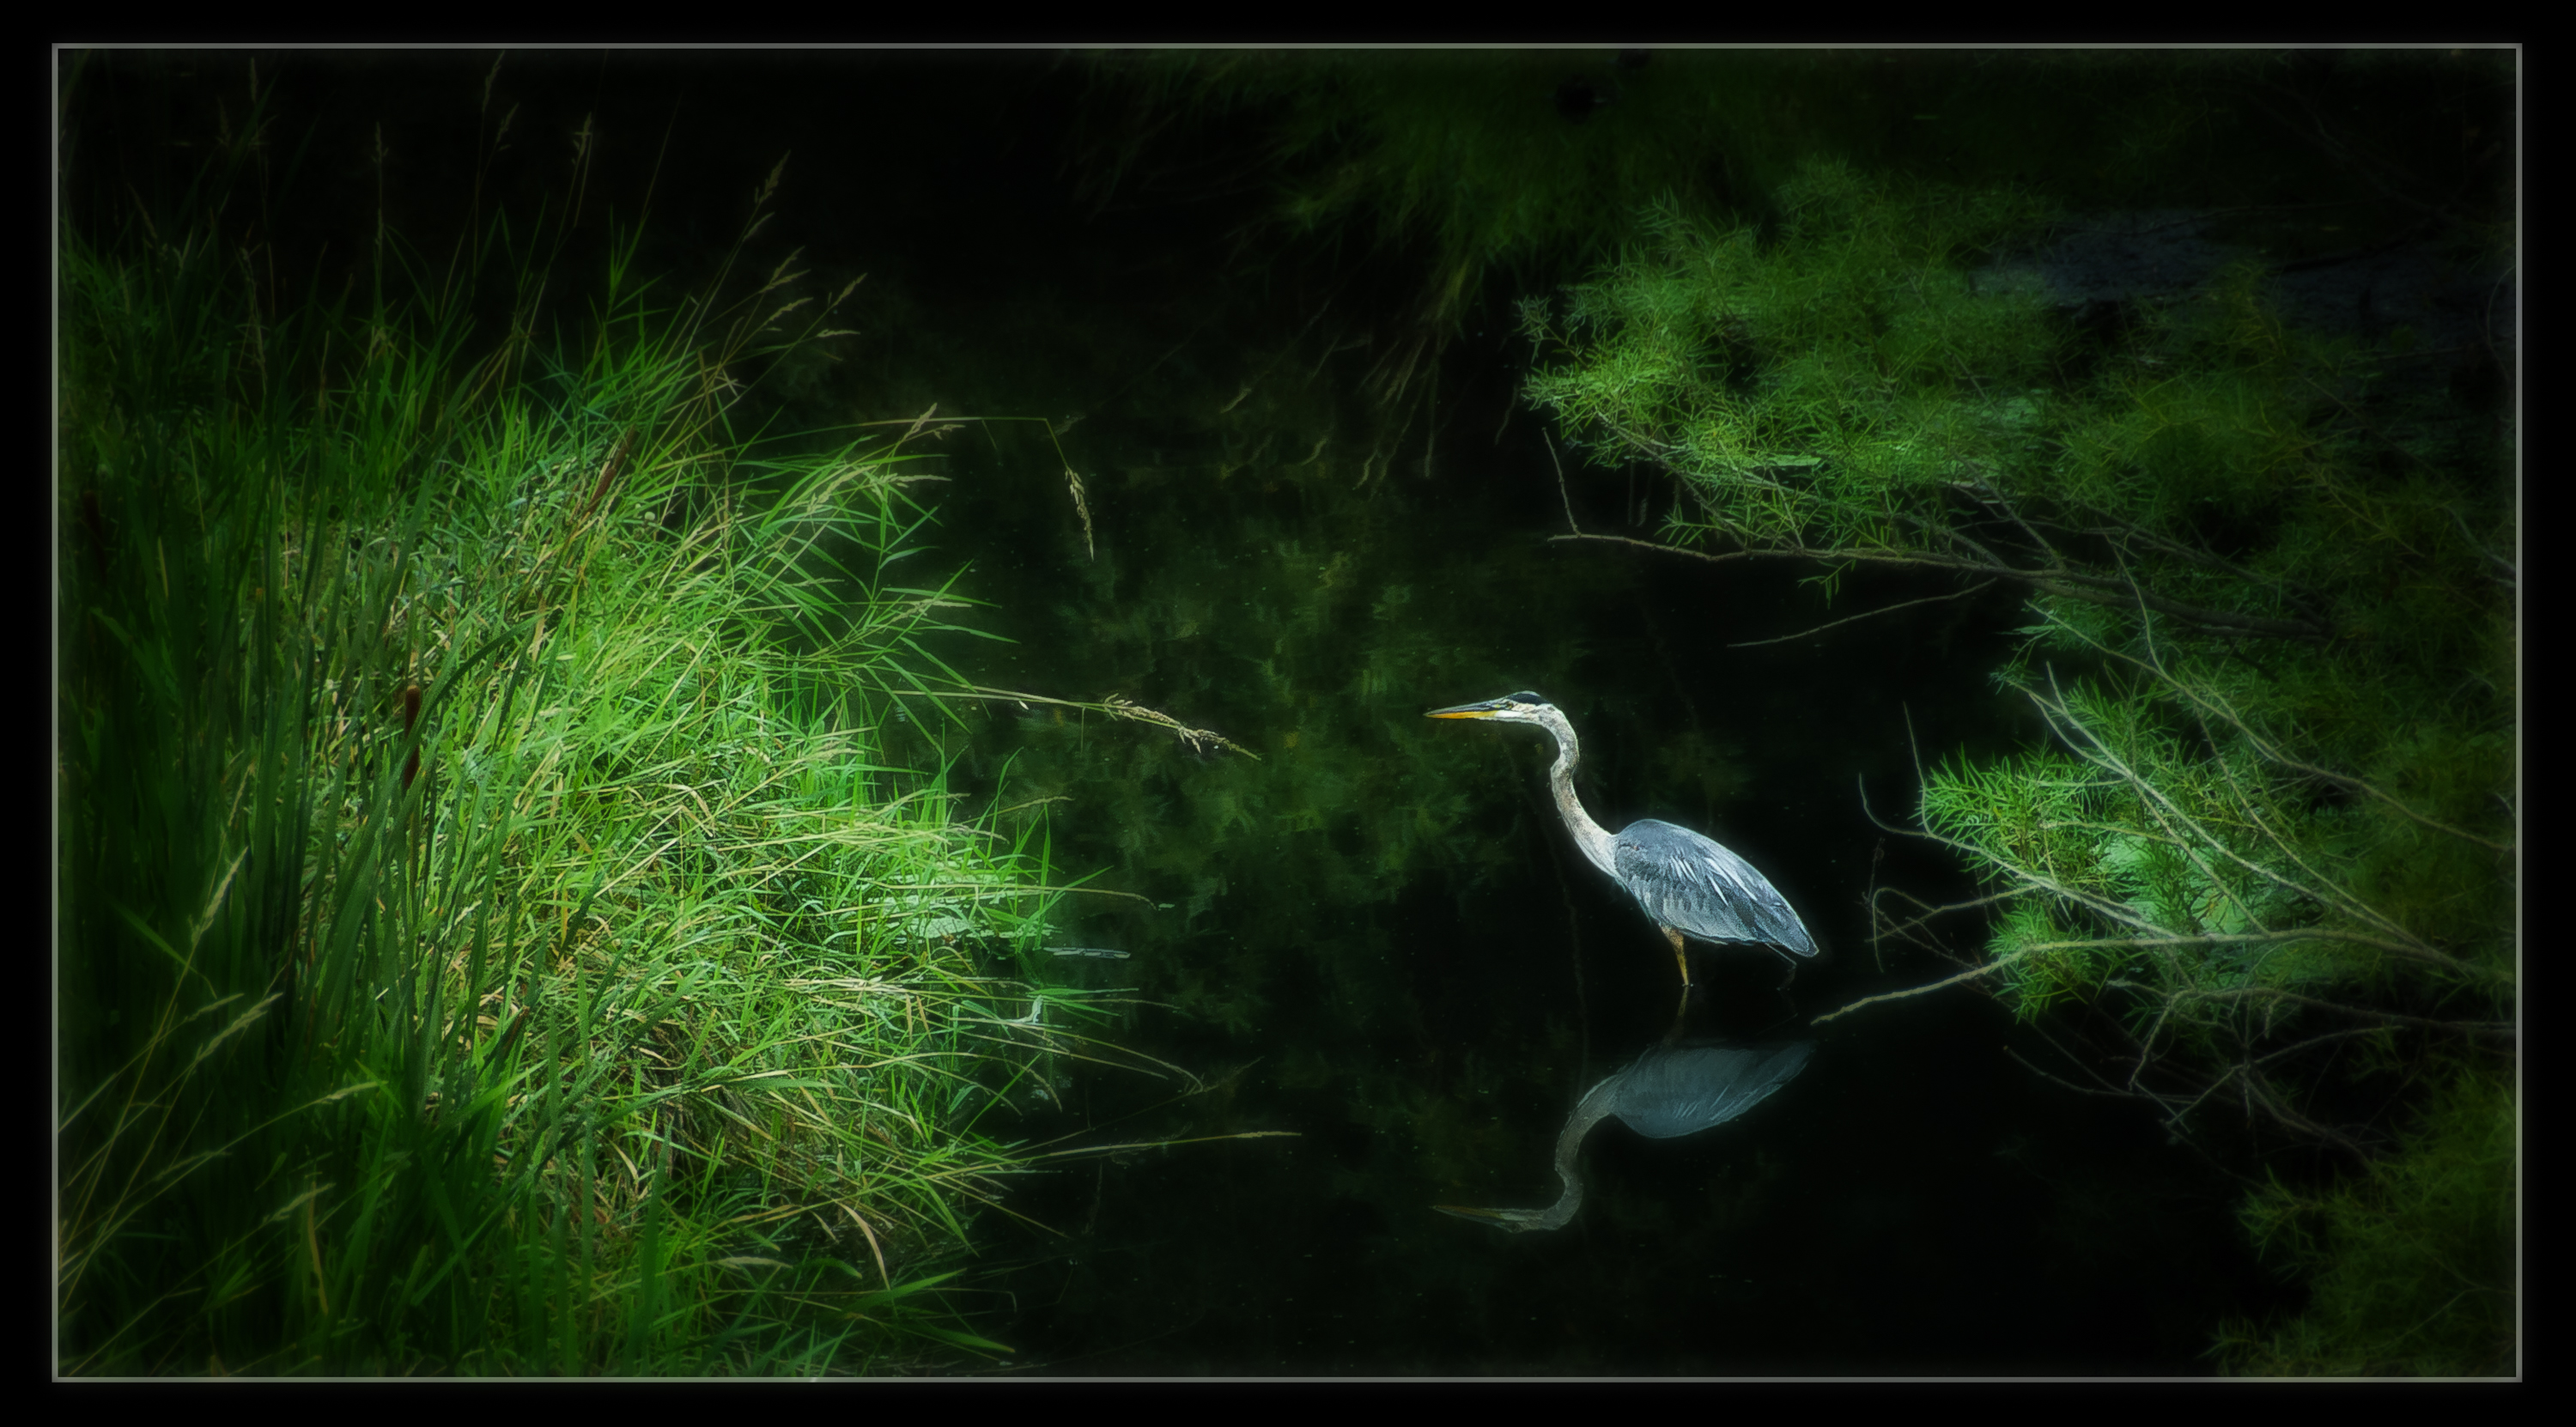
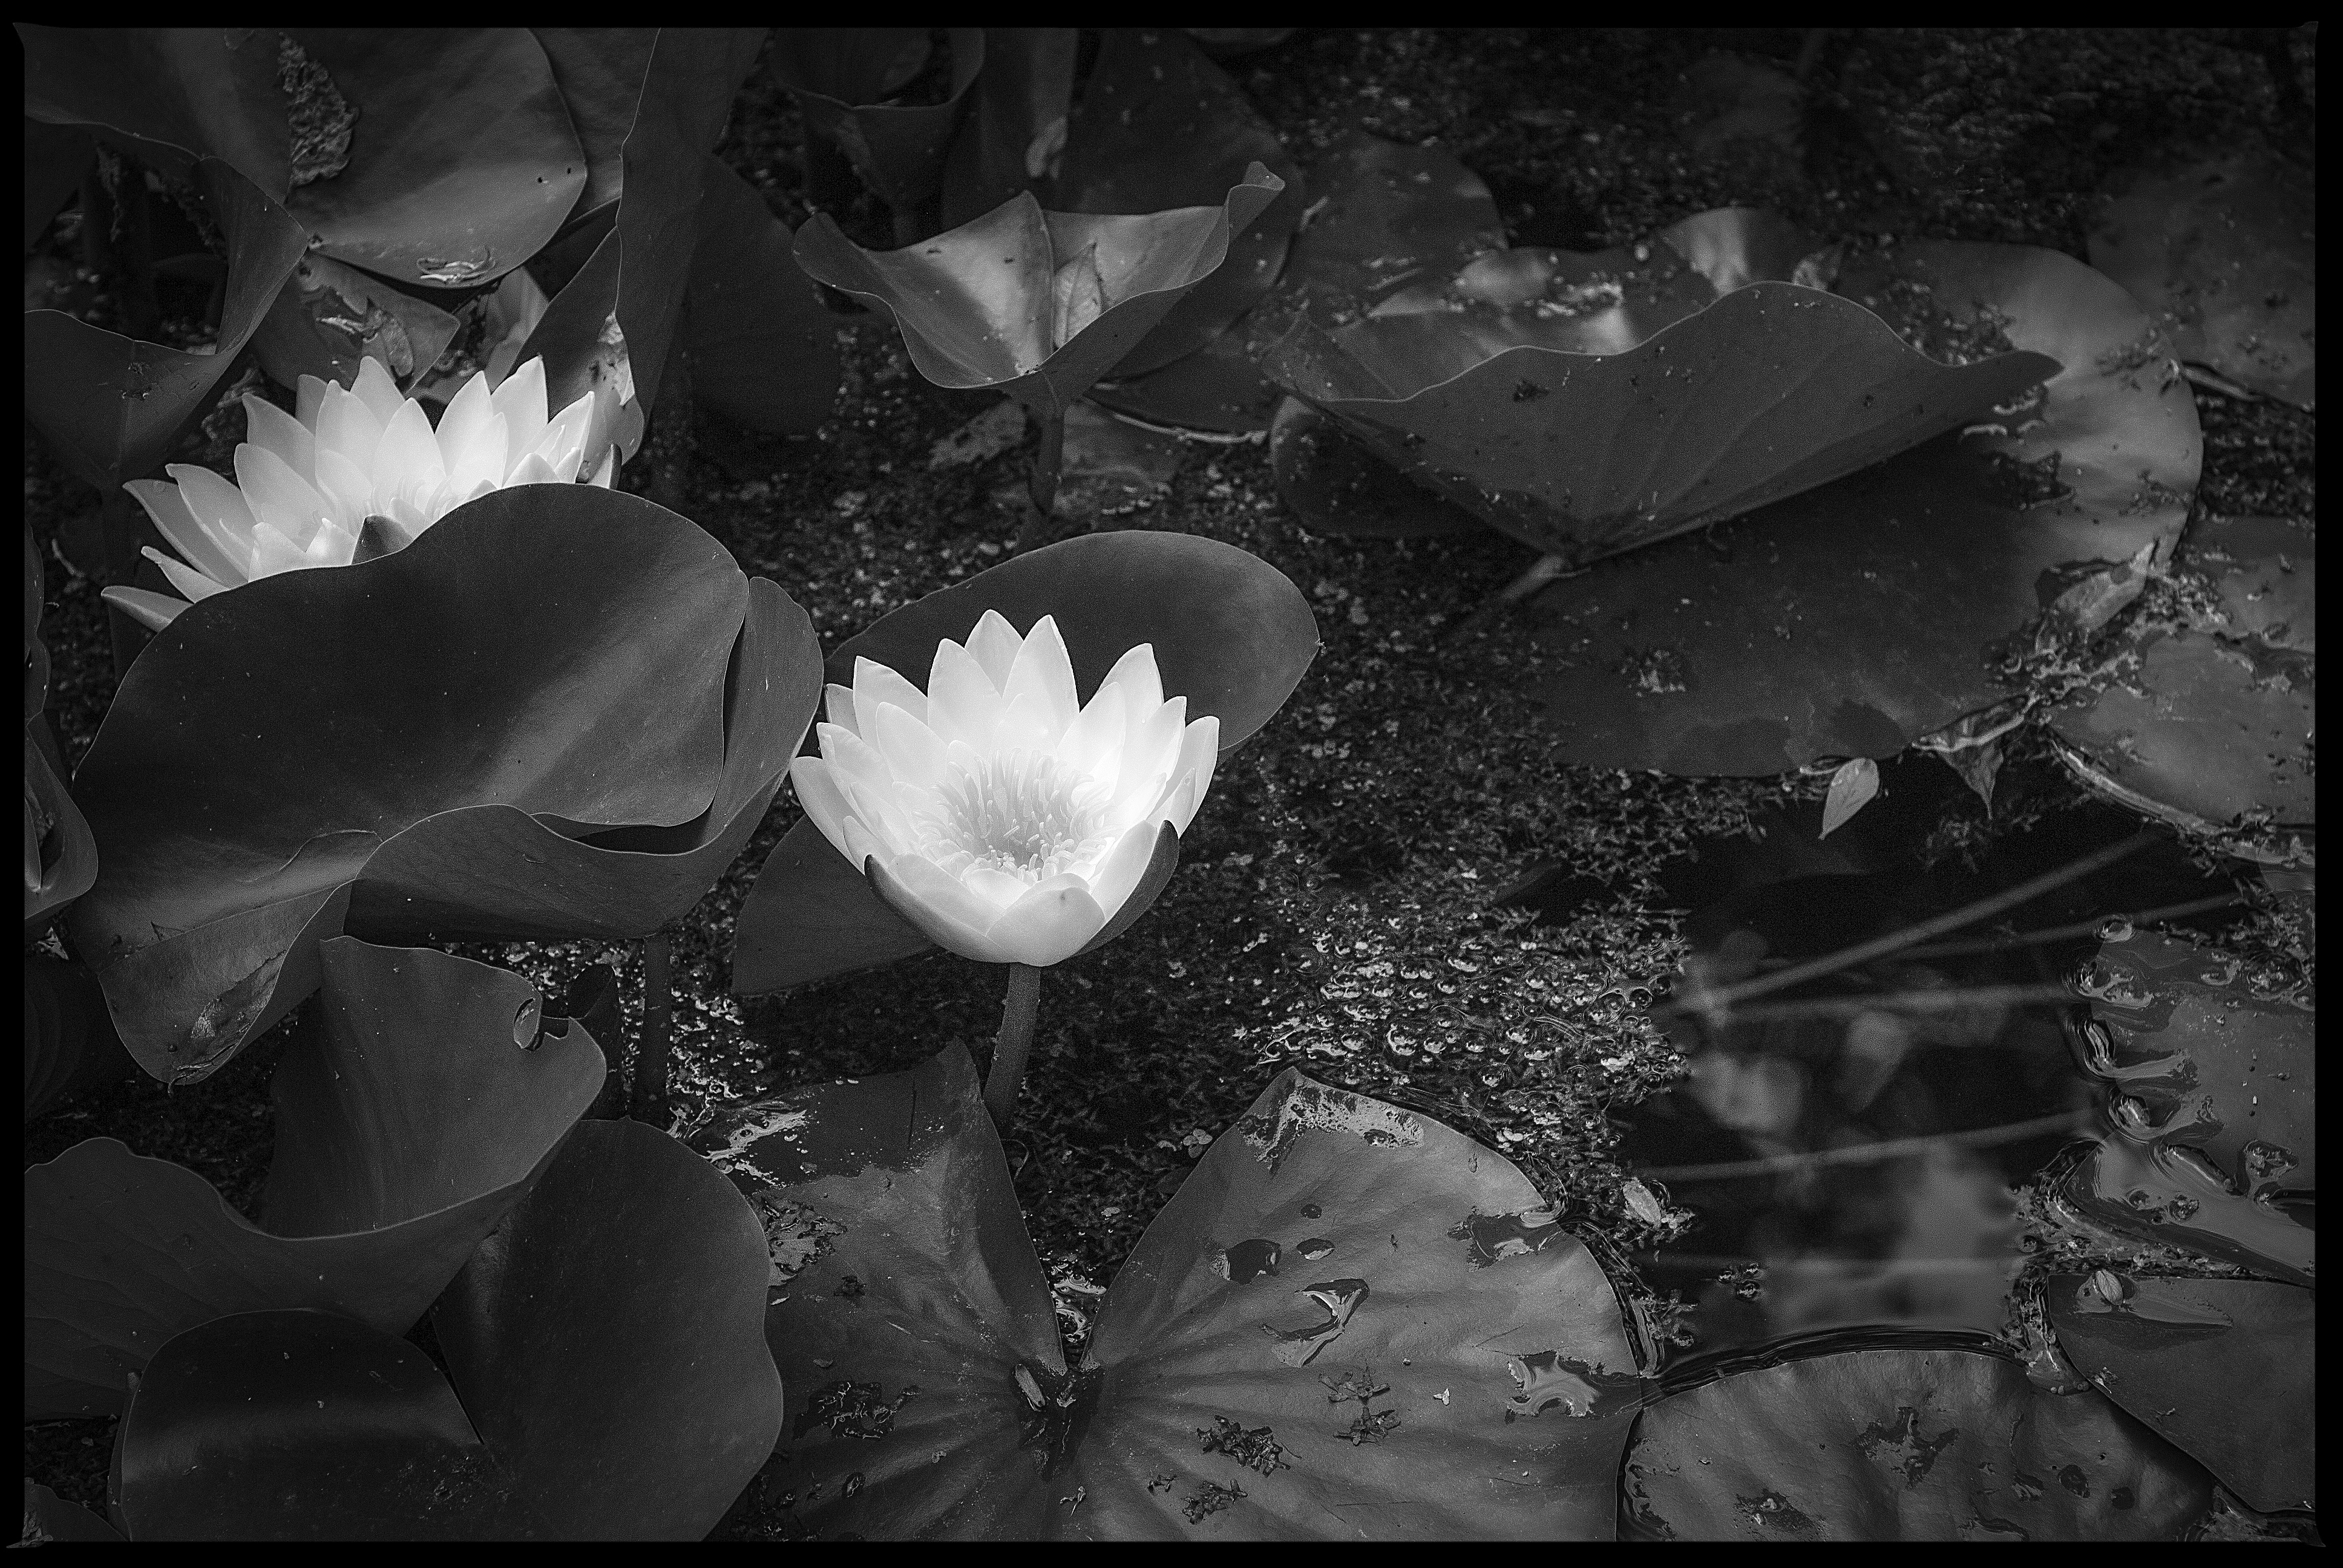
My first image was posted on Oct 21. This was a shot taken at the Leo Mole sculpture garden in Winnipeg. When I first saw this original colour image I liked the contrast that existed between the dark greens, dark clear waters and the light yellow lilies. When I loaded it into LR5 and did a basic B&W conversion, based on a preset I created, I discovered much more. In B&W this image shows a tremendous amount of character in the depth of blacks in the matte leaves, the bubbles on the waters surface and of course the subtle details of the flowers that once you look into them you see more and more of the details that first look appear to be slightly over exposed.
Captured at the Leo Mole Gardens, Winnipeg, Canada.
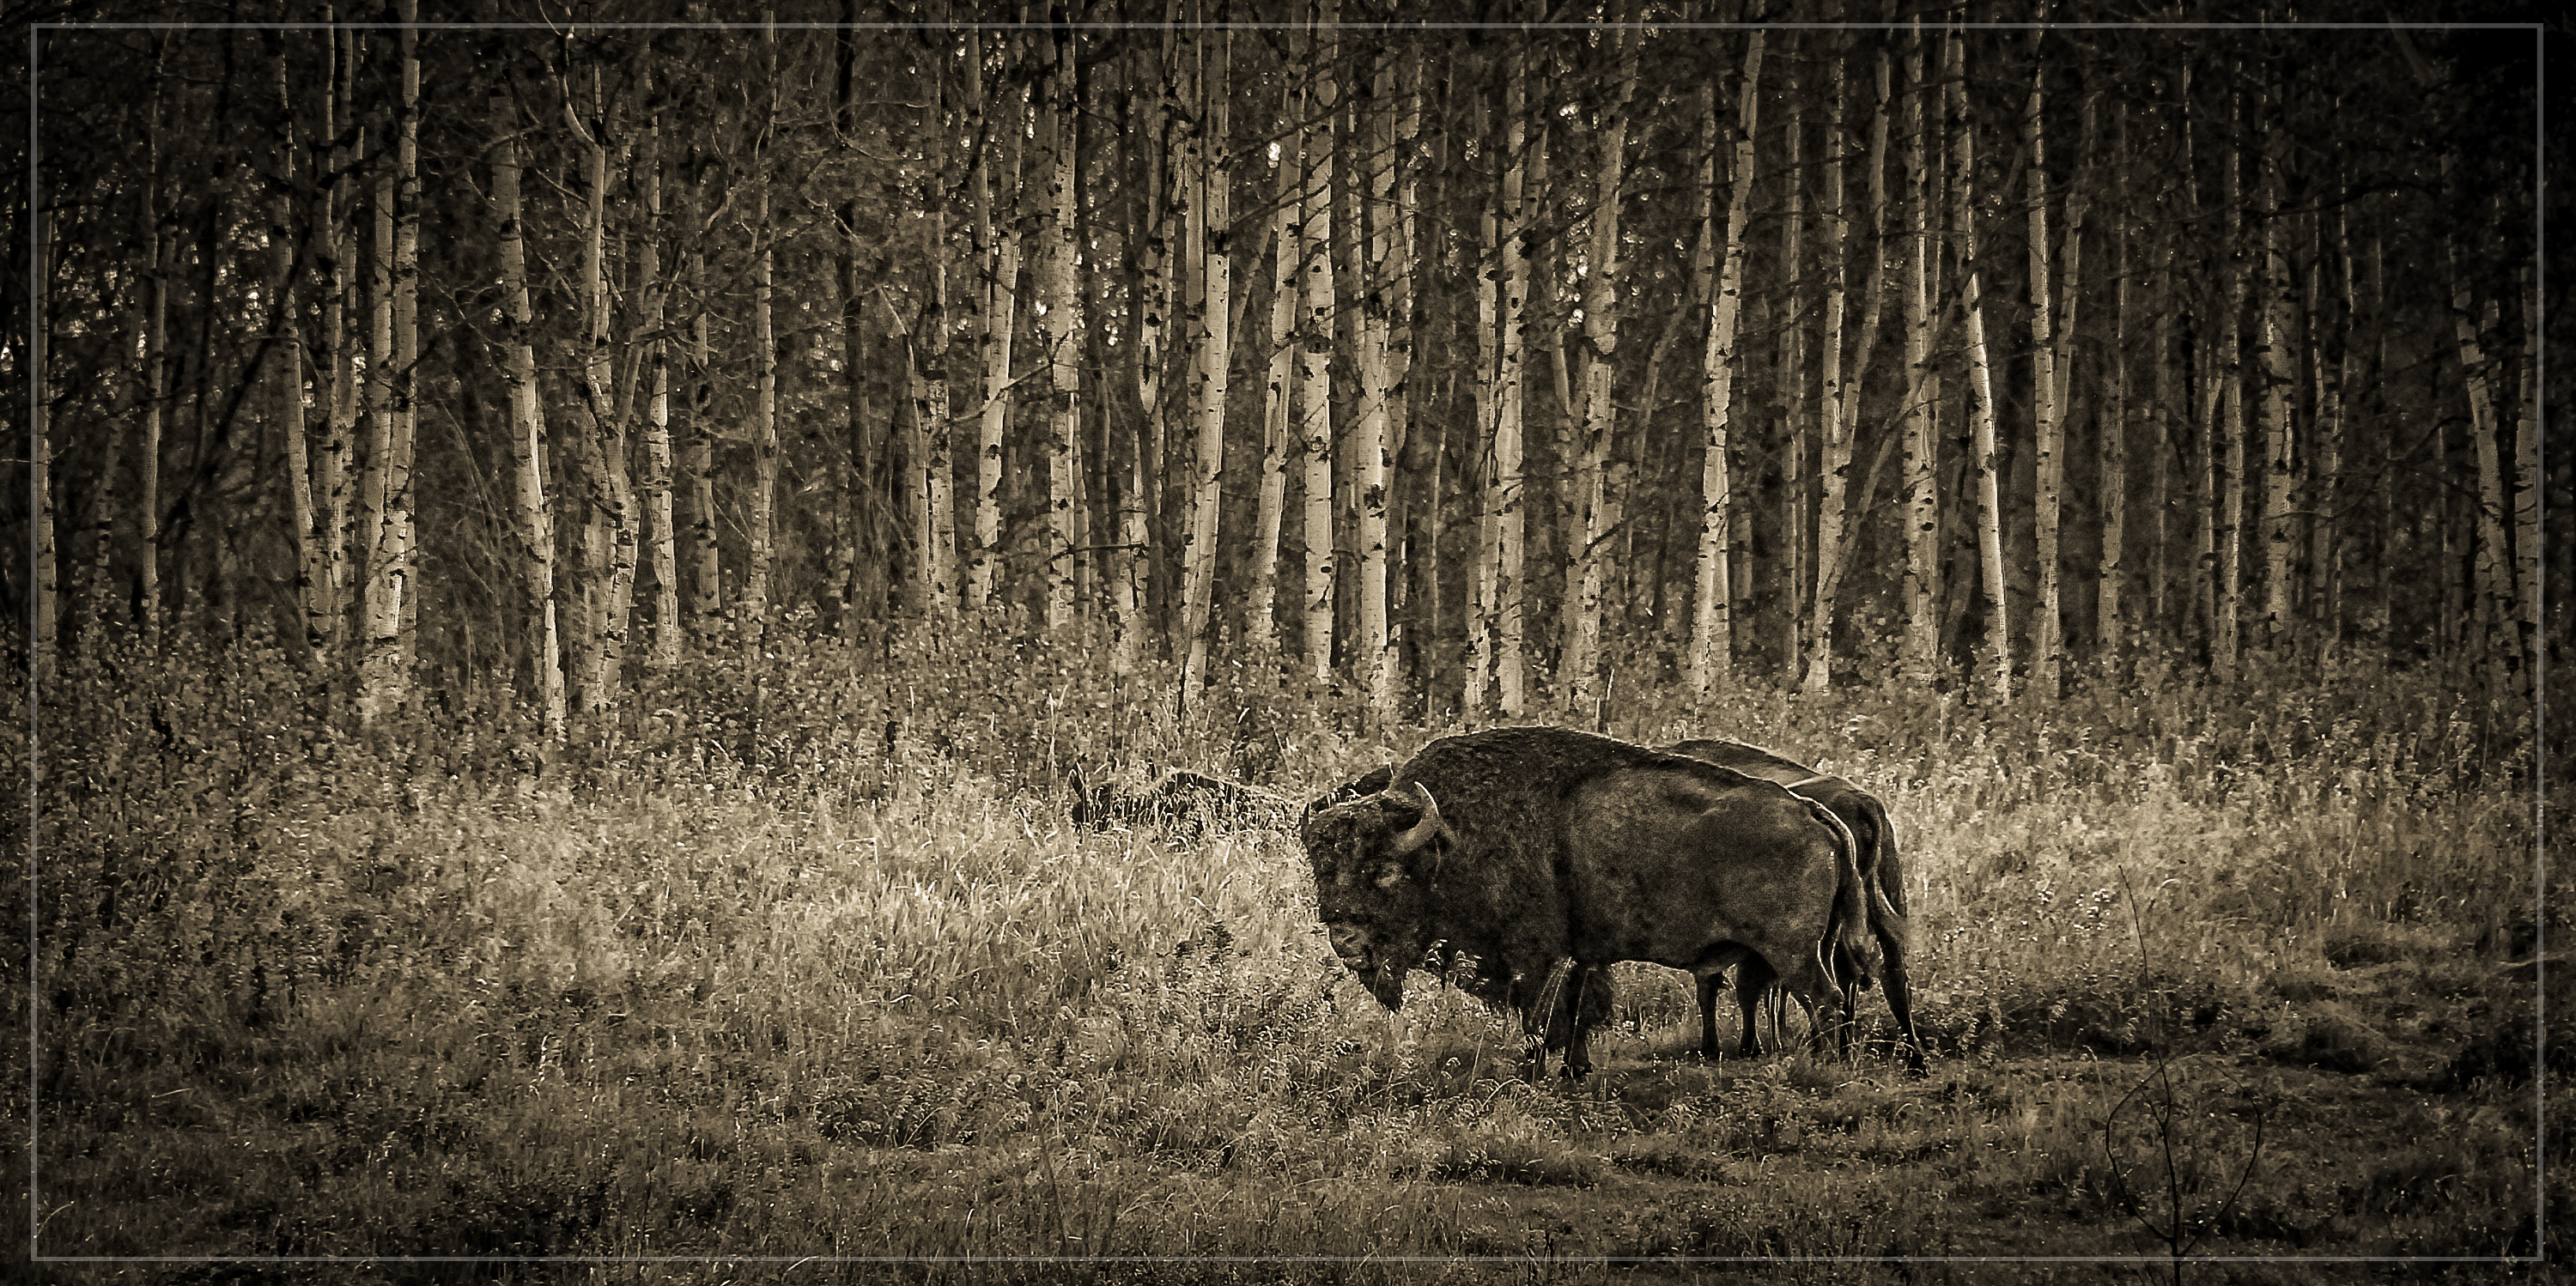
My second image was posted Oct 22. This was a shot taken in North Eastern Alberta at Elk Island. This location became a favorite haunt of mine for about five years. Arriving predawn I would walk among the bison sleeping in the in the meadows and trees. I got quite used to them over the years and I had a good understanding of their body language so I was comfortable walking among them, stupid maybe, but it allowed me to get some very peaceful morning shots. This was one taken just as the bison were awakening. The setting was very nice with the edge of a forested area behind adding some nice light and vertical contrast to the dark animals and tall light grasses.
Captured at Elk Island, Alberta.
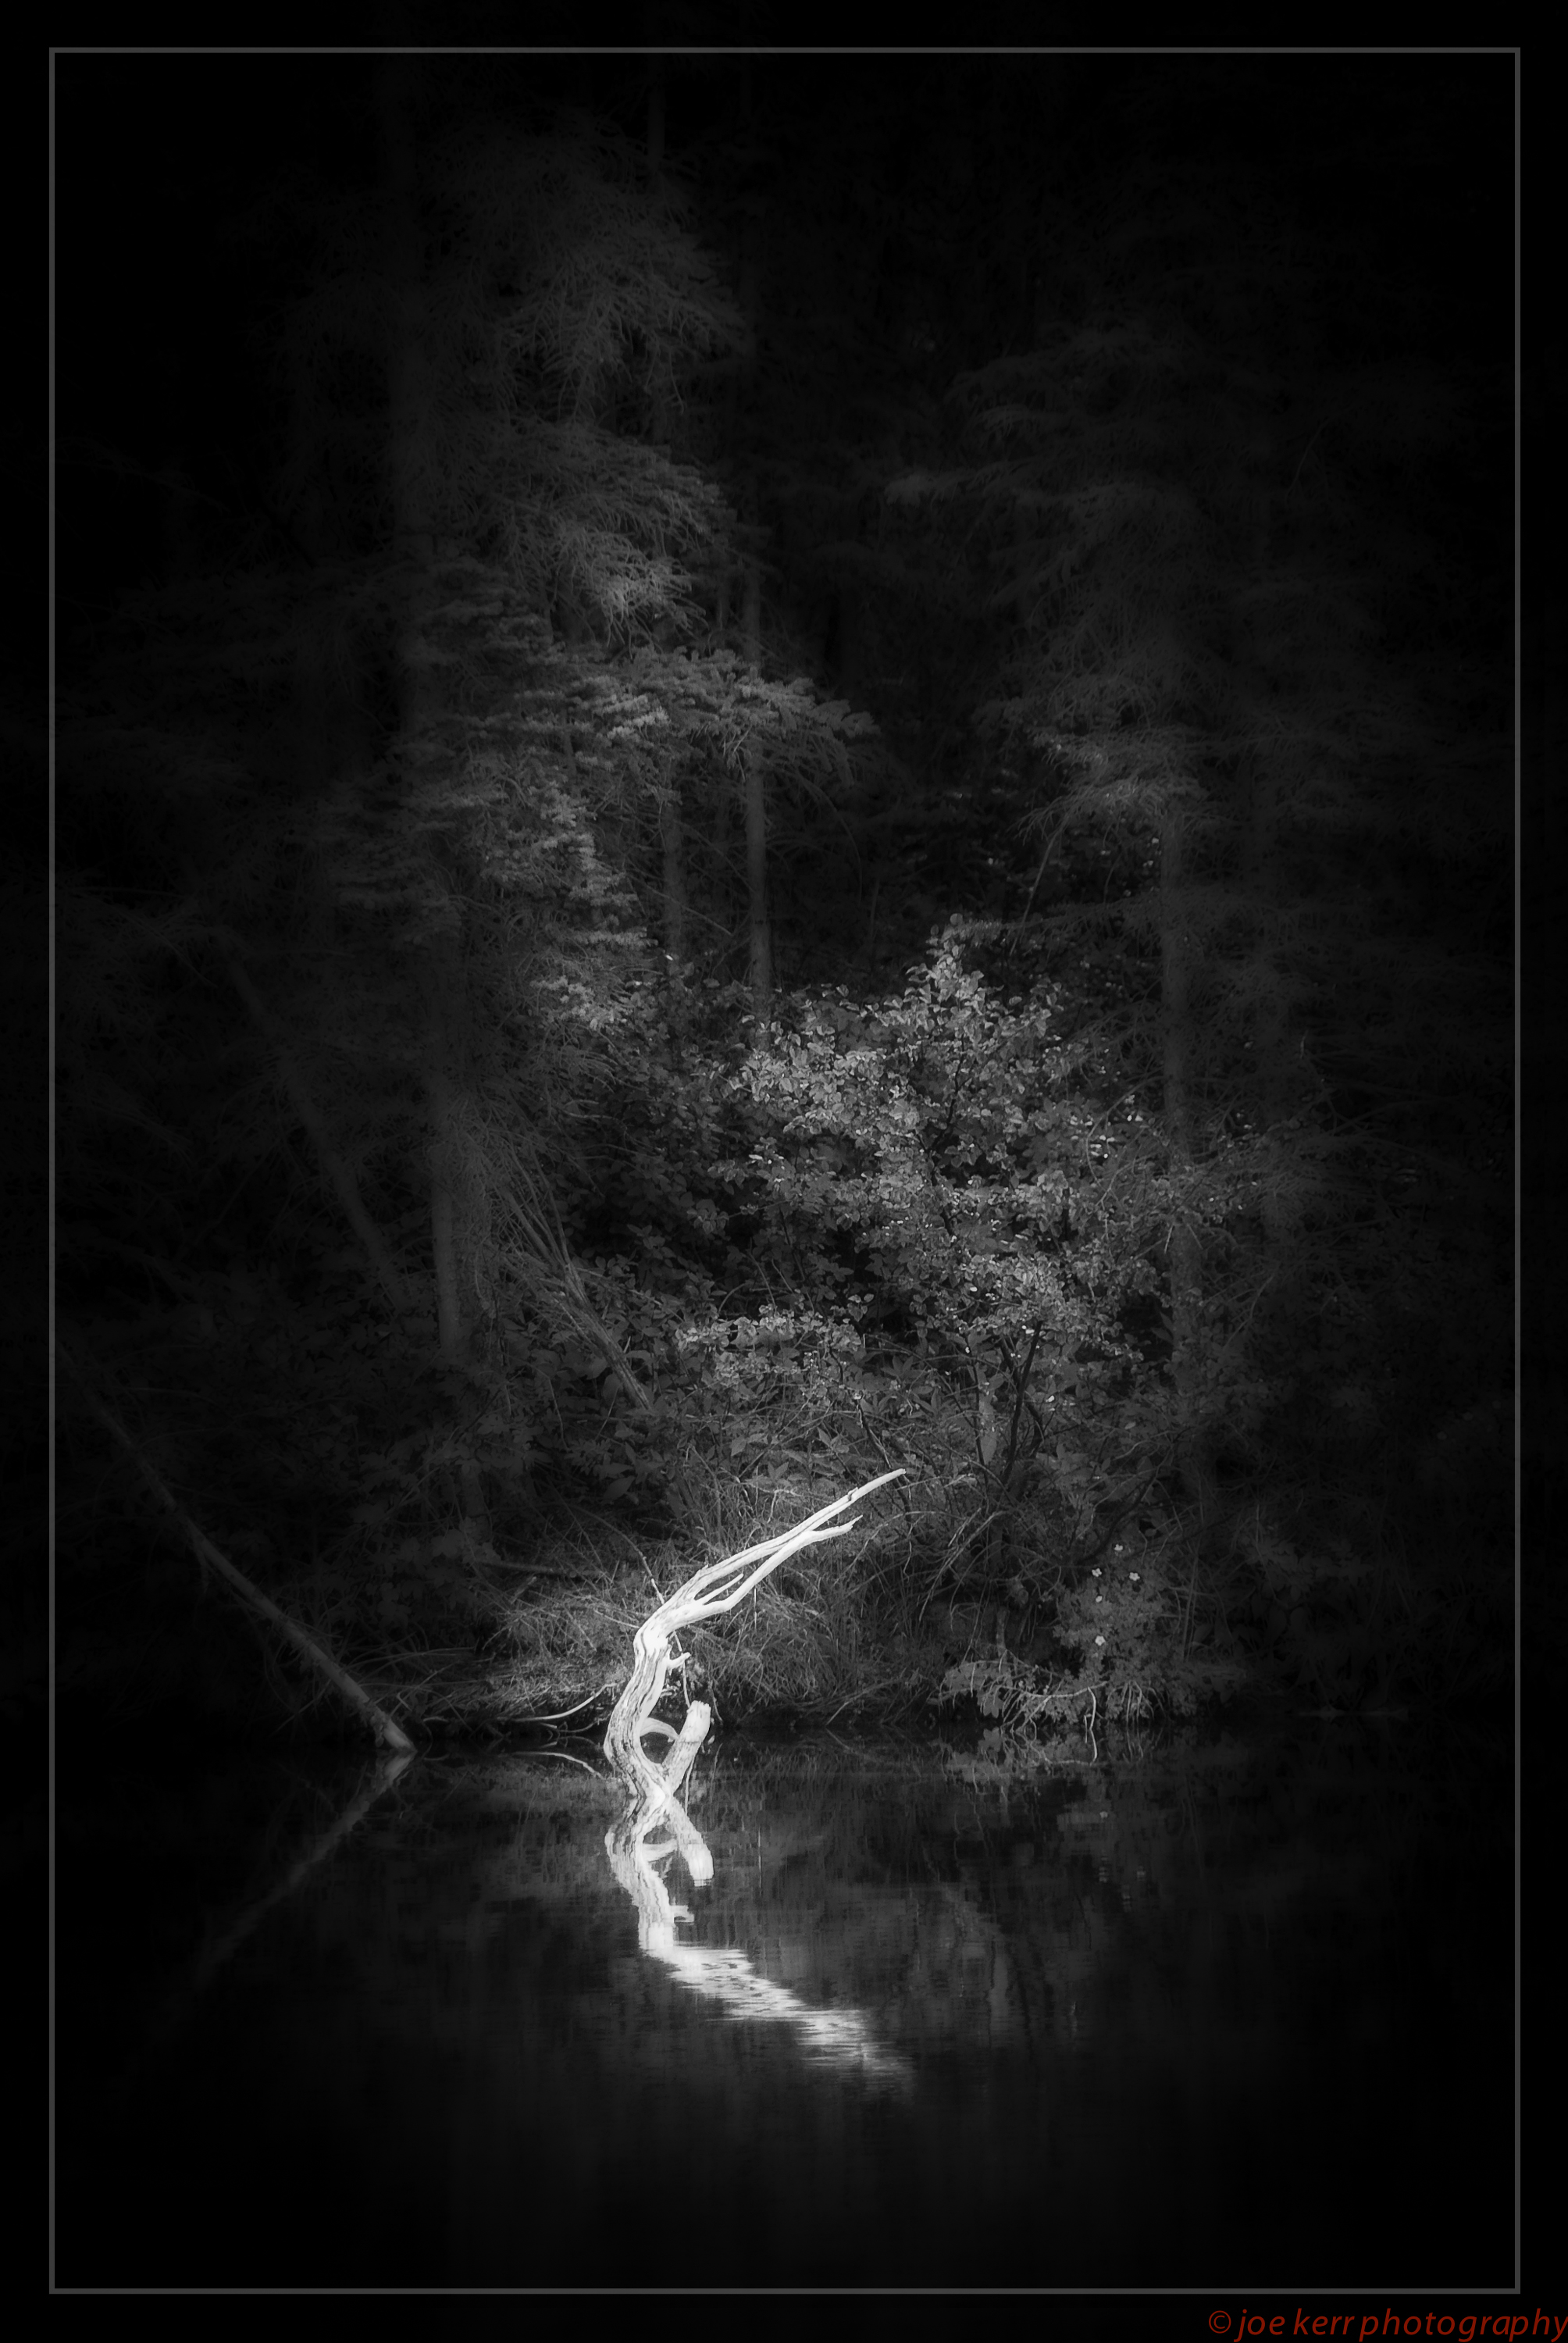
My third image was posted on Oct 23. This was taken in the Rockies near Jasper, Alberta. I was on a two day hike in the mountains and I came upon this small alpine lake. Along its shoreline were the roots of fallen trees that had been bleached by the sun and waters. The white sculptural roots strictures were a beautiful contrast to the dark green of the forest and the emerald green waters. The B&W conversion allowed even more depth and the selective highlights I chose created a nice “S” curve to the composition.
Taken at an alpine lake near Jasper, Alberta.
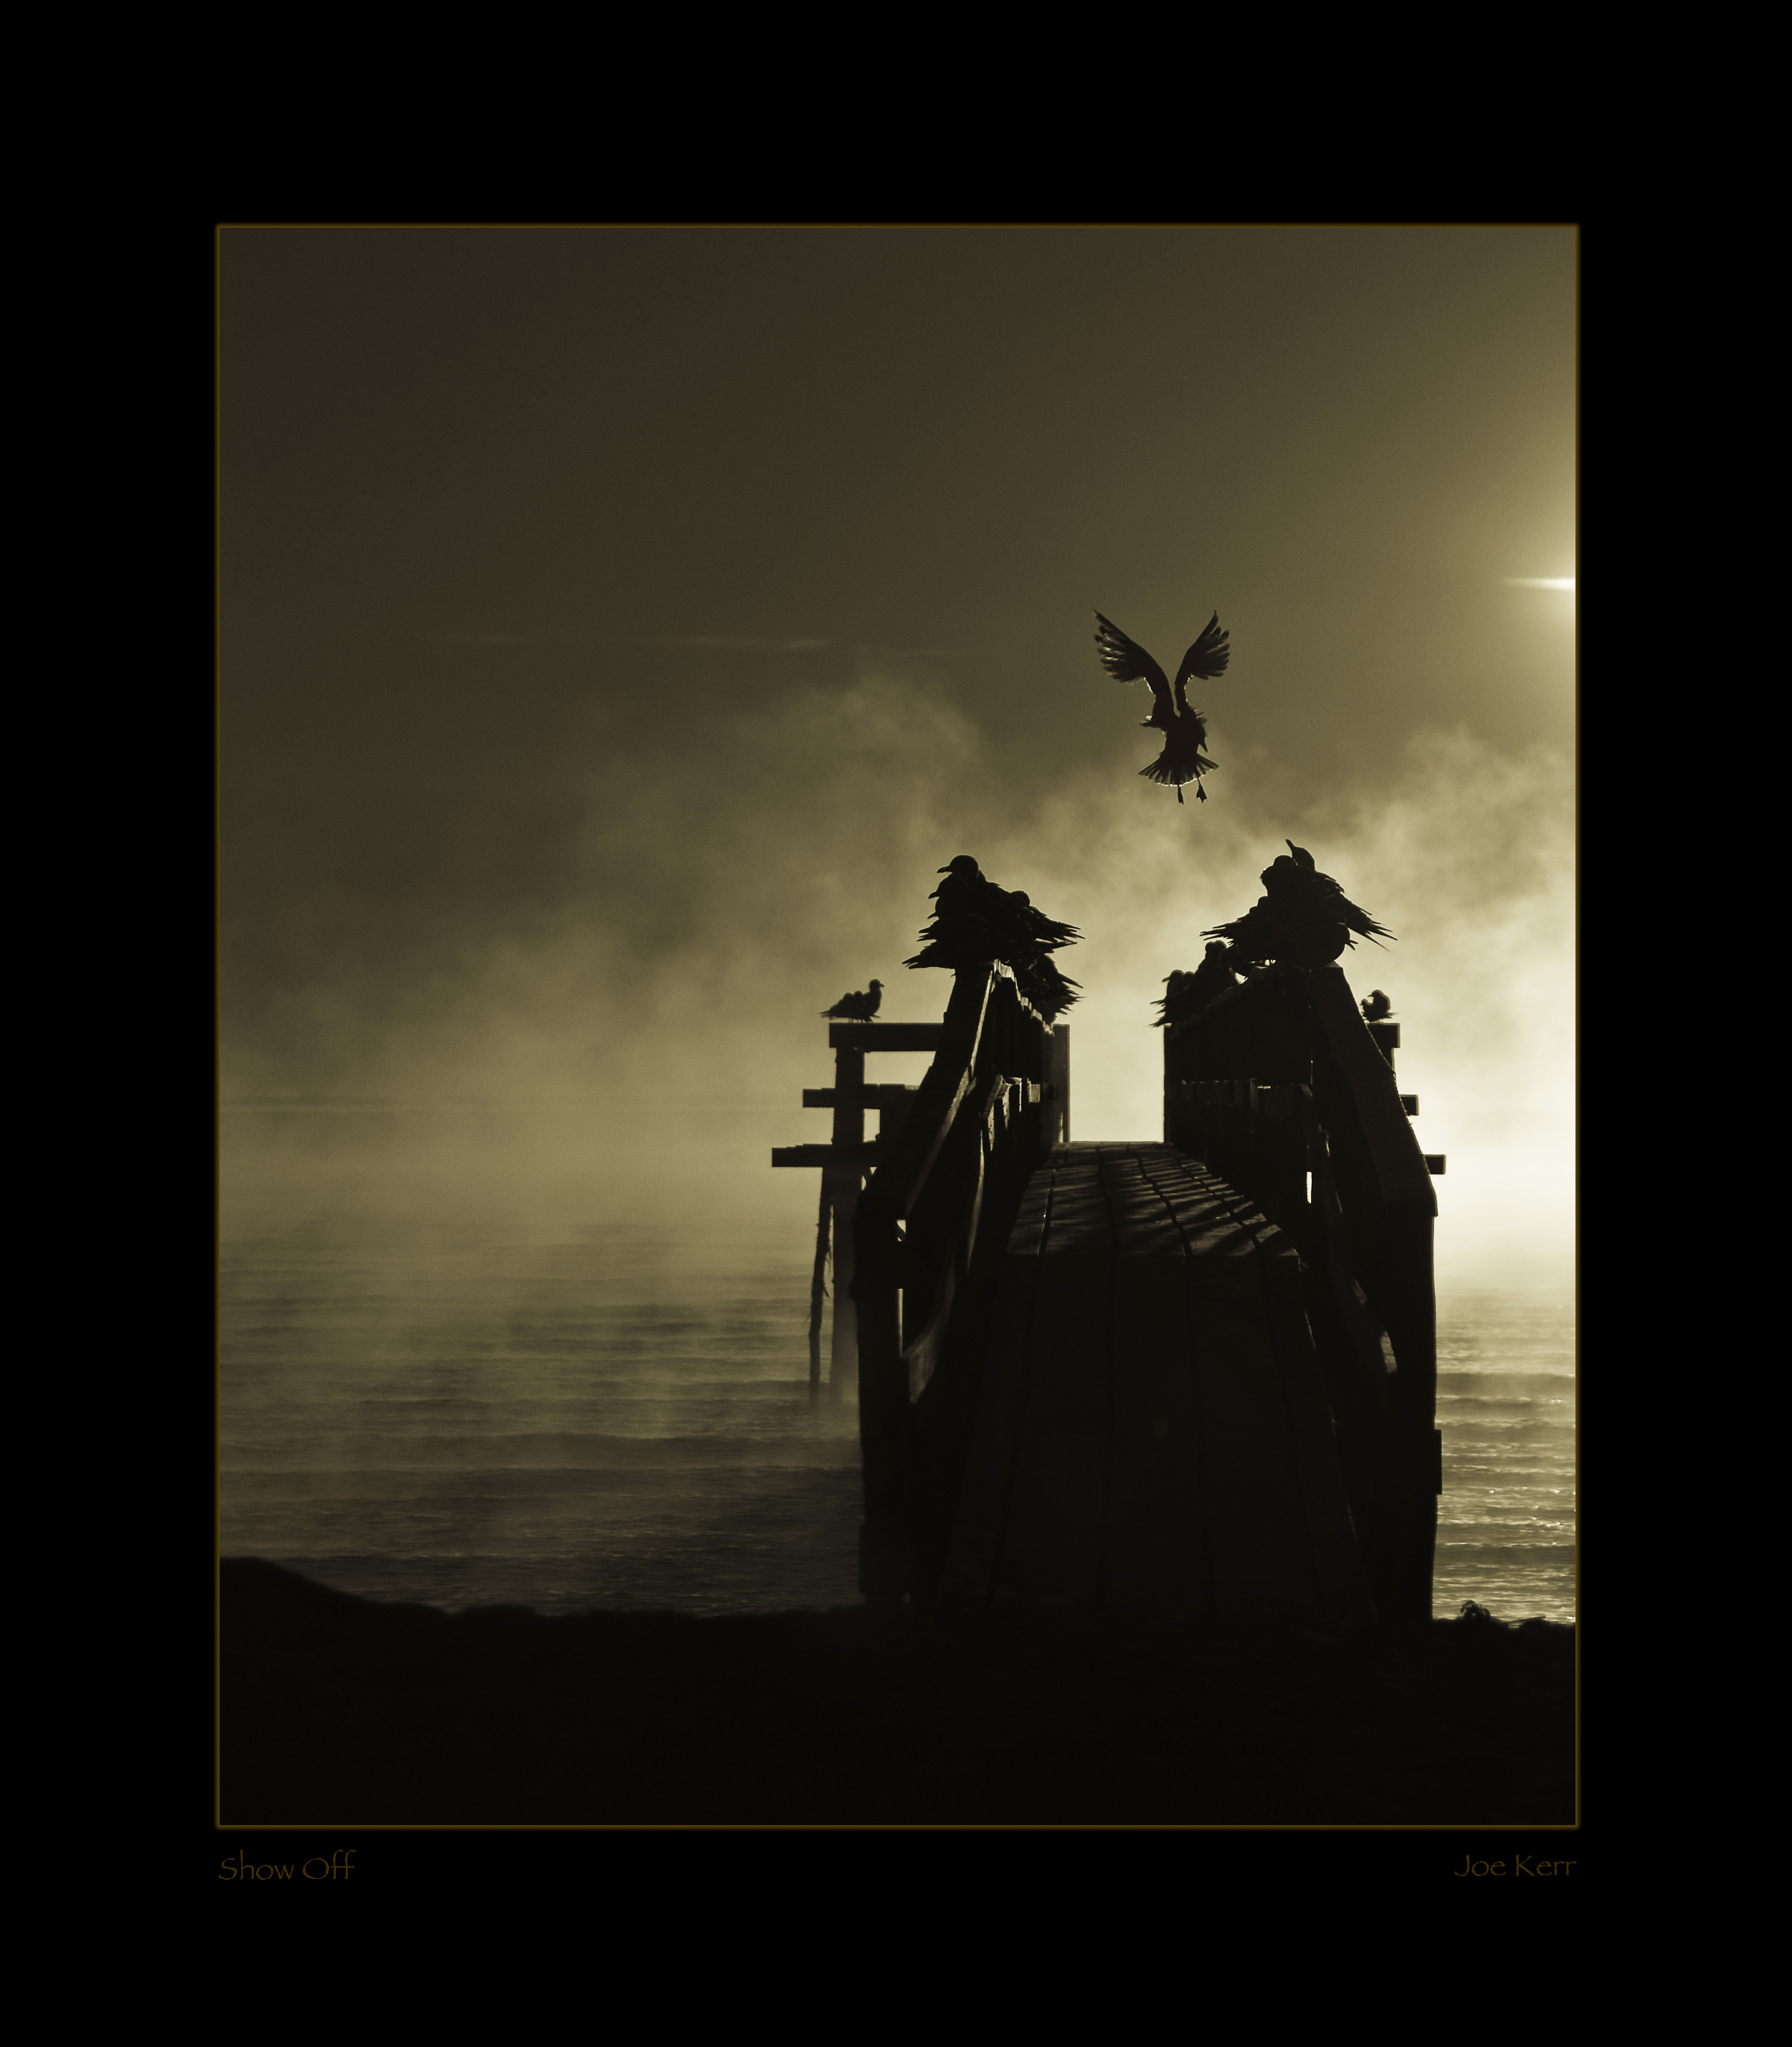
My forth image was posted on Oct 24. On my travels to the city of Chicago in 2011 I captured this shot from the Navy Pier. Looking west on a bleak rainy day the sun would breaking through the clouds every once in a while. I lined up the lamp post to be directly in front of the sun so it would illuminate the glass shades. The twin towers were wrapped in a shroud of mist but the dual antennas rose above the mist rendering a classic double elements composition. In processing I discovered a fortuitous third double of a pair of birds just above the lights. Divine intervention…
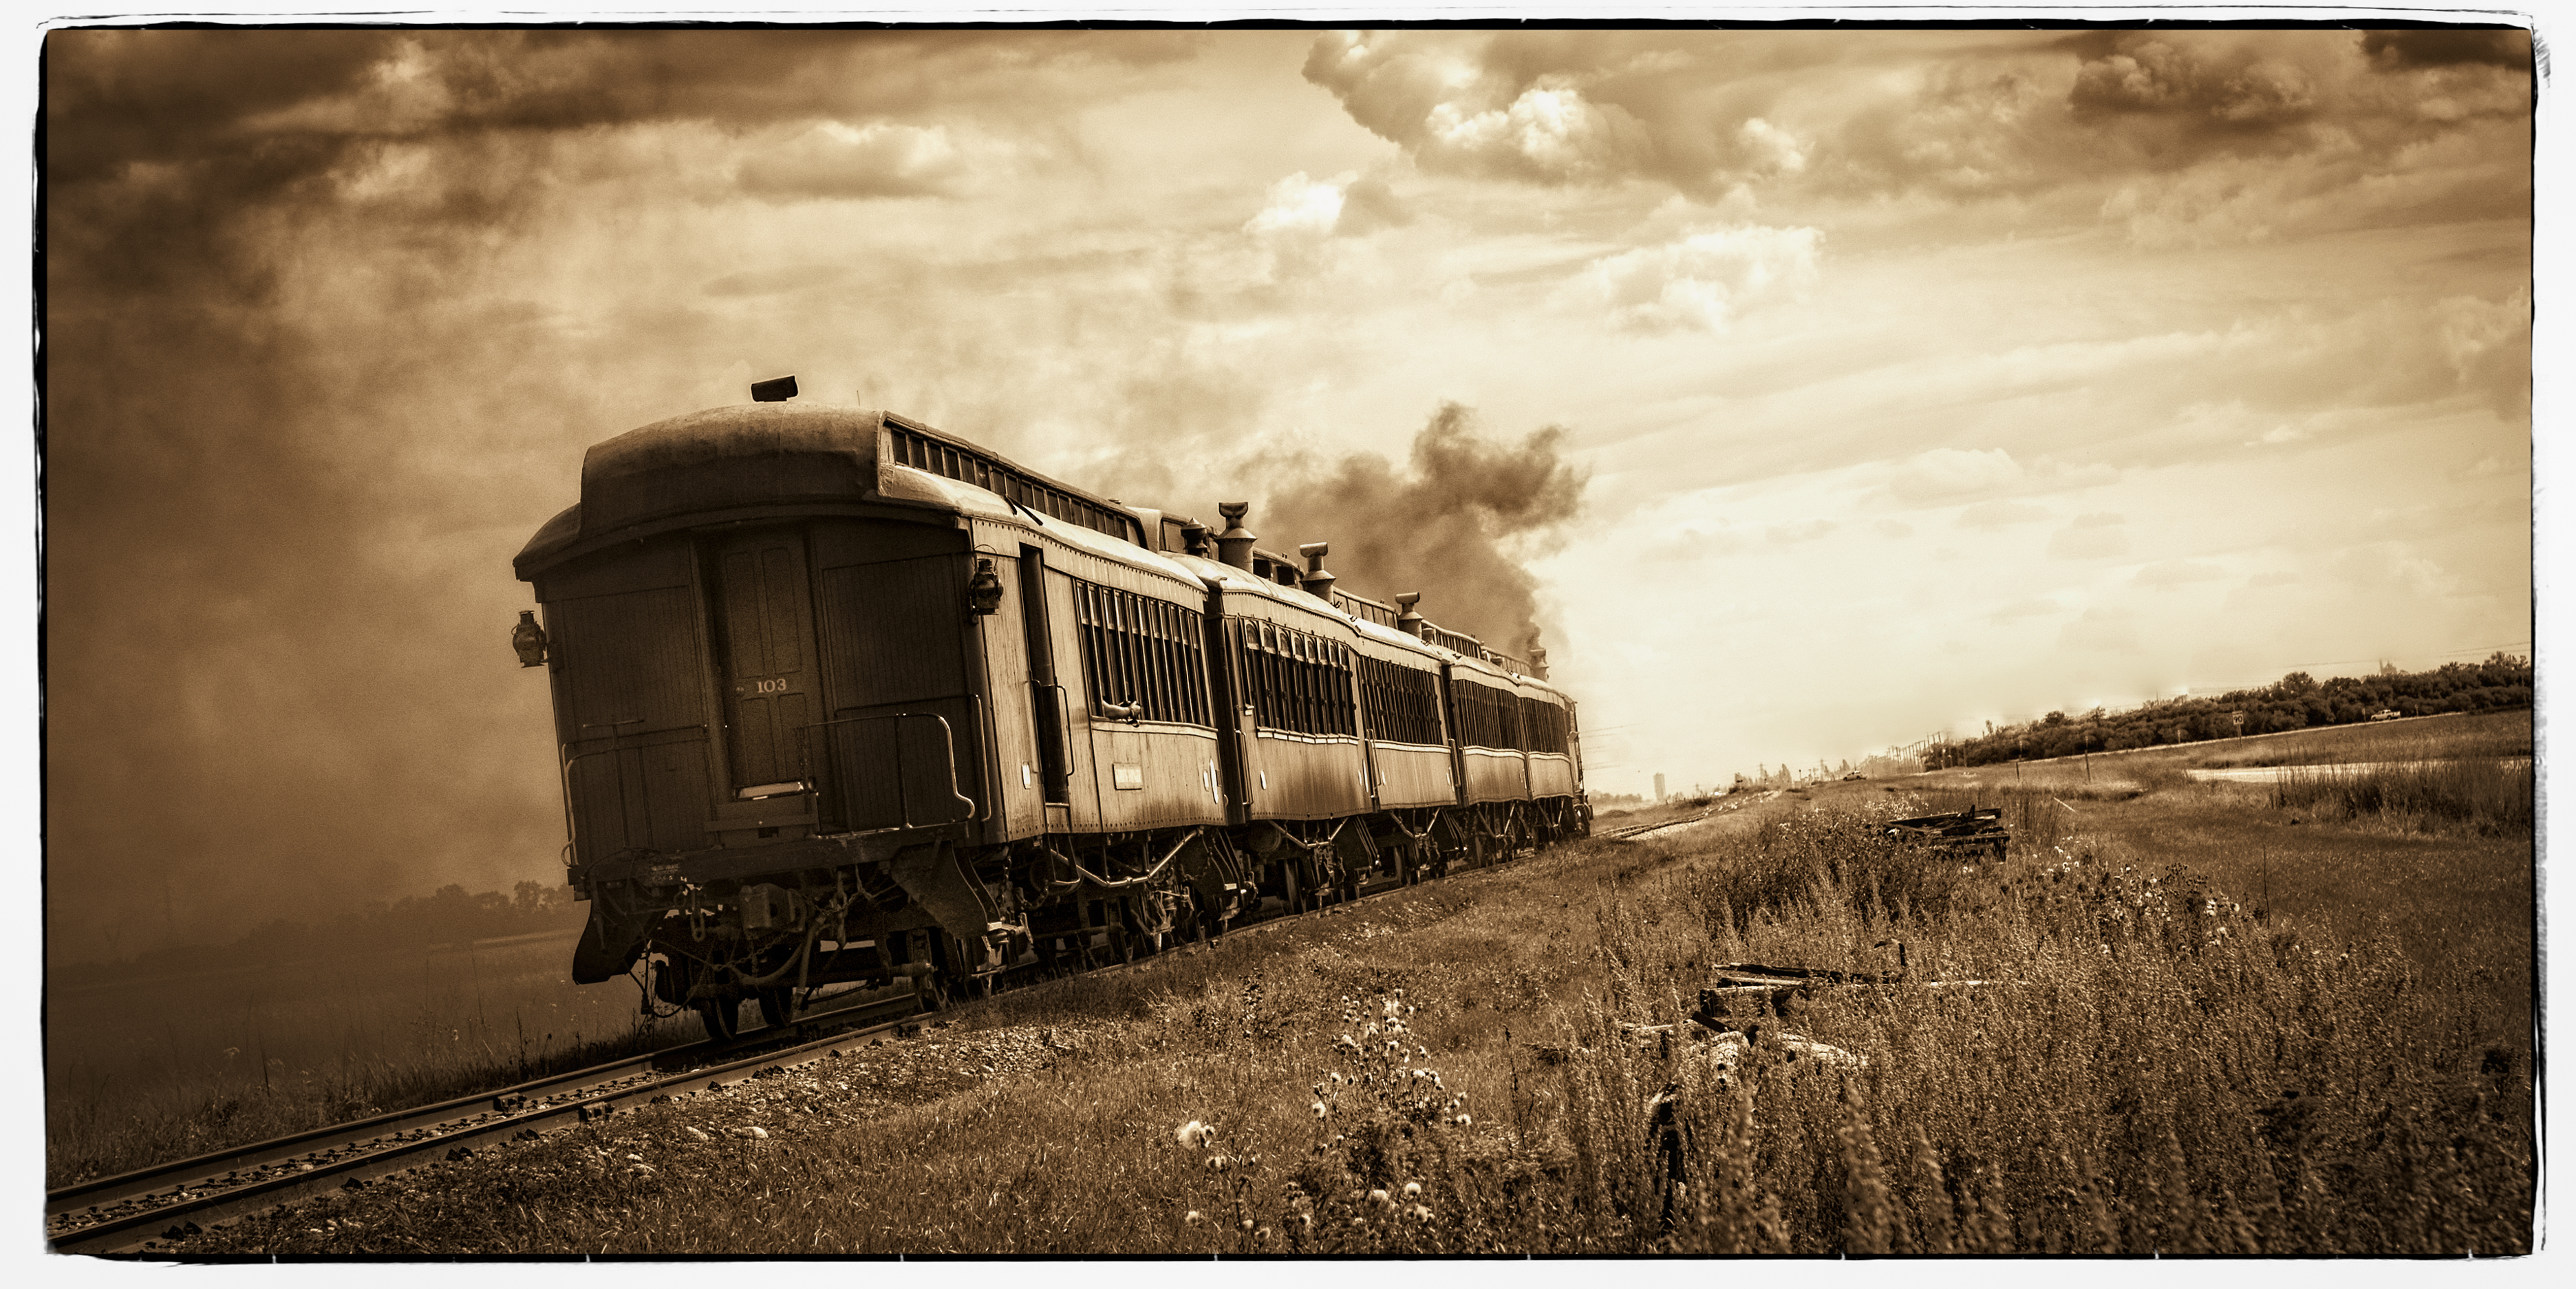
My fifth and final post was on Oct 25. With an international group I thought I would end it with an iconic symbol of the Canadian Prairies and take a step back in time when the history of our country was just being written. The Iron Horse is a imposing machine of iron and steel with a belly full of fire and boiler full of steam on the brink of catastrophe, yet, it intimately wove a steel thread that forged our culture and heritage from coast to coast. The Prairie Dog Central is the oldest functioning steam locomotive in North America, circa 1882, which still runs today. Its an amazing sight to behold as this Hollywood star steams across the prairie landscape as its black smoke plum dissipates into the abyss of the westerly prairie winds. I apologize that I was posting two images but I thought its was appropriate as they symbolize the coming and going of an era in early Canadian history.
So this concluded my posts for the challenge. During my five days I was determined to share comments with as many photographers as possible. I search “fivedayblackandwhitechallenge” for the five days to see other peoples works and give comments when I was inspired by their images to do so. I must have “liked” upwards of 100 posts and commented on 20-25 that were outside of the community I already knew. There were some great images.
I guess I was an anomaly by doing this but I thought sharing opinions would be something that most would look for. Unfortunately on the receiving end my images rarely earned any comments outside of my known friends and colleagues, which I really appreciated, but it was a bit of a disappointment not hearing from photographers from other countries.
So, would I do it again, of course I would… its a joy to share the art you create.
Some Interesting News:
When I spoke to Rosemarie & Pat Keough about joining in on the fivedayblackandwhitechallenege they gratefully declined because in a few short days they are leaving on another amazing photographic expedition that will see them on a return journey to Antarctica and then on to South America to venture up the Amazon River. I’ll look forward to learning more about these amazing expeditions in the future.
Rosemarie told me about an exciting recent development regarding their book (tome) entitled “Antarctica”. She wrote “Big news for us is that the prestigious Arts + Auction magazine, in its current international edition, highlights our photographic tome Antarctica as being one of the “Three Classics” together with Sierra Nevada: The John Muir Trail by Ansel Adams (1938) and Henri Cartier- Bresson’s The Decisive Moment (1958).” Attach is the pdf of the article “Snapshot of Photography Books, The Top Shelf.” Good company indeed! You can read more about their amazing books and travels by clicking on the link above.
Photographers often have images of sculptures of famous and historic people, monuments and even commissioned art works. Most of what I’ve seen are well lit, typically an afternoon sun during a visit to a park. The subject is positioned in a balanced position among flowers or trees sometimes with friends and relative near by.
The Bean, in down town Chicago’s Millennium Park.
Have you ever shot sculpture thinking of it as a model ? Why not ? Look at it this way, each subject will hold its pose for you indefinitely and never complain. They are usually in ideal settings giving beautiful backdrops, even better having a natural light environment where you control the time, light and weather, you can return to your studio check your images and re-shoot with your improvements even a year later. Lastly some of these famous people would charge you a small fortune in modeling fees, of course some are no longer with us and some are just iconic symbols.
Selecting the right spot with a well contrasted background and in this case a strategic refection.
Here is a suggestion on how to get started. Find a subject that your interested in and it doesn’t have to be a human figure. Go to it and look at it from every different angle you can imagine and take shots from all these locations. Return to your studio and look at each one, find your favorite and ask these questions:
What is in the back ground?
Should I move closer or further away?
Would a slight elevation change make the composition better?
What time of day gives you the best light for the subject?
What weather condition would best suit a mood for this subject?
Would a secondary light source enhance the subject?
Lets detail this out a bit further:
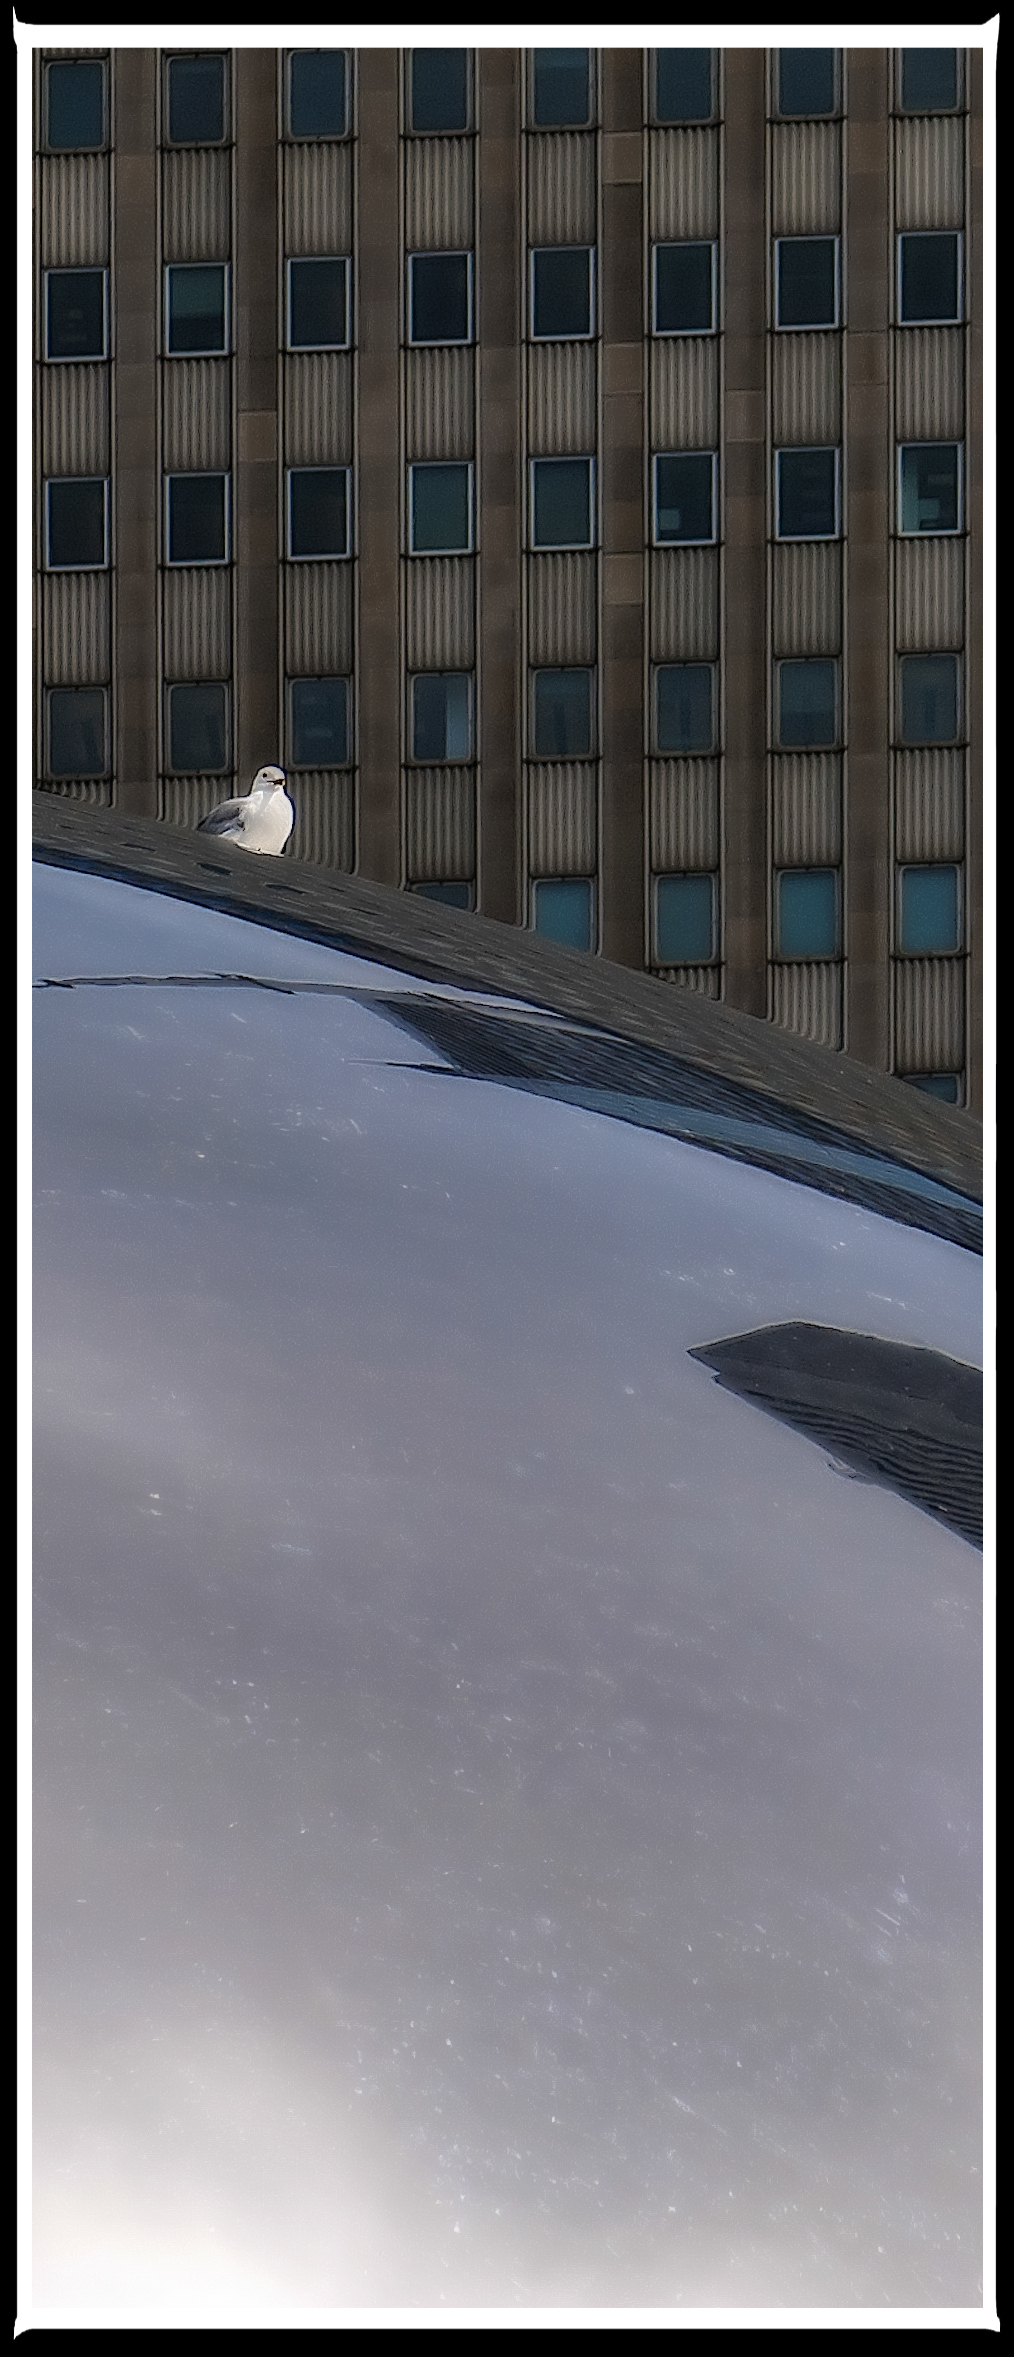
The Background – Examine your image looking closely at whats behind and around the subject. Less is more in most cases so find a contiguous fill that has good neutral contrast. Remember that depth of field can change the look of this field as well as texture, light and shadows. Will the change of season offer a different more appealing contrast. Time has no limitation to this subject.
Standing further back revealed this gull trying to hatch this egg, placing him with a contrasting background of a darker building with its geometric window pattern.
Foot Zooming – If your happy with the angle of your composition how does that change if you stand closer and even further away. Image compression is seldom considered so try it out and see how it changes this type of imagery.
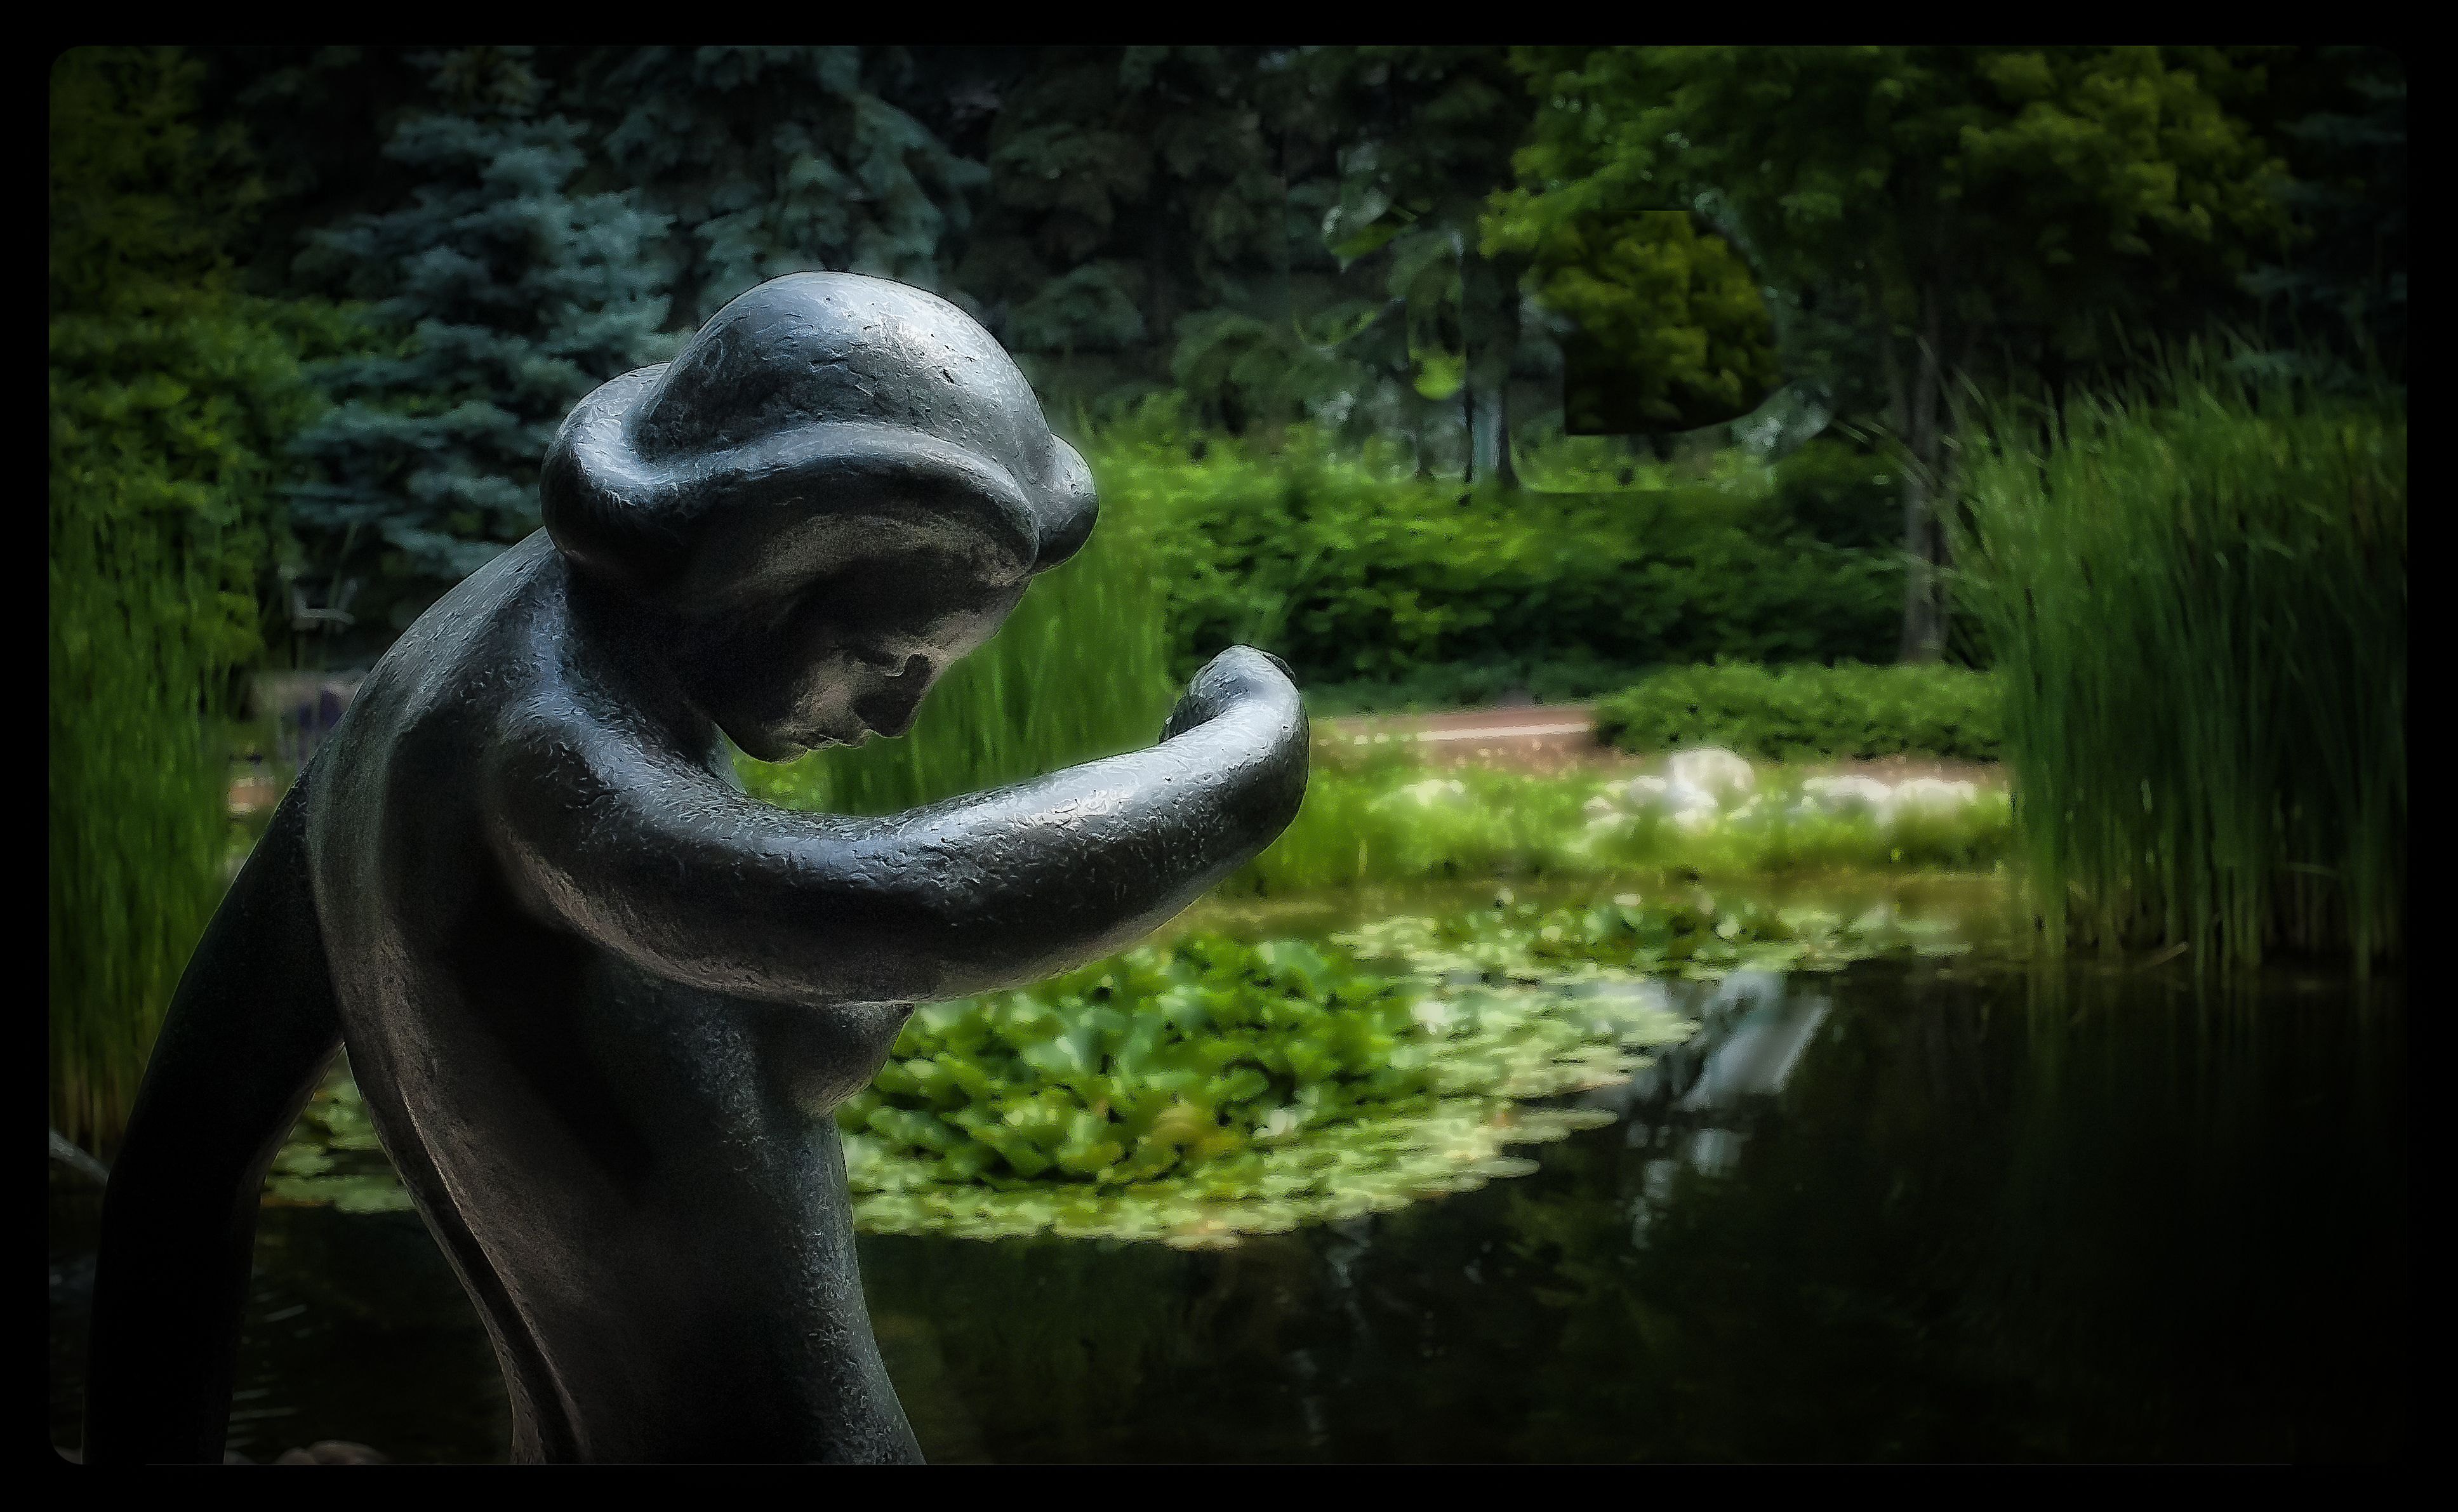
This frog at the foot of the statue was a great opportunity. The pond refection was the motivator, shot from a mono-pod at arms length and a remote trigger release allowed for an uninterrupted refection of blue sky with no people.
Elevation Changes – You have the perfect spot that best suites your composition and background but what happens if you just do an elevation change. Most people will shoot from eye level, the human tripod height. Get low and see what you have, maybe bring a small step ladder and see what change that brings to the composition. Most viewers will comment on images that have this slight variation.
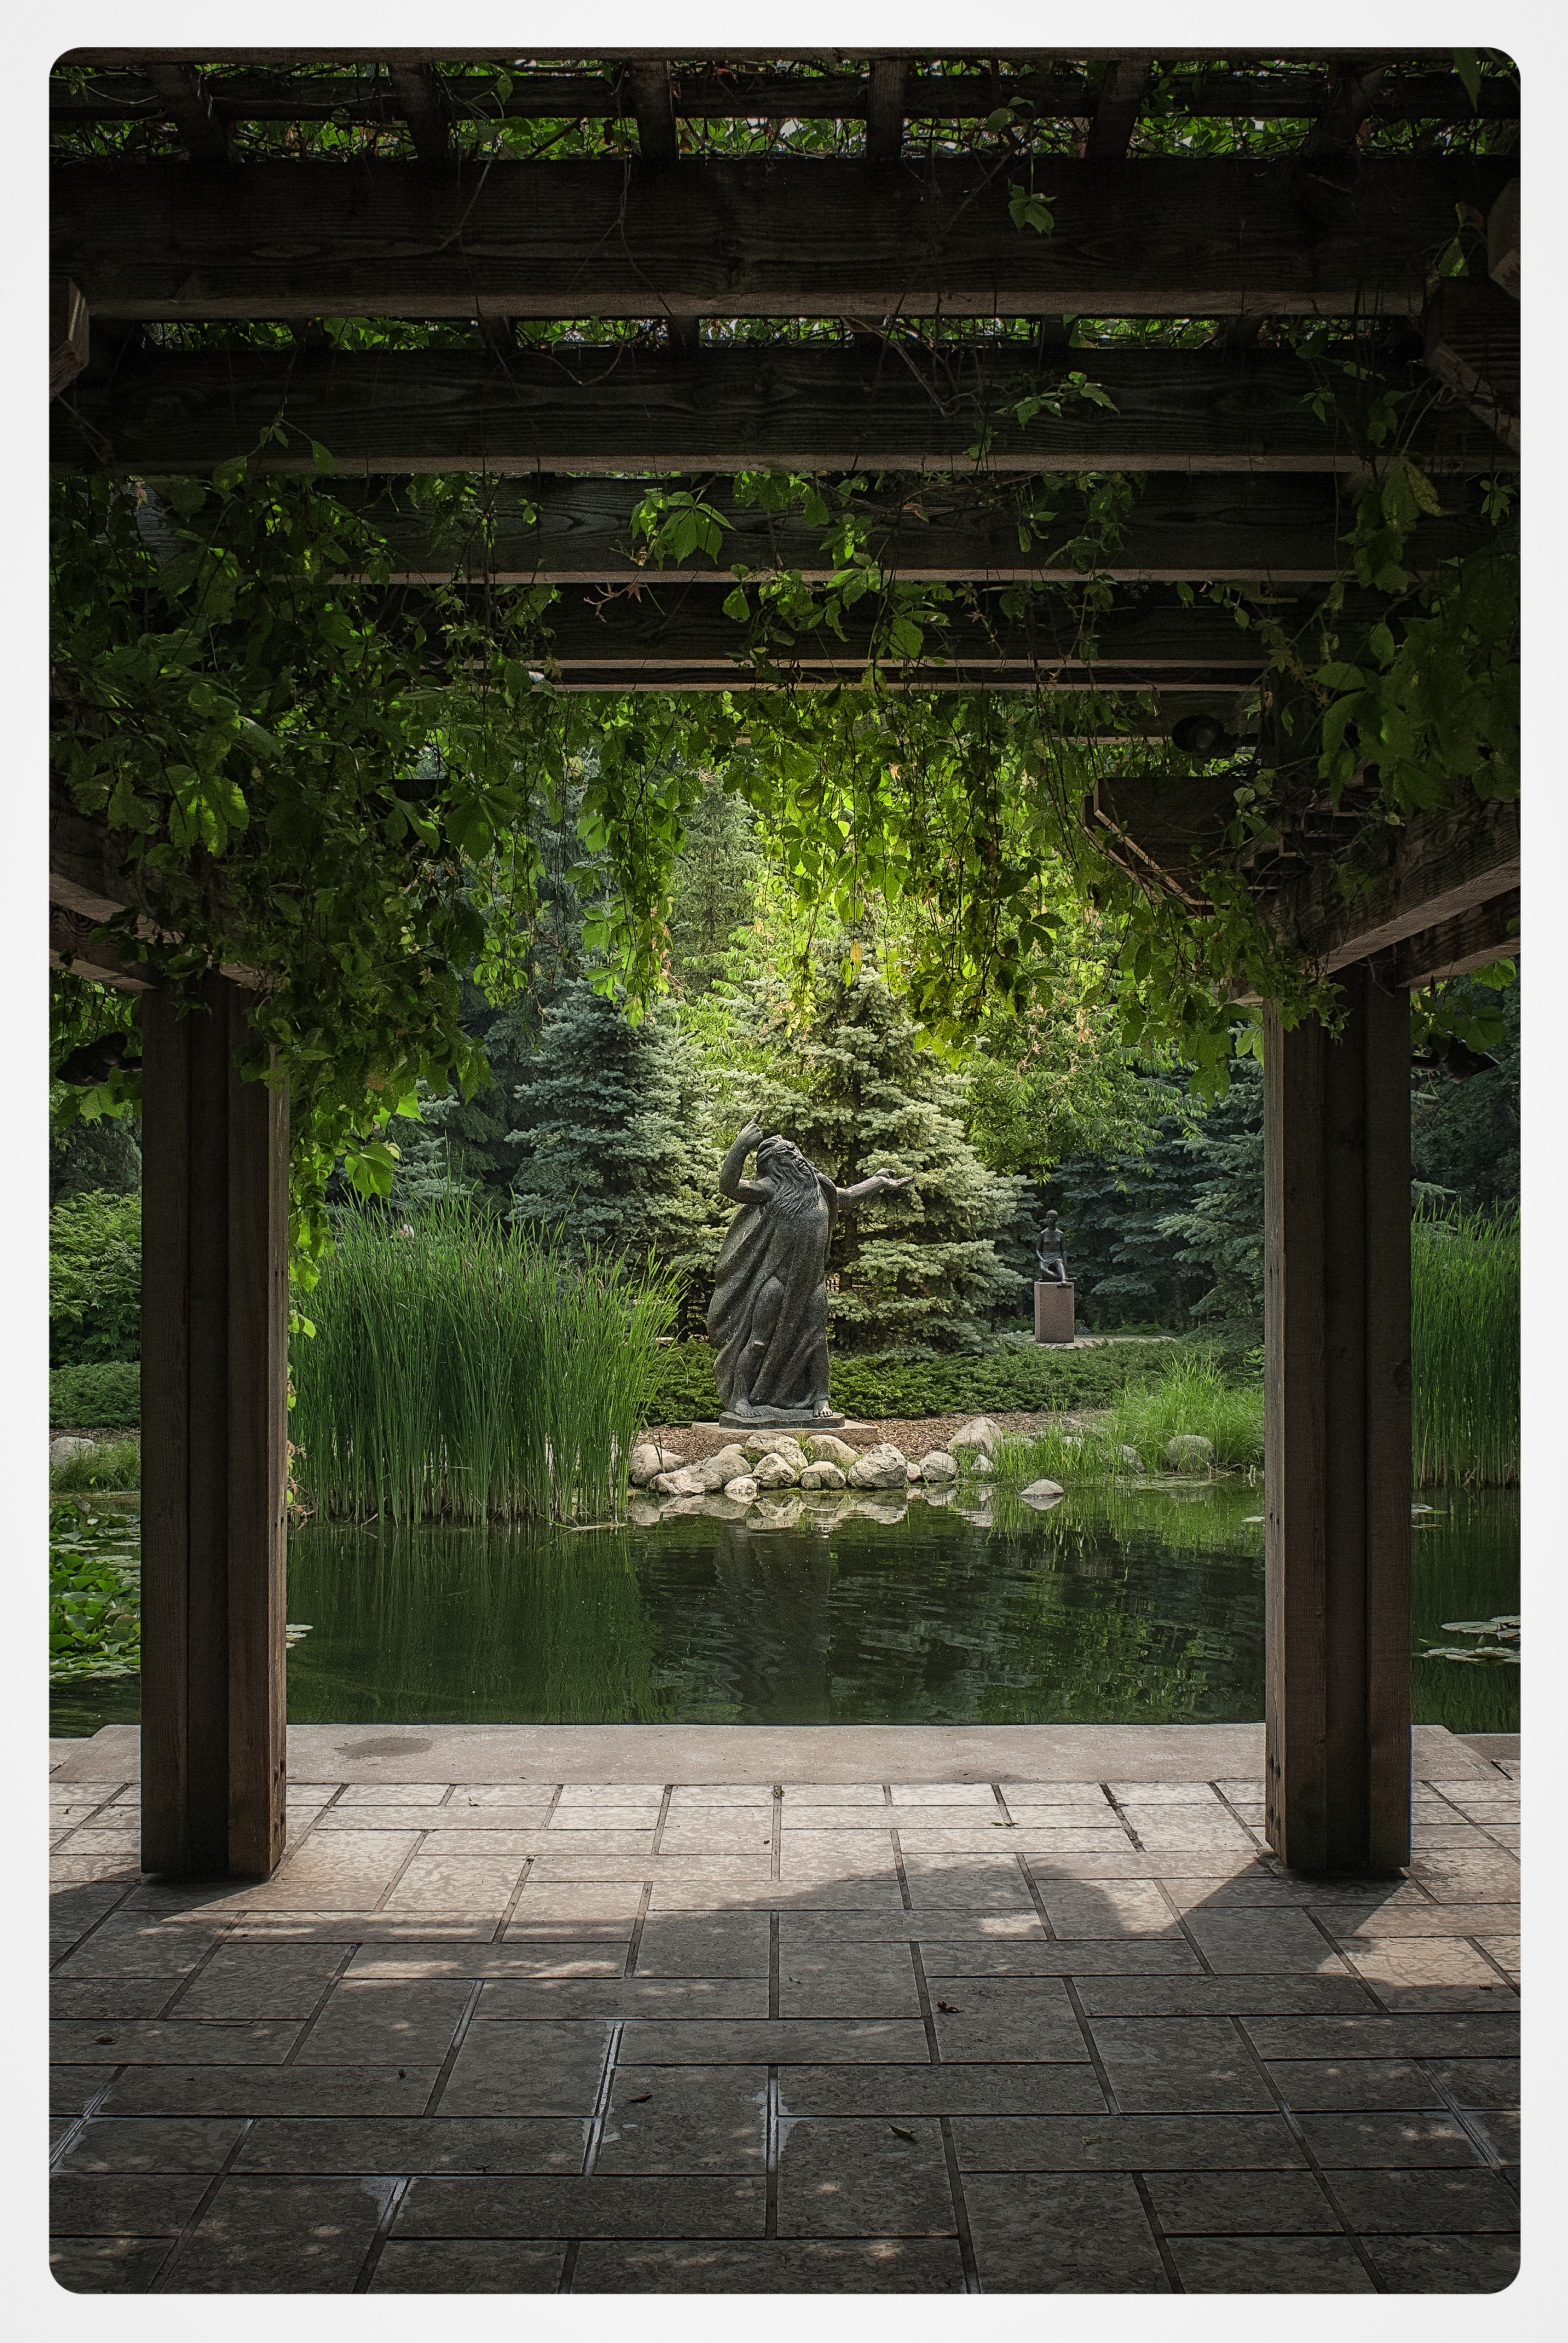
Looking up to the angle in the clouds was a must do. The light from behind gives the viewer a sense of the angle not knowing we’re present as she looks down and prays to the crosses below.
Time of Day – We’re all aware of the golden hour but is it the best light for your subject. Does it cast the best shadow lines to enhance the character, is morning or sunset best. It maybe that a time later in the morning or earlier in the evening is best remember the sun moves in an arch across the sky what is the optimum time. Also don’t forget that the seasonal changes will cast shadows differently as well.
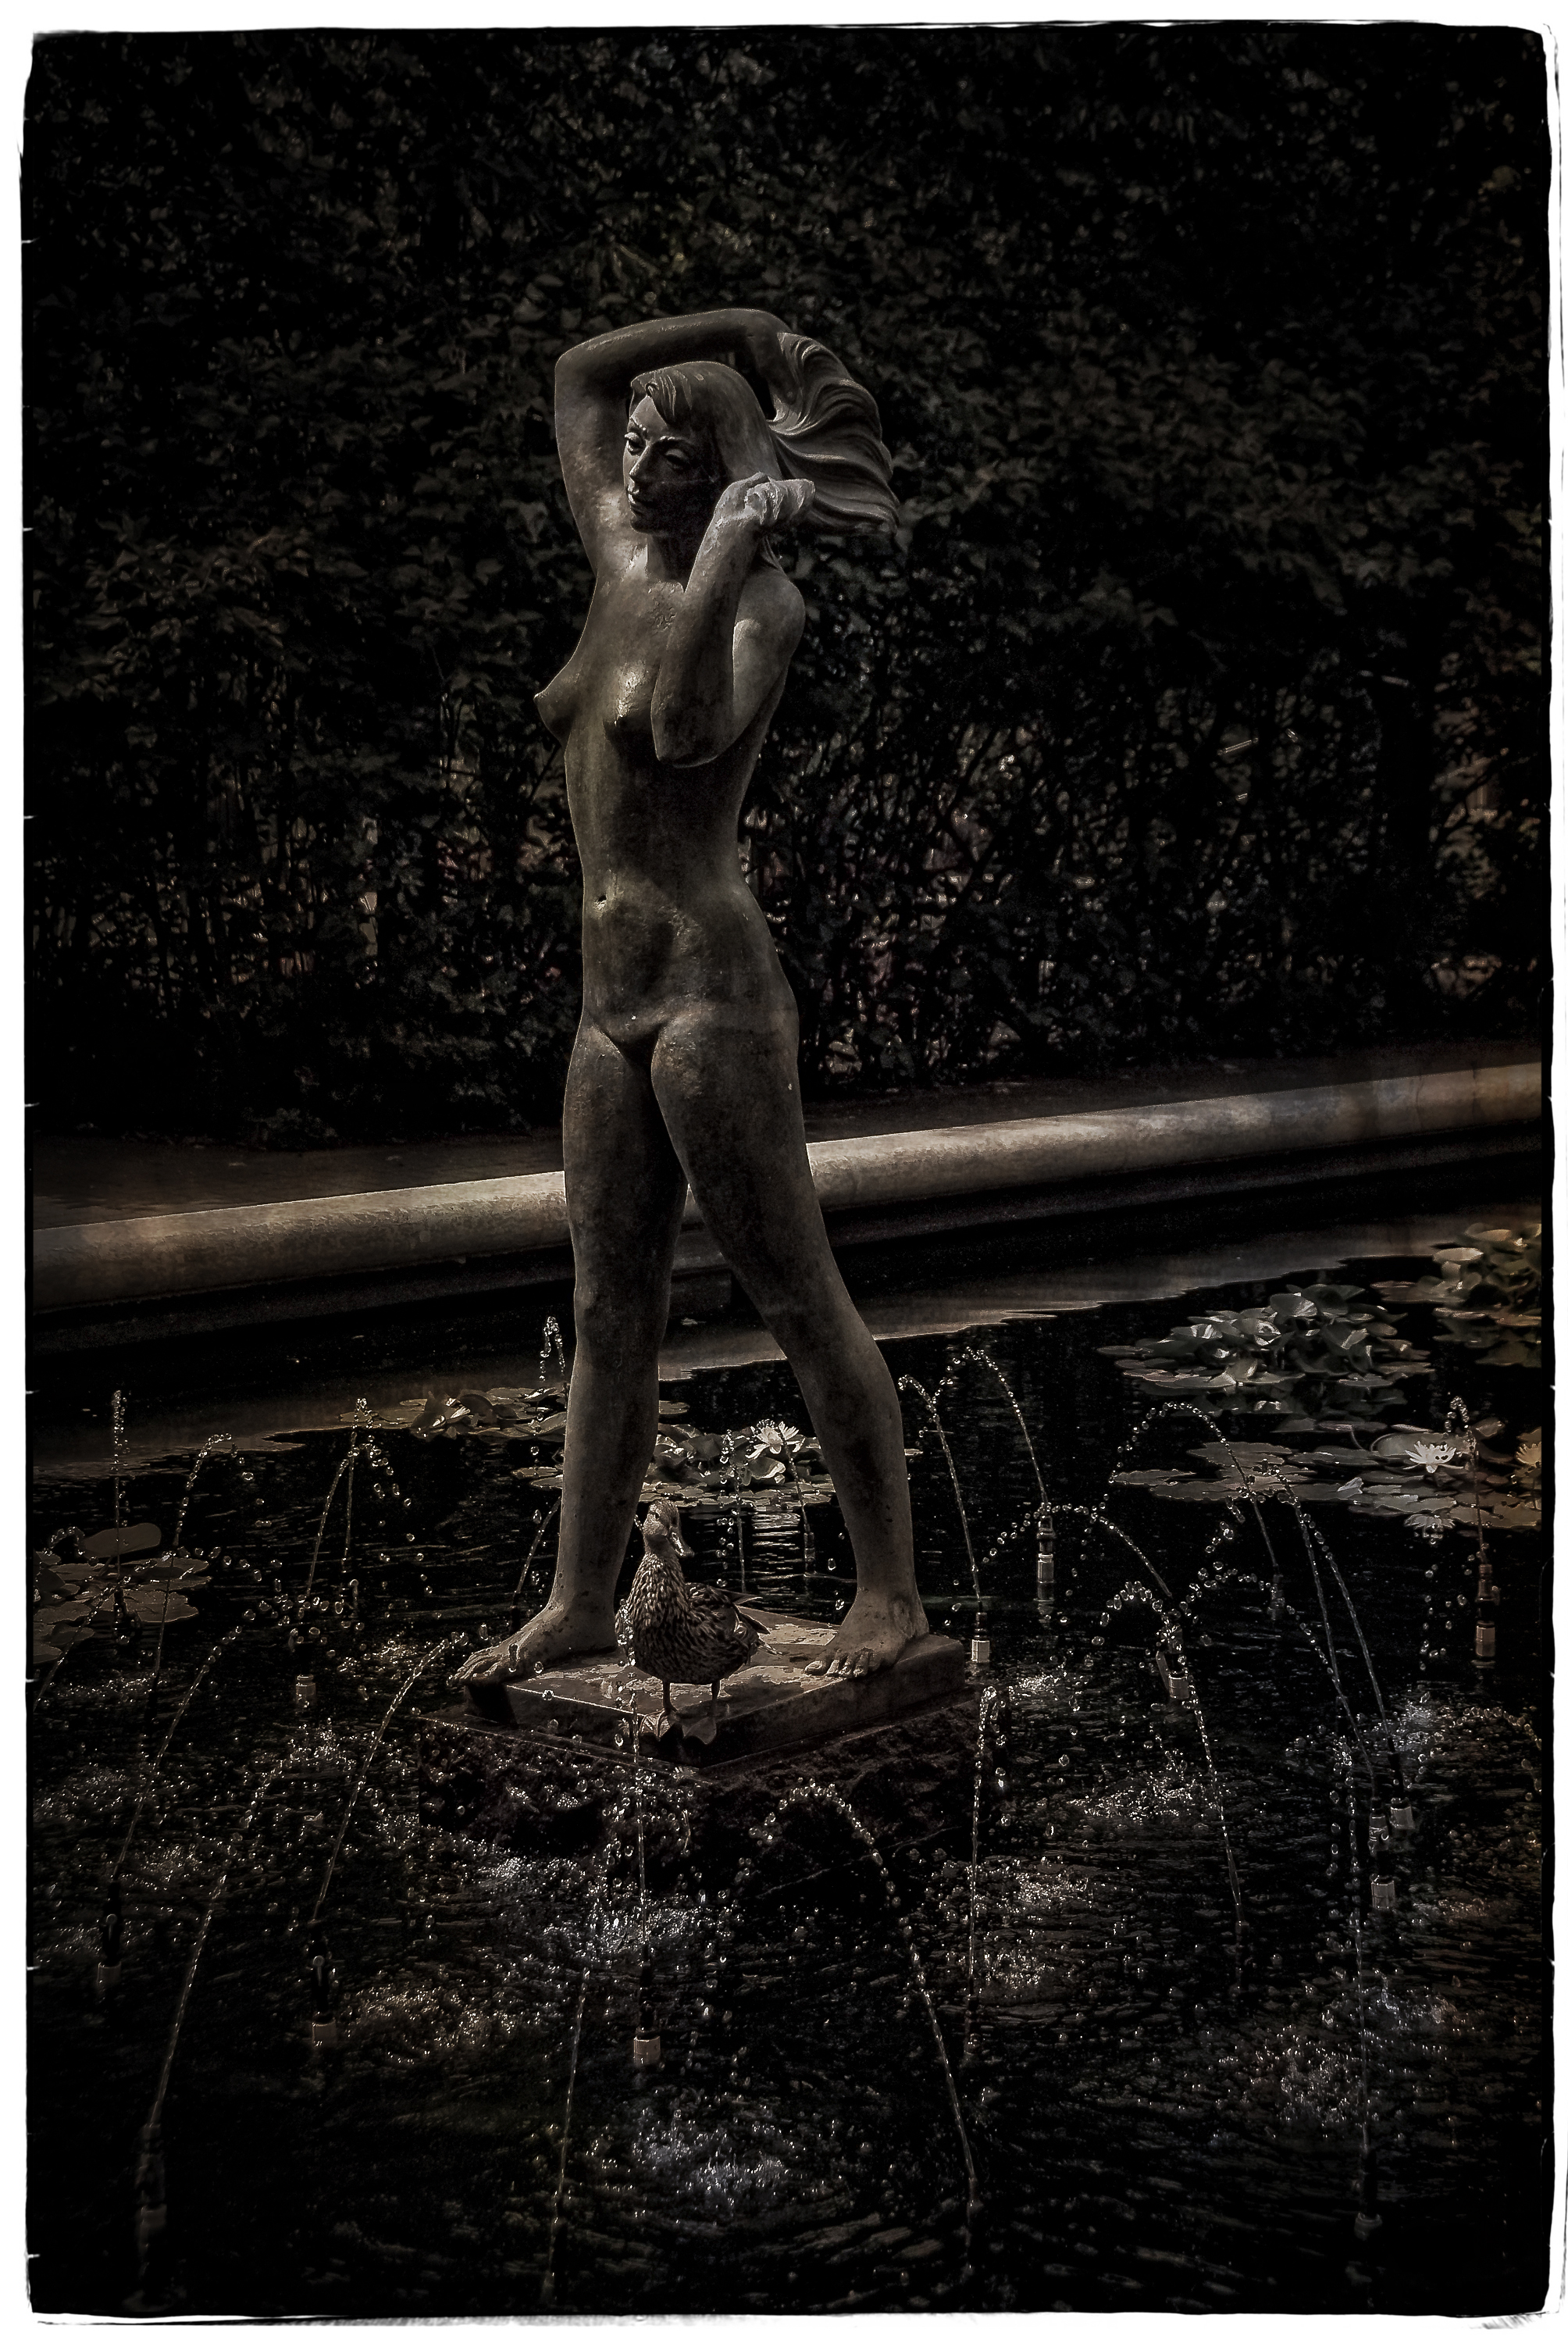
High noon gave this sculpture a nice highlight across her entire body. It also allowed the camera settings to be closed down so as to not blow out any highlights and create this high contrast dark background.
The Weather – All types of weather will add another variation to the lighting of your subject. Could an over cast day suite your subject even better or a rain or actual down pour have a positive effect, never know till you try. Fog has an amazing effect and a capture during a snow storm can be effective as well.
Taken after an afternoon rain, broken clouds allowed just enough light to cast off the wet concrete patio illuminating her face under a dappled lit background.
Additional Light – Adding a secondary light source can add a real sense of drama to a sculpture. A controlled highlight of soft colour during a rain is very special. A night shoot with a start lit sky and specially crafted light painting can be spectacular, this is very popular in advertizing today.
Why does the rain make everything greener, because its wet. Great time to shoot in a garden. The Honeysuckle vine cascaded down to her face gives this a real garden of Eden mood. Broken skies allow many different lighting opportunities.
So why can’t sculpture portray a mood, well of course it can and creating it is a lot of fun and in some cases takes a lot of skill and practice. Try it out.
Orion looking toward the skies which just so happened to be broken clouds allowing a variety of lighting opportunities. The light at this moment was defused as clouds moved by.
Post production can help to create many different moods.